These days, users expect fast-loading sites, and search engines like Google heavily factor page speed into their ranking algorithms, so it's important to optimize your website for speed. A key technique for achieving this optimization is minifying JavaScript (JS) and CSS. However, simply minifying without understanding the implications can lead to broken layouts, non-functional features, and a frustrating user experience. In this article, you'll learn how to minify JS and CSS in WordPress safely for basic users.
What is Minification?
Minification is the process of reducing the file size of your website's code by removing unnecessary characters without altering its functionality.
This includes:
Whitespace: Spaces, tabs, and line breaks that developers use for readability.
Comments: Notes within the code that explain its purpose but are ignored by browsers.
Redundant Code: In some cases, minifiers can identify and remove code that is not actually used.
Shortening Variable and Function Names (for JS): Advanced minifiers can rename variables and functions to shorter, often single-character names.
Why is it important to minify JS & CSS in WordPress safely?
Minifying JavaScript and CSS is an important optimization step for websites, but it's equally important to do it safely. The main benefit of minification is to reduce file sizes by removing unnecessary characters like whitespace, comments, and sometimes even shortening variable names. This translates directly to faster loading times for users, as less data needs to be downloaded.
Faster loading times result in more benefits. Improved user experience is super important; visitors are more likely to stay on a site that loads quickly, reducing bounce rates. Search engine optimization (SEO) also benefits significantly, as page speed is a ranking factor for major search engines like Google. This can lead to better visibility and more organic traffic. Additionally, reduced bandwidth consumption can lead to lower hosting costs, especially for high-traffic websites.
However, the "safely" aspect is critical. Improper minification can break a website's functionality or design. For JavaScript, this often involves issues with scope, variable names, or the order of operations if the minifier isn't intelligent enough to handle complex code structures. For CSS, problems can arise from incorrectly merged selectors, overridden styles, or issues with responsive design if media queries are mishandled.
Minifying JS & CSS: Best Practices You Start
Before you minify JS and CSS in WordPress, here are some best practices:
Always Backup First: Repeat: always, always, always backup your entire site before making any significant optimization changes
Test on a Staging Environment: Never implement minification directly on a live site. Use a staging environment to catch issues before they impact your users.
Implement Gradually: Don't enable all minification options at once. Start with basic CSS minification, test, then add JS minification, test again, and so on
Use Reliable Tools: Stick to well-regarded and actively maintained WordPress plugins. Read reviews and check compatibility.
Understand Exclusion Options: Learn how to exclude specific files. This is your primary defense against breaking your site. If a particular plugin or theme component breaks, excluding its associated JS/CSS files is often the quickest fix.
Clear Caches Religiously: After making any changes related to minification or optimization, always clear your plugin's cache, any server-level cache (if applicable), and your browser cache.
Monitor Performance and Errors: Continuously monitor your site's performance using tools like Google PageSpeed Insights and keep an eye on your browser's console for JavaScript errors (F12 > Console).
Minify JS & CSS in WordPress Safely: How-to
It’s important to note that this article will not go into advanced manual minification steps, as the WordPress community has built quite a few solid plugins to help. This tutorial will guide you through the process of safely minifying JS and CSS in WordPress using a popular and reliable plugin, Autoptimize. While other plugins like WP Rocket (premium) or Fast Velocity Minify are excellent alternatives, Autoptimize is a fantastic free option that offers robust features and fine-grained control, making it ideal for this safe tutorial.
Before beginning, remember the golden rule of WordPress optimization: ALWAYS BACK UP YOUR WEBSITE FIRST! This tutorial involves modifying how your website's code is delivered, and while we'll proceed safely, a backup ensures you can easily revert if any unexpected issues arise.
- Backup Your WordPress Website
- Install and Activate Autoptimize
- Initial Configuration of Autoptimize (The Safe Start)
- Enabling Advanced Optimization Options (Gradually and Safely)
- Troubleshooting and Excluding Files (The Safe Way to Fix Issues)
- Verify Performance Improvements
- Ongoing Maintenance
Step 1: Backup Your WordPress Website
Use a reliable backup plugin (like UpdraftPlus, Duplicator, or your hosting provider's backup service) to create a complete backup of your WordPress files and database. Store it in a safe, external location.
Step 2: Install and Activate Autoptimize
- Log in to your WordPress admin dashboard.
- Navigate to Plugins > Add New.
- In the search bar, type Autoptimize and press Enter.
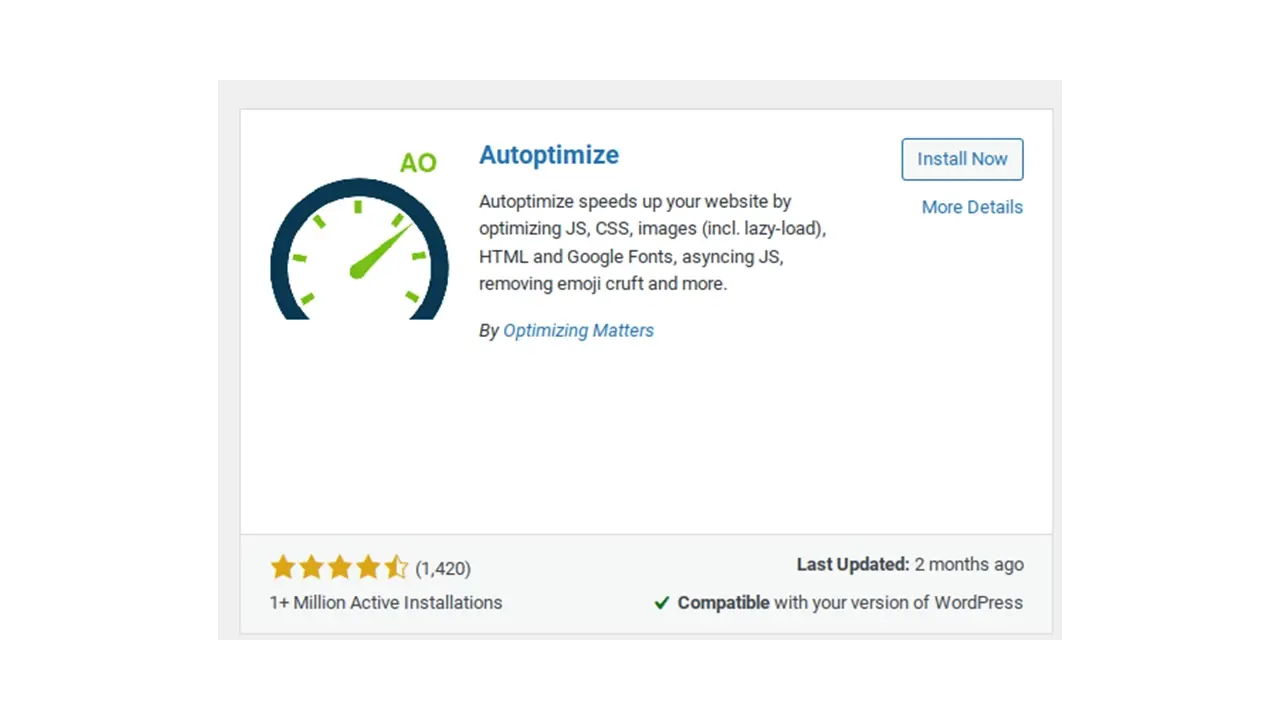
Locate the "Autoptimize" plugin by Frank Goossens. It should have a large number of active installations and good reviews
Click "Install Now".
Once installed, click "Activate".
Step 3: Initial Configuration of Autoptimize (The Safe Start)
- After activation, Autoptimize will add a new menu item under "Settings."
- Go to Settings > Autoptimize.
- You'll see several tabs. We'll focus on the "JS, CSS & HTML" tab first.
Important Safety Note: Do NOT check all options at once. We will enable them one by one and test after each change. This allows us to pinpoint exactly which setting might be causing a conflict if one occurs.
Optimize JavaScript Code (First Attempt)
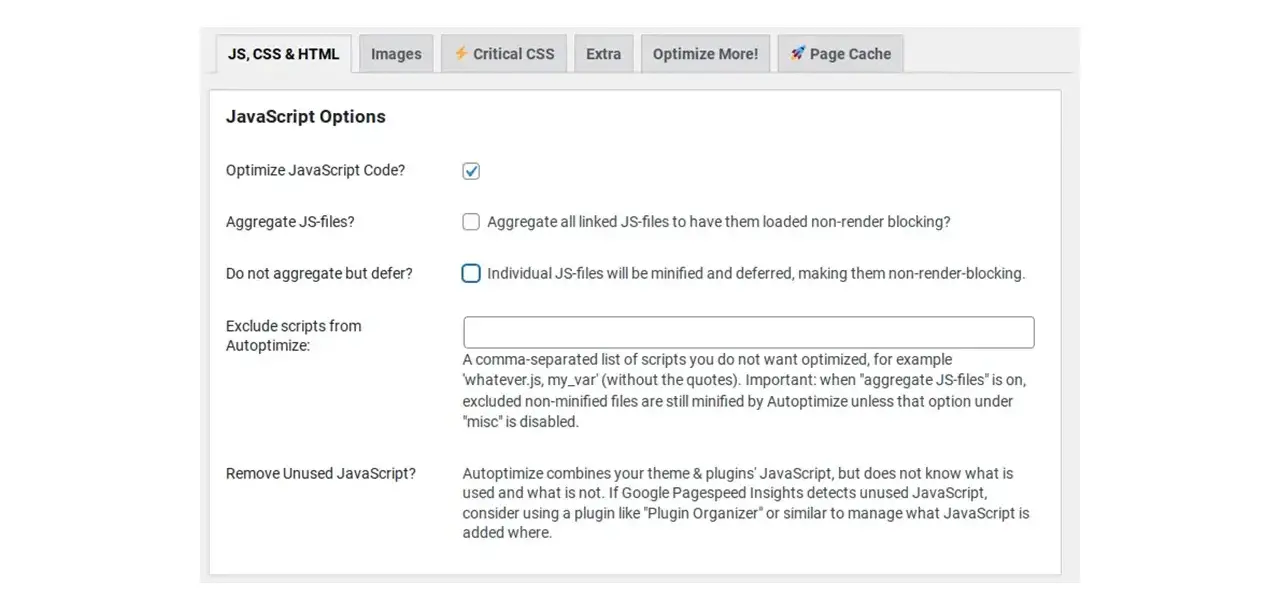
Under the "JavaScript Options" section, check the box next to "Optimize JavaScript Code."
Leave other JavaScript options unchecked for now. We want to start with the most basic minification.
Scroll down to the bottom and click "Save Changes and Empty Cache."
Test Your Website (Important Step After Each Change)
Immediately after saving:
Open your website in an Incognito/Private browser window. This ensures you're seeing the fresh, minified version and not a cached version from your previous visits.
Thoroughly browse your website.
Check your homepage, several blog posts/pages, and any critical interactive elements (example - navigation menus, contact forms, image sliders, add-to-cart buttons on an e-commerce site, pop-ups).
Look for any visual glitches (broken layouts, missing images/icons) or non-functional features.
Check your browser's developer console for errors.
Right-click anywhere on your page and select "Inspect" (or press F12 on Windows/Linux, Cmd + Opt + I on Mac).
Go to the "Console" tab. Look for any red error messages related to JavaScript.
If your site looks and functions perfectly: Great! You've successfully minified your JavaScript. Proceed to Step 3C.
If you encounter issues (broken layout, non-functional elements, console errors):
This means the basic JS optimization caused a conflict. Don't panic!
11.Go back to Settings > Autoptimize.
Uncheck "Optimize JavaScript Code.”
Click "Save Changes and Empty Cache."
Re-test your site in an Incognito window to confirm it's back to normal.
If the site is back to normal, it means a script is conflicting. You'll need to use the "Exclude scripts from Autoptimize" option later, but for now, move on to CSS optimization.
Optimize CSS Code
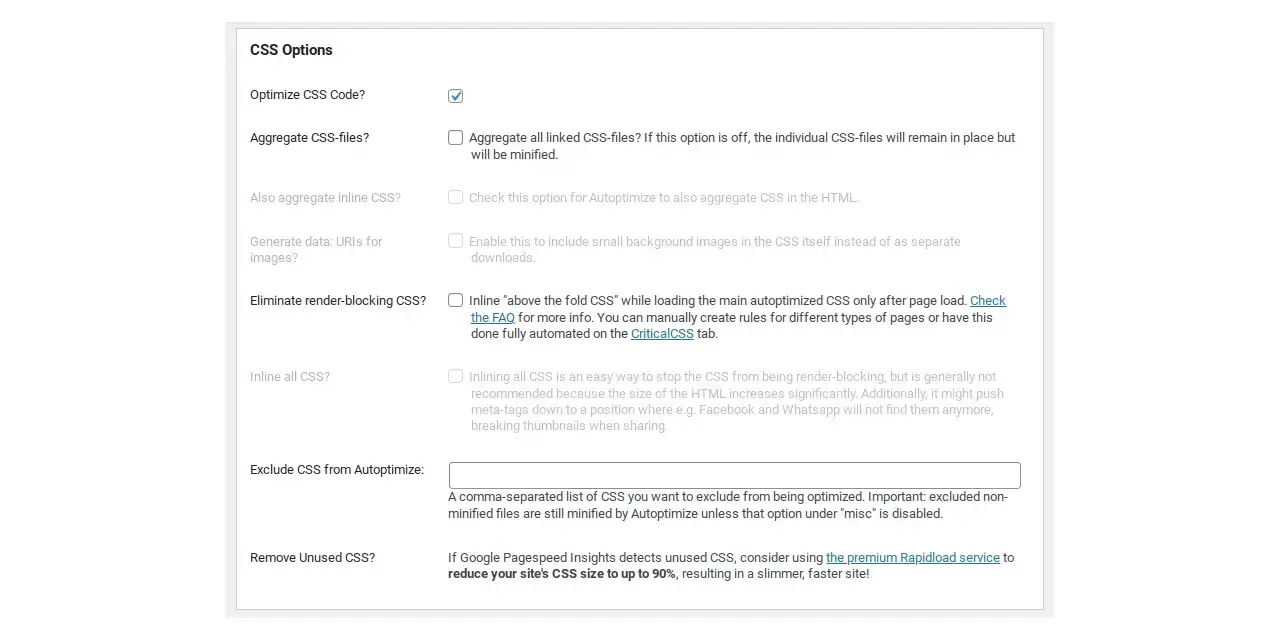
Go back to Settings > Autoptimize.
Under the "CSS Options" section, check the box next to "Optimize CSS Code."
If you had issues with JS optimization in step B, make sure "Optimize JavaScript Code" remains unchecked for now. If JS optimization worked, you can leave it checked.
Scroll down to the bottom and click "Save Changes and Empty Cache."
Test Your Website Again (Important Step)
Immediately after saving:
Open your website in an Incognito/Private browser window.
Thoroughly browse your website.
Pay close attention to your site's design, colors, fonts, spacing, and responsiveness on different screen sizes (if you can test on mobile/tablet or use developer tools' responsive mode).
Look for any visual glitches like broken layouts, misaligned elements, or missing styles.
Check your browser's developer console for errors.
Go to the "Console" tab. While CSS typically doesn't throw JavaScript errors, it's good practice to check.
If your site looks and functions perfectly: Excellent! You've successfully minified your CSS.
If you encounter issues (broken layout, visual glitches): This means the basic CSS optimization caused a conflict.
Go back to Settings > Autoptimize.
Uncheck "Optimize CSS Code."
Click "Save Changes and Empty Cache."
Re-test your site in an Incognito window to confirm it's back to normal.
If the site is back to normal, it means a stylesheet is conflicting. You'll need to use the "Exclude CSS from Autoptimize" option later.
Step 4: Enabling Advanced Optimization Options (Gradually and Safely)
Once basic JS and CSS minification is working without issues, you can progressively enable more advanced options for further performance gains. Remember to test after each new option is enabled.
HTML Optimization (Relatively Safe)

Go to Settings > Autoptimize.
Under "HTML Options," check "Optimize HTML Code."
Click "Save Changes and Empty Cache."
Test your website thoroughly in an Incognito window. HTML minification is usually safe but can sometimes cause issues with inline scripts or styles. If any issues arise, uncheck it and re-test.
Advanced JavaScript Options (Proceed with Caution)
These options can offer significant speed improvements but are more likely to cause conflicts.
Go to Settings > Autoptimize.
If "Optimize JavaScript Code" is already checked, you can try:
"Aggregate JS-files": (Combines multiple JS files into one or a few to reduce HTTP requests). Check this.
"Also aggregate inline JS?": (Minifies and combines JavaScript embedded directly within your HTML). Check this only if "Aggregate JS-files" worked.
"Force JavaScript in ?": (Generally leave unchecked unless advised by a page speed tool, as it can be render-blocking).
"Add try-catch wrapping?": (Adds error handling, can be useful for debugging but adds a small overhead. Start without it).
"Exclude scripts from Autoptimize": This is your troubleshooting lifeline. If your JS breaks, this is where you'll add the paths to conflicting scripts (see Step 5).
Click "Save Changes and Empty Cache."
Test your website extensively in an Incognito window, focusing on all interactive elements.
Advanced CSS Options (Proceed with Caution)
Go to Settings > Autoptimize.
If "Optimize CSS Code" is already checked, you can try:
"Aggregate CSS-files": (Combines multiple CSS files into one or a few to reduce HTTP requests). Check this.
"Also aggregate inline CSS?": (Minifies and combines CSS embedded directly within your HTML). Check this only if "Aggregate CSS-files" worked.
"Generate data: URIs for images?": (Embeds small images directly into CSS, reducing HTTP requests. Generally safe, but can increase CSS file size. Test carefully).
"Inline and Defer CSS (critical CSS)": Highly recommended for performance, but requires careful setup. This generates critical CSS for your page (above-the-fold content) and defers the rest.
a. If you enable this, you will see a text area to paste your "Critical CSS." You can use an online Critical CSS generator (search for "critical CSS generator" and input your site's URL) or rely on the Autoptimize plugin’s built-in "Generate Critical CSS" feature (if available and stable).
Start by enabling the main checkbox and not adding custom critical CSS. Autoptimize will try to automatically generate it.
"Exclude CSS from Autoptimize": This is your troubleshooting lifeline. If your CSS breaks, this is where you'll add the paths to conflicting stylesheets (see Step 5).
Click "Save Changes and Empty Cache."
Test your website extensively in an Incognito window, paying close attention to visual fidelity across different pages and devices.
Step 5: Troubleshooting and Excluding Files (The Safe Way to Fix Issues)
If your website breaks at any point after enabling an Autoptimize setting, you'll need to identify the problematic file(s) and exclude them from minification.
- Identify the broken element/functionality.
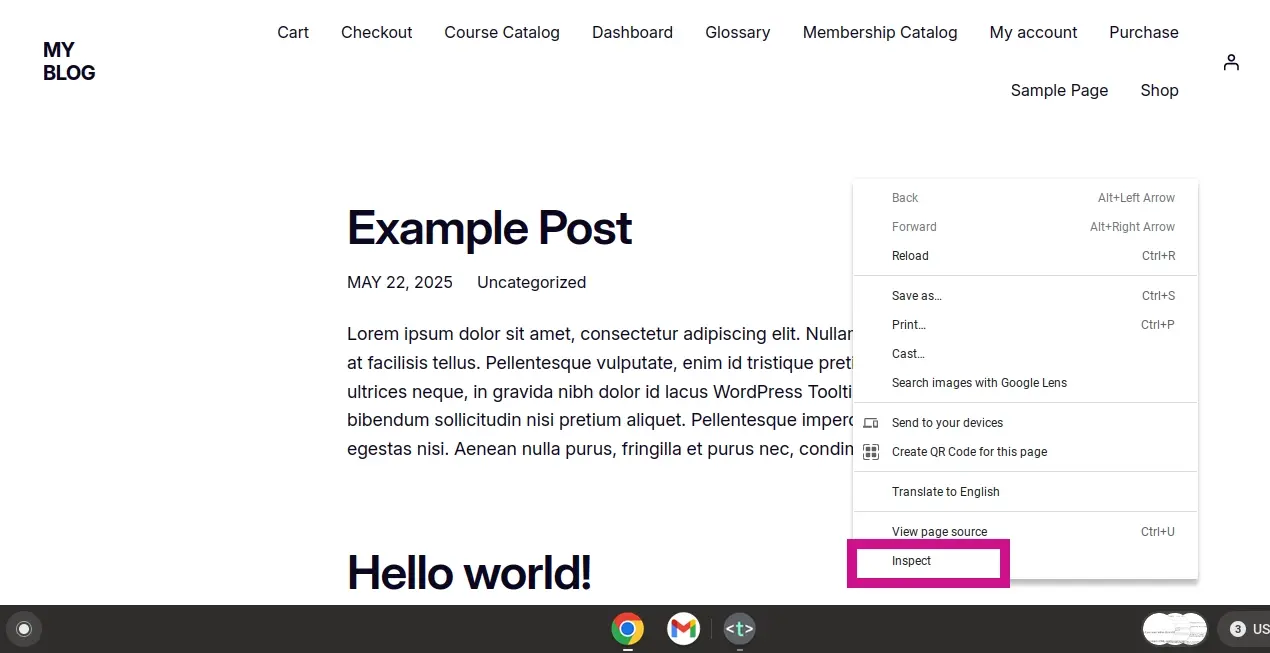
Open your browser's Developer Tools (F12 or right-click > Inspect).
Go to the "Console" tab for JavaScript errors.
Go to the "Network" tab (refresh the page if necessary). Look for files that failed to load or were incorrectly loaded.
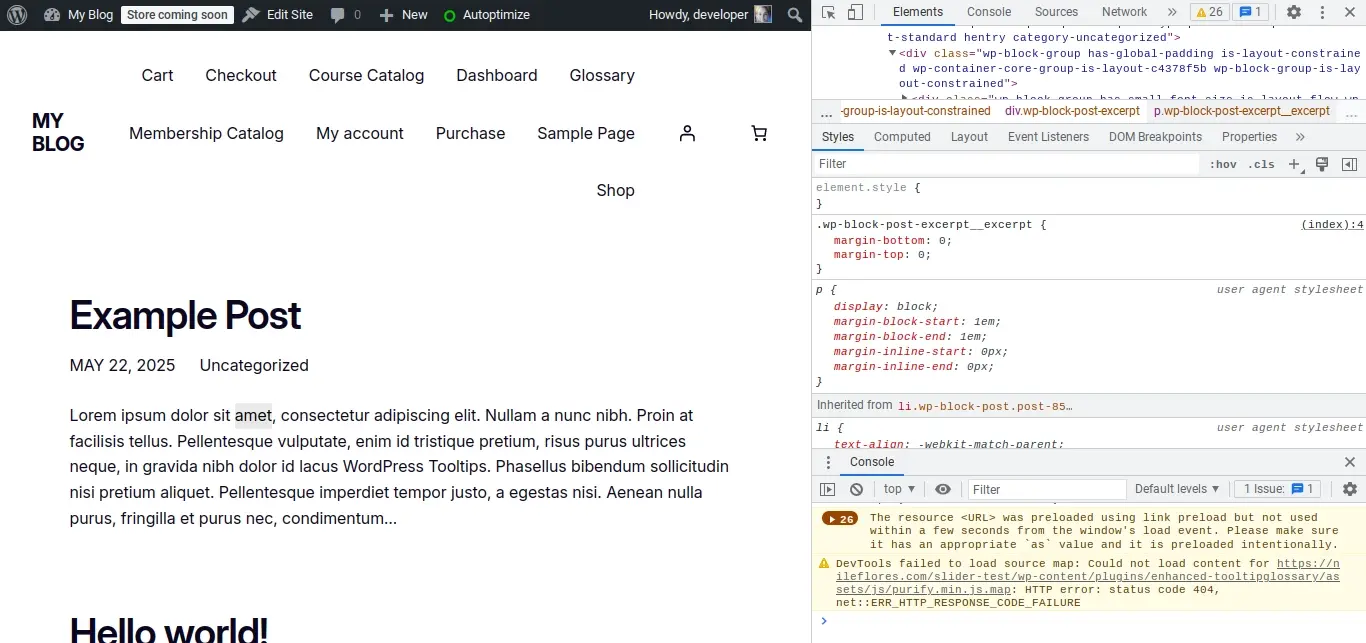
Go to the "Sources" or "Elements" tab and try to locate the HTML, CSS, or JS related to the broken element. Look at the file paths associated with those elements.
a. For example, if a slider is broken, you might see JavaScript errors pointing to
wp-content/plugins/your-slider-plugin/js/slider.min.js.b. If a menu's styling is off, you might find CSS paths like
wp-content/themes/your-theme/css/menu-styles.css.Once you have a potential file path (or part of it), go back to Settings > Autoptimize.
In the "JavaScript Options" or "CSS Options" section, locate the "Exclude scripts from Autoptimize" or "Exclude CSS from Autoptimize" text area.
Add the file path(s) to the exclusion list.
a. You don't need the full URL, just a unique part of the path. For example, if the problematic file is
https://yourdomain.com/wp-content/plugins/some-plugin/assets/js/broken-script.js, you could excludesome-plugin/assets/js/broken-script.jsor even just broken-script.js. Start with a more specific path if possible.Separate multiple exclusions with commas.
Click "Save Changes and Empty Cache."
Test your website again in an Incognito window. The issue should now be resolved.
Common Exclusion Scenarios:
jQuery: Many themes and plugins rely on jQuery. If your site breaks completely with JS optimization, try adding
js/jquery/jquery.min.jsto the JS exclusion list.Theme-specific JS/CSS: Your theme might have custom scripts or styles that conflict. Look for files in
wp-content/themes/your-theme-name/.Plugin-specific JS/CSS: Individual plugins often load their own assets. Look for files in
wp-content/plugins/plugin-name/.Known Conflicts: Sometimes, a plugin might simply not play well with minification. If you've tried excluding specific files and still have issues, you might have to disable minification for that specific type of asset (JS or CSS) if it's not critical for your speed score, or try a different optimization plugin altogether.
Step 6: Verify Performance Improvements
After you've safely configured Autoptimize and ensured your site is fully functional, it's time to measure the impact.
Use performance testing tools like:
Google PageSpeed Insights: Provides a comprehensive report and scores for both mobile and desktop.
GTmetrix: Offers detailed Waterfall charts to visualize loading times of individual resources.
Pingdom Tools: Another popular tool for speed testing.
Run tests before and after minification to see the improvement in your scores, load times, and number of HTTP requests. Look specifically at the "Reduce unused CSS/JavaScript" and "Minify CSS/JavaScript" suggestions in PageSpeed Insights.
Step 7: Ongoing Maintenance
Clear Cache Regularly: Whenever you make significant changes to your theme, add/remove plugins, or update content, clear Autoptimize's cache (via the "Delete Cache" button in the admin bar or plugin settings) and any other caching plugins you use.
Monitor After Updates: After updating WordPress, your theme, or any plugins, always check your site in an Incognito window to ensure minification hasn't caused new conflicts. If it has, use the exclusion method.
Re-evaluate: Periodically re-run performance tests and review your Autoptimize settings. As your site evolves, some settings might become more or less effective, or new conflicts might arise.
In Summary
By following this careful, step-by-step approach, you can successfully minify JS & CSS in WordPress safely using a plugin like Autoptimize, significantly improving your website's performance while maintaining its full functionality and design. Remember, patience and thorough testing are your best allies in the world of website optimization.
Frequently Asked Questions
How has typography improved with CSS3?
CSS3 introduces features like @font-face for custom fonts, text-shadow for added depth, and word-wrap for better text readability. These enhancements improve the typography of web content, making it more visually appealing and engaging.
Are HTML5 and CSS3 important for mobile web development?
Absolutely. HTML5 and CSS3 enable responsive design, ensuring websites adapt to different screen sizes and devices. This is crucial for delivering a consistent and user-friendly experience on mobile devices.
How do CSS3 transitions and animations enhance web interactivity?
CSS3 transitions allow smooth transitions between different states of an element, while animations enable the creation of dynamic movement and effects. These features enhance user engagement by adding interactivity and visual interest to web interfaces.
Can free HTML editors support other languages like CSS and JavaScript?
Yes, free HTML editors often support languages like CSS and JavaScript, enabling integrated web development.

Nile Flores is a long time professional blogger, as well as WordPress website designer and developer from the St. Louis Metro East. Nile blogs at NileFlores.com, where she’s passionate about helping website owners, whether they’re small business owners or bloggers. She teaches about Blogging, Social Media, Search Engine Optimization, Website Design, and WordPress. Additionally, Nile loves to speak at WordCamps (WordPress conferences) across the United States. When Nile isn’t knee-deep in coding, she’s a proud mom of a college student, and enjoys oil painting, cigar smoking, nail art design, and practicing traditional Okinawan kempo karate.
View all posts by Nile Flores


