Canva, the ubiquitous design platform, has become synonymous with stunning visuals and user-friendly creation. But its potential extends far beyond static graphics and presentations. With a little ingenuity, Canva can be a powerful tool for crafting prototypes – low-fidelity representations of your design ideas that allow for user testing and iteration before diving into complex coding.
This comprehensive guide will equip you with the knowledge and steps to confidently prototype within Canva. We'll delve into the essence of prototyping, explore its advantages, and then guide you through the hands-on process of creating prototypes in Canva, from ideation to user testing.
Understanding Prototyping: What and Why?
A prototype is a basic, functional representation of a design concept. It's a tangible way to express your ideas and gather valuable feedback from users early in the design process. Prototypes are not meant to be polished; their primary purpose is to test the usability and functionality of your design before investing significant time and resources into development.
There are numerous benefits to embracing prototyping in your design workflow:
- Enhanced User Experience (UX)
Prototypes allow you to observe how users interact with your design, identify potential pain points, and refine your concept to ensure a smooth and intuitive user experience.
- Early Feedback
By getting prototypes in front of users early on, you can gather valuable feedback that can significantly improve your design before significant development efforts begin.
- Cost-Effective Iteration
Prototyping is a relatively inexpensive way to experiment and iterate on your design. It's much more cost-effective to make changes at the prototype stage than to rework a fully developed product.
- Improved Communication
Prototypes act as a bridge between designers, developers, and stakeholders. They provide a shared understanding of the design vision and facilitate clear communication throughout the development process.
Prototyping in Canva: Embracing Simplicity
Canva's intuitive interface and vast library of design elements make it an excellent platform for creating low-fidelity prototypes. Here's a breakdown of the prototyping process in Canva:
1. Define Your Objective:
Before diving into Canva, take a step back and define the purpose of your prototype. What specific aspect of your design do you want to test? Are you focusing on user flow, information architecture, or a particular feature? Having a clear objective will guide your prototype's development and ensure you gather the most relevant feedback.
2. Craft Your User Journey:
Map out the user journey you want to test in your prototype. This includes outlining the different screens or pages users will encounter and the actions they can take on each screen. Sketching a basic user flow diagram can help visualize this process.
3. Enter the Canva Environment:
Now it's time to unleash your creativity in Canva! Starting with a design size suited to your project (e.g., mobile dimensions for an app prototype). You can then leverage Canva's pre-made UI elements or upload your assets to construct the prototype's structure. Placeholder text boxes are used instead of full content, and hotspots with linking allow you to simulate real app interactions between different "pages" within your prototype.
4. Prototype Refinement:
Once you have a basic prototype in place, take a step back and refine it. Ensure the flow is intuitive and easy to follow. Pay attention to visual consistency and maintain a clear distinction between interactive elements and static content.
5. User Testing and Feedback:
The true value of a prototype lies in user testing. Gather a group of potential users and conduct a testing session. Observe how they interact with your prototype, ask them to think aloud as they navigate, and solicit their feedback on usability, clarity, and overall impression.
Effective Prototyping in Canva
Building on the foundation laid out earlier, let's explore some additional tips to elevate your prototyping experience in Canva:
Leveraging Canva Features:
Master Pages: Utilize Canva's Master Pages feature to ensure consistency across your prototype. Create a master page with your base layout, including headers, footers, and navigation elements, and then apply it to all your prototype pages.
Animations and Microinteractions: While complex interactions might not be feasible, consider adding simple animations and micro-interactions to enhance user engagement. Canva offers pre-built animation options that can add a touch of polish without overwhelming users.
Comments and Collaboration: If you're working with a team, utilize Canva's commenting and collaboration features in real-time. This allows team members to provide feedback directly on the prototype, streamlining the design process.
Focusing on User Experience:
Clarity over Detail: Prioritize clear communication of the user flow and functionality over intricate design details. Users should be able to understand the purpose of each screen and how to interact with it.
Test Different Scenarios: Consider creating variations of your prototype to test different user journeys or functionalities. This can provide valuable insights into user behavior under diverse circumstances.
Think Mobile-First (if applicable): If you're prototyping a mobile app, design your prototype with a mobile-first approach. Consider using a mobile preview mode in Canva to visualize how your prototype will look on a smartphone screen.
Beyond the Prototype:
Export and Share: Once your prototype is finalized, export it as a PDF or presentation for easy sharing with stakeholders and users. Canva offers various export options to suit your needs.
Iteration is Key: Remember, a prototype is a living document. Use the feedback you gather to iterate and refine your design. Canva allows for easy modification, making it perfect for quick changes based on user feedback.
Types of Prototype Templates in Canva
While Canva doesn't offer a vast array of pre-built prototype templates like some dedicated prototyping software, it provides the flexibility to create prototypes for various purposes. Here are the common approaches using Canva's design template by device:
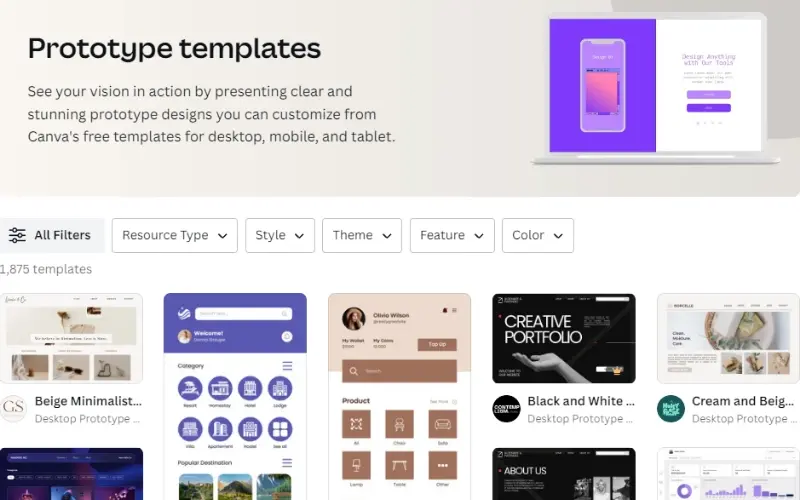
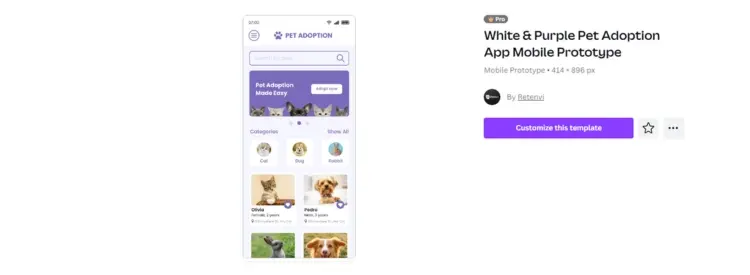
- Mobile App Prototypes: Canva caters well to mobile app prototyping. Start with a design size that matches a popular smartphone model (e.g., iPhone or Android phone). Utilize mobile-friendly UI components and leverage page linking to represent the flow between different screens in your app.
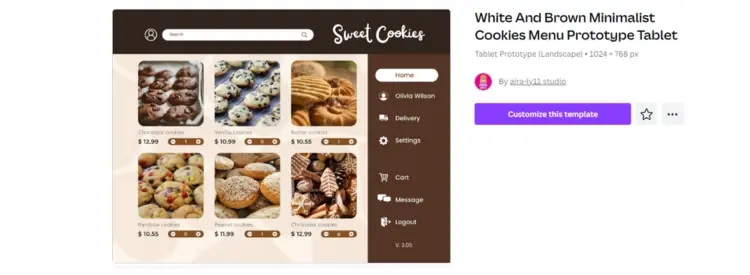
- Tablet Prototypes: If your design caters to tablets, adjust the design size accordingly. You can adapt mobile app UI components or website elements, depending on the complexity of your tablet interface.
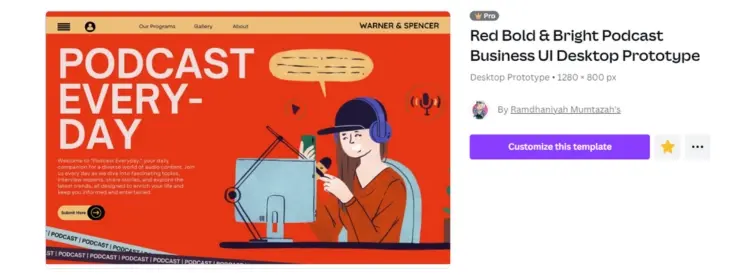
- Desktop Website Prototypes: For desktop website prototypes, choose a design size that accommodates a typical desktop resolution. Utilize navigation bar elements, content sections, and page linking to showcase the website's structure and user journey.
Canva Features or Tools to Create Prototype Design
Canva doesn't have advanced prototyping features like animation tools or intricate user flows, however, it offers a robust set of tools that make it well-suited for creating prototypes using pictures and graphics. Here are some key features to leverage:
Media Library:
Stock Photos and Illustrations: Canva boasts a vast library of royalty-free stock photos and illustrations. Utilize these visuals to represent screens, user interfaces, and backgrounds in your prototype. You can search for specific images or browse by category to find what you need.
Upload Your Assets: If you have your own pictures or graphics relevant to your prototype, you can upload them to Canva and incorporate them seamlessly. This allows you to maintain brand consistency or use custom design elements.
Design Elements:
Pre-Made UI Components: Canva provides a treasure trove of pre-made UI components like buttons, forms, navigation bars, and progress bars. Drag and drop these elements onto your design to quickly build the basic structure of your prototype.
Shapes and Icons: Utilize various shapes and icons offered by Canva to represent functionalities or data visualizations within your prototype. Explore different styles and colors to find elements that complement your overall design.
Putting it Together:
Frames and Masks: Leverage frames and masks to create a polished look for your prototype elements. Frames can be used to house images and text, while masks allow you to create custom shapes for your UI components.
Text Boxes and Placeholders: Since prototypes are low-fidelity, you don't need complete paragraphs. Use text boxes to represent placeholder text and indicate the type of content that will be displayed on each screen.
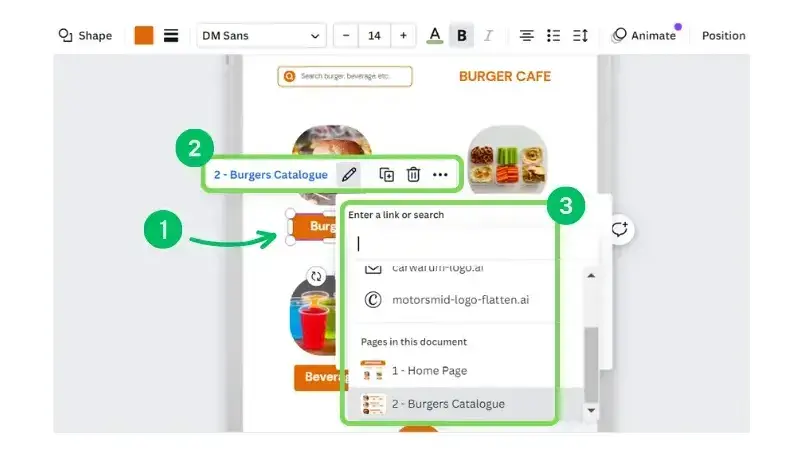
Links and Interactions: One of Canva's powerful features for prototyping is the ability to link pages. You can create clickable hotspots on elements (like buttons) that, when clicked, navigate the user to another page within your prototype, mimicking the flow of a real application.
How to Publish a Canva Prototype
Canva prototypes aren't designed for direct publishing like a website or social media post. Their purpose is to be shared with a limited audience for testing and feedback. Here's how to share your Canva prototype for user testing:
1. Finalize Your Prototype: Ensure your prototype is polished and reflects the user flow you want to test.
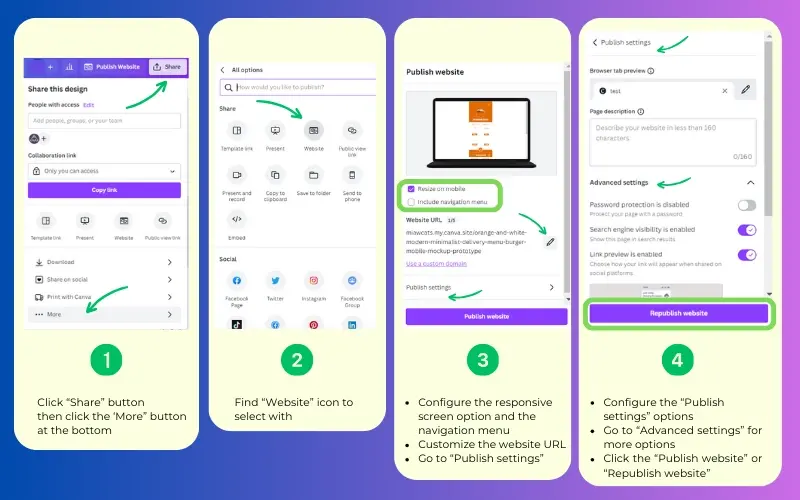
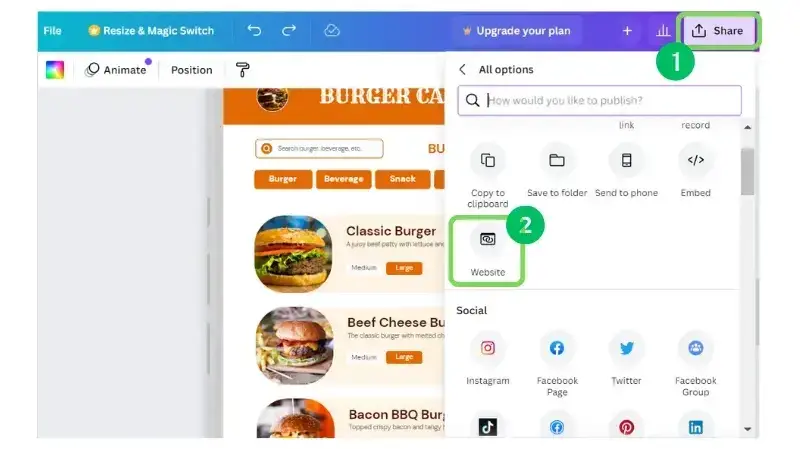
2. Access Sharing Options: Within the Canva editor, click the "Share" button located at the top right corner then click the ‘More” button at the bottom.
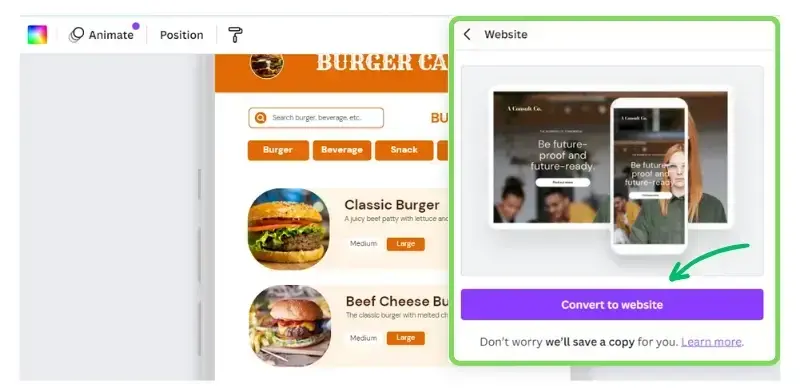
3. Publish Website Configuration: Find the “Website” icon to access the Publish website configuration and options. Set the responsive screen option and the navigation menu, also customize the website URL as needed.
4. Publish Settings Options: Set the browser tab preview and add the page description.
5. Advanced Settings Options: Enable or disable the password protection, the search engine visibility, and the link preview
6. Publish as Website: Click the “Publish website” button or “Republish website” if the prototype design has some more changes after the first publish to view it using the provided link.
Conclusion
You can transform Canva from a design tool into a powerful prototyping platform, fostering effective communication, user-centered design, and successful product development.
User testing and iteration are crucial, and by leveraging Master Pages, animations, and mobile previews, you can craft clear and functional prototypes that effectively communicate your design ideas. Remember, to focus on user flow and functionality over intricate details.
Frequently Asked Questions
How do I choose a design for my website?
One of the most important things when creating a website for your art is the design. Even though your pieces of art might be amazing, people will leave if your site is hard to navigate. This is why it’s important that the site is easy on the eyes and easy to navigate.
What type of design should my fitness blog have?
When you’re a beginner, don’t go crazy with the design of the site. The most important thing is to have a site that looks professional, easy to read, and fast.
What are the best practices for responsive design in WordPress themes?
Use a mobile-first approach, implement media queries, test across various devices, and prioritize user experience on both desktop and mobile.
What role does user interface (UI) design play in the effectiveness of browser push notifications?
UI design significantly influences notification effectiveness. Clear, visually appealing notifications with concise messaging and compelling calls-to-action enhance user engagement. Consistent UI across browsers fosters a positive user experience.

Audee Mirza is a graphic designer and WordPress developer at audeemirza.com who resides in Surabaya, Indonesia. She's also the author of Graphic Identity Blog, a professional logo designer, and often creates vector illustrations for clients and marketplaces. She enjoys good typography design and all kinds of animation.
View all posts by Audee Mirza


