Clarity and user engagement are super important for any website. One often-overlooked yet incredibly effective element in achieving this is the tooltip. In this article, you’ll learn about this element, as well as learn about adding tooltips in WordPress posts and pages.
What are Tooltips and What are They Best Used For?
Before diving into the "how," let's establish a solid understanding of the "what."
What are Tooltips?
Tooltips are small, pop-up information boxes that appear when a user hovers their mouse cursor over a specific element on a webpage. This element could be text, an image, an icon, or even a button. The tooltip typically displays a brief, concise piece of supplementary information related to the hovered element, disappearing once the cursor moves away. Think of them as miniature, on-demand footnotes that provide context without cluttering the main content.
Visually, tooltips can range from simple text boxes with a background and border to more elaborate designs incorporating icons, images, and even short videos. Their appearance and behavior are largely determined by the method used to implement them and the specific design choices made.
What are Tooltips Best Used For?
Tooltips are powerful tools for enhancing user experience and conveying information efficiently. Their best uses lie in situations where you need to:
Provide Definitions or Explanations for Technical Terms/Jargon: If your content uses industry-specific terms, acronyms, or complex concepts, tooltips can offer immediate definitions without forcing the reader to navigate away from the page or search externally. For example, in a medical article, hovering over "MRI" could display "Magnetic Resonance Imaging."
Offer Supplementary Information Without Cluttering Main Content: Sometimes, you have extra details that are relevant but not essential to the primary flow of your text. Tooltips are perfect for housing this "nice-to-know" information, keeping your main paragraphs lean and focused. This could include statistics, brief historical facts, or tangential examples.
Clarify Abbreviations or Acronyms: Similar to technical terms, tooltips are excellent for expanding on abbreviations. Instead of writing out "World Health Organization (WHO)" every time, you can simply use "WHO" and have the full name appear on hover.
Provide Context for Images or Icons: Hovering over an image could reveal its source, a brief description, or even a credit. For icons, a tooltip can explain its function (e.g., hovering over a "share" icon reveals "Share this article").
Explain Form Fields or User Interface Elements: In forms, tooltips can offer hints or examples for specific input fields, guiding users to enter the correct information. On user interfaces, they can explain the purpose of various buttons or navigation elements.
Add "Easter Eggs" or Engaging Micro-Interactions: Beyond purely functional uses, tooltips can be used creatively to add subtle, engaging elements to your site, surprising and delighting users with hidden facts or playful messages.
Improve Accessibility: While not a primary accessibility solution, tooltips can indirectly aid users by providing on-demand explanations for content that might otherwise be unclear. However, it's crucial to ensure tooltips are keyboard-accessible for users who don't use a mouse.
Overall, tooltips are about providing just-in-time information, reducing cognitive load, and creating a more intuitive and interactive Browse experience. They prevent information overload while ensuring that users can access deeper levels of detail when they need it.
Adding Tooltips in WordPress Posts and Pages
WordPress, with its vast ecosystem of plugins and its flexible underlying code, offers several ways to add tooltips to your posts and pages. We'll explore the most common and effective method, to make it easy for you.
Using Dedicated Tooltip Plugins (Recommended for Beginners and Non-Coders)
For most WordPress users, dedicated tooltip plugins offer the simplest and most efficient way to implement tooltips without touching a single line of code. These plugins typically provide a user-friendly interface for creating, managing, and styling your tooltips.
Popular Tooltip Plugins:
Several excellent tooltip plugins are available in the WordPress plugin directory. Here are a few highly-rated and feature-rich options:
WordPress Tooltips: This plugin is a straightforward option for adding simple text tooltips. It allows you to create a list of terms and their corresponding definitions, which then automatically appear as tooltips throughout your site.
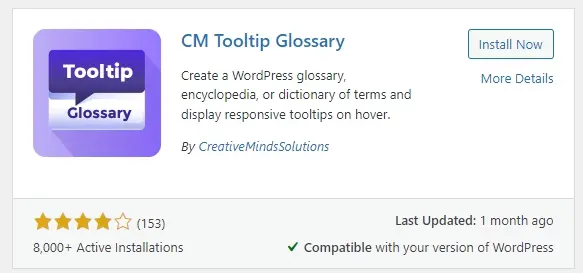
CM Tooltip Glossary: More robust than simple tooltip plugins, CM Tooltip Glossary is ideal for creating comprehensive glossaries or dictionaries. It automatically links terms within your content to their glossary entries, displaying a tooltip on hover. It offers extensive customization options and supports various content types within tooltips (text, images, videos).
Ultimate Blocks (Gutenberg Block): If you're primarily using the Gutenberg block editor, Ultimate Blocks is a fantastic choice. It includes a dedicated "Tooltip" block that allows you to easily add tooltips directly within your content, offering basic styling options.
General Steps for Using a Tooltip Plugin (Illustrative Example with CM Tooltip Glossary):
While each plugin will have its own specific interface, the general workflow remains similar. Let's use CM Tooltip Glossary as an example due to its comprehensive features.
Step 1: Installation and Activation:
- Navigate to your WordPress dashboard.
- Go to Plugins > Add New.
- Search for "CM Tooltip Glossary" (or your chosen plugin).
- Click "Install Now" and then "Activate."
Step 2: Creating Glossary Terms (for CM Tooltip Glossary):

- After activation, you'll usually find a new menu item in your dashboard (example - "CM Tooltip Glossary" or "Glossary").
a. Click on it, and then select "Add New Glossary Item."
- Title: Enter the term you want to define (example - "API"). This will be the text that triggers the tooltip.
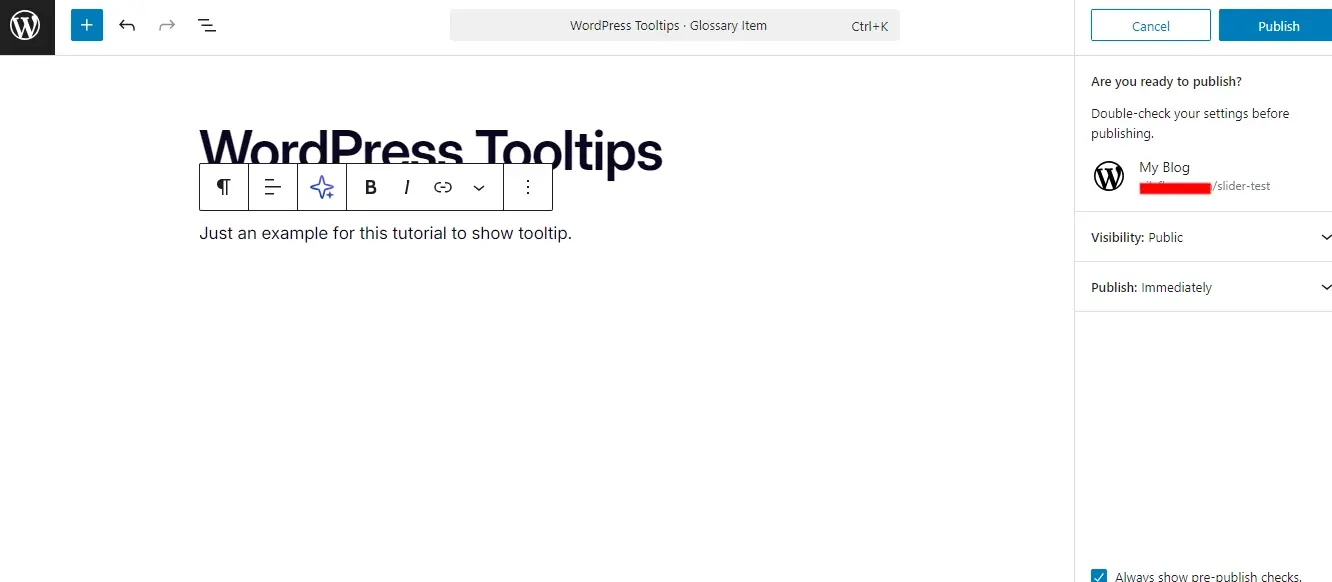
Content: In the main content editor, provide the definition or supplementary information for the term (example - WordPress Tooltips: Just an example for this tutorial to show tooltip.).
Settings (Optional but Recommended): Explore the various settings offered by the plugin. CM Tooltip Glossary, for instance, allows you to:
a. Choose whether the tooltip should appear automatically or only when a specific shortcode is used.
b. Configure the tooltip display (example - position, animation, delay).
c. Exclude certain posts/pages from showing tooltips.
d. Customize tooltip styling (colors, fonts, etc.).
e. Click "Publish" to save your glossary item.
Step 3: Displaying Tooltips in Posts/Pages:
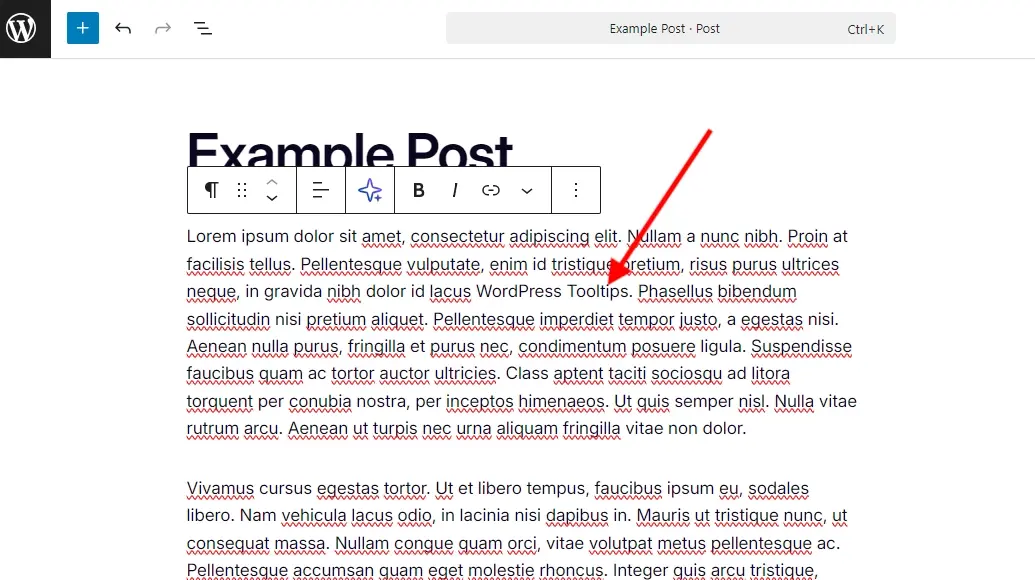
- With CM Tooltip Glossary, once you've created a glossary item, the plugin will automatically detect instances of that term within your posts and pages and turn them into tooltips. You don't need to do anything extra.
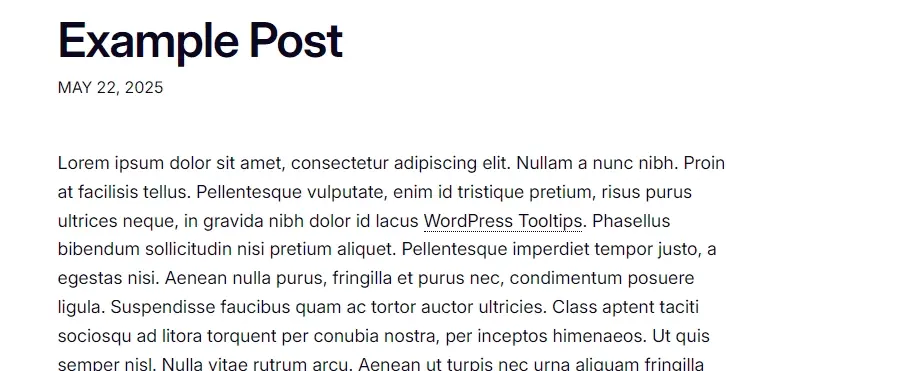
- For other plugins that rely on shortcodes (like Easy Tooltip or Ultimate Blocks), you would typically:
a. Edit the post or page where you want to add a tooltip.
b. If using the Gutenberg editor, add the specific tooltip block.
c. If using the classic editor or a shortcode-based plugin, you'd wrap the text with the plugin's shortcode: ‘[tooltip text="Your hovered text"]Your tooltip content[/tooltip]’. (The exact shortcode will vary by plugin).
Step 4: Styling and Customization:
Most plugins offer options within their settings panel to customize the appearance of your tooltips. This can include:
- Background color
- Text color
- Font size and family
- Border style and color
- Padding and margins
- Animation effects (fade, slide, etc.)
- Positioning (top, bottom, left, right relative to the hovered element)
Best Practices for Implementing Tooltips
Regardless of the method you choose, adhering to best practices will ensure your tooltips are effective and enhance the user experience rather than detract from it.
Keep Tooltip Content Concise: Tooltips are meant for brief, supplementary information. Avoid long paragraphs or complex explanations. If you need extensive detail, link to a separate page.
Use Them Sparingly: Overusing tooltips can be distracting and overwhelming. Reserve them for genuinely important or clarifying information. If every other word has a tooltip, it defeats the purpose.
Ensure Accessibility: This is important!
a. Keyboard Navigation:** Tooltips should be accessible via keyboard. Users who navigate with the tab key or screen readers should be able to trigger and read the tooltip content. This often requires JavaScript and ARIA attributes (example - ‘aria-describedby’).
b, Clear Contrast: Ensure sufficient color contrast between the tooltip text and its background for readability.
c. Proper Placement: Avoid placing tooltips where they obscure other important content. They should disappear when the user moves away.
- Provide a Visual Cue:** Make it clear to users that an element has a tooltip. Common visual cues include:
a. A dotted or dashed underline.
b. A slightly different text color.
c. A question mark icon next to the text.
d. Changing the cursor to a "help" or "pointer" icon on hover.
Consistent Styling: Maintain a consistent look and feel for all your tooltips across your website. This contributes to a professional and cohesive user experience.
Consider Delay and Duration:
a. Delay: A slight delay before the tooltip appears (example - 200-500ms) prevents accidental pop-ups as users move their mouse around.
b. Duration: Tooltips should disappear relatively quickly once the mouse leaves the element, but not so fast that the user can't read them.
Test Across Devices: Always test your tooltips on different screen sizes (desktop, tablet, mobile) and browsers to ensure they display correctly and are usable. Mobile devices, in particular, don't have a hover state, so consider how tooltips will behave like on tap, or if they're even necessary. For mobile, a clickable icon revealing a pop-up might be a more appropriate alternative.
Prioritize Performance: If using a plugin, choose one that is lightweight and well-coded. If using custom code, ensure your CSS and JavaScript are optimized and don't create unnecessary overhead.
No Critical Information in Tooltips: Do not put essential information that users absolutely must see in a tooltip. If it's critical, it belongs directly in the main content. Tooltips are for supplementary details.
Explain Their Purpose (if needed): For users unfamiliar with tooltips, you might briefly explain in a "How to Use This Site" section that some terms have additional information available on hover.
In Summary
Tooltips, when used thoughtfully and strategically, are invaluable assets in enhancing the user experience on your WordPress website. They offer a refined way to deliver contextual information, reduce cognitive load, and keep your content clean and focused. Whether you opt for the simplicity and power of dedicated plugins, the ultimate control of custom code, or leverage the evolving capabilities of the Gutenberg block editor, the key lies in understanding your audience, adhering to best practices, and consistently testing your implementation. Hopefully this tutorial on adding tooltips in WordPress posts and pages will help enhance your website visitors’ experience.
Frequently Asked Questions
Can I export my WordPress posts as Markdown documents?
Yes, certain plugins and tools enable the export of WordPress posts as Markdown documents. These tools typically add an option to the WordPress editor or in the plugin's settings to export your fully formatted posts into Markdown format, allowing for easy migration or backup in Markdown form.
Which newsletter tools are compatible with WordPress?
Many newsletter platforms have official plugins or third-party tools that let you use them with WordPress. Flodesk and Kit are two examples.
What tools are available for automated testing of WordPress themes?
Use tools like Theme Check, PHP_CodeSniffer, and automated testing frameworks such as PHPUnit for unit testing to ensure code quality and theme functionality.
What are the best tools or IDEs for WordPress plugin development?
Popular tools include Visual Studio Code, PhpStorm, and Sublime Text. IDEs like PhpStorm offer advanced features, while lightweight editors like Visual Studio Code are versatile and beginner-friendly.

Nile Flores is a long time professional blogger, as well as WordPress website designer and developer from the St. Louis Metro East. Nile blogs at NileFlores.com, where she’s passionate about helping website owners, whether they’re small business owners or bloggers. She teaches about Blogging, Social Media, Search Engine Optimization, Website Design, and WordPress. Additionally, Nile loves to speak at WordCamps (WordPress conferences) across the United States. When Nile isn’t knee-deep in coding, she’s a proud mom of a college student, and enjoys oil painting, cigar smoking, nail art design, and practicing traditional Okinawan kempo karate.
View all posts by Nile Flores


