
The evolution of the internet has forever altered the landscape of education. No longer confined to brick-and-mortar institutions, learning now transcends geographical boundaries, facilitated by the power of virtual classrooms. In this article you’ll learn about how to run a virtual classroom using WordPress.
Whether you’re a seasoned educator, a subject matter expert, or simply passionate about sharing your knowledge, running a virtual classroom presents an unparalleled opportunity to connect with learners worldwide. However, transitioning from traditional teaching to the digital realm requires careful planning, strategic execution, and a keen understanding of the unique challenges and rewards that come with online education.
Why Use WordPress to Run A Virtual Classroom?
Although there’s quite a few platforms for you to jumpstart your own online course business, like Teachable, Thinkific, Udemy, and more, WordPress powered over 43% of the existing websites in 2025.
WordPress has evolved significantly, offering robust solutions for creating and managing online classrooms. Here are 5 quick reasons why WordPress is a strong contender for building your online educational platform:
- Unparalleled Flexibility and Customization
- Ownership and Control
- Cost-Effectiveness
- Strong Community and Support
- SEO Friendliness

Choosing the Right WordPress Setup for your Virtual Classroom
Before diving into plugins, it's important to have a solid WordPress foundation. You'll need:
A Self-Hosted WordPress Installation: While WordPress.com offers a free option, it comes with limitations that hinder the functionality required for a full-fledged virtual classroom. Opt for a self-hosted WordPress.org setup, which gives you complete control over your website and allows you to install plugins and themes.
Reliable Web Hosting: Choose a hosting provider that offers sufficient bandwidth, storage, and uptime to handle your anticipated student traffic and multimedia content. Consider options optimized for WordPress for better performance.
A Relevant Theme: While any well-coded theme can work, selecting a theme designed for education or with a clean and organized layout will enhance the user experience. Many themes offer features like course layouts, student profiles, and event calendars.
Transforming WordPress into an LMS
The true power of using WordPress for a virtual classroom lies in its vast plugin ecosystem. Several Learning Management System (LMS) plugins are available, each offering a range of features to manage courses, enroll students, track progress, and facilitate interaction. Some popular and highly recommended LMS plugins include:
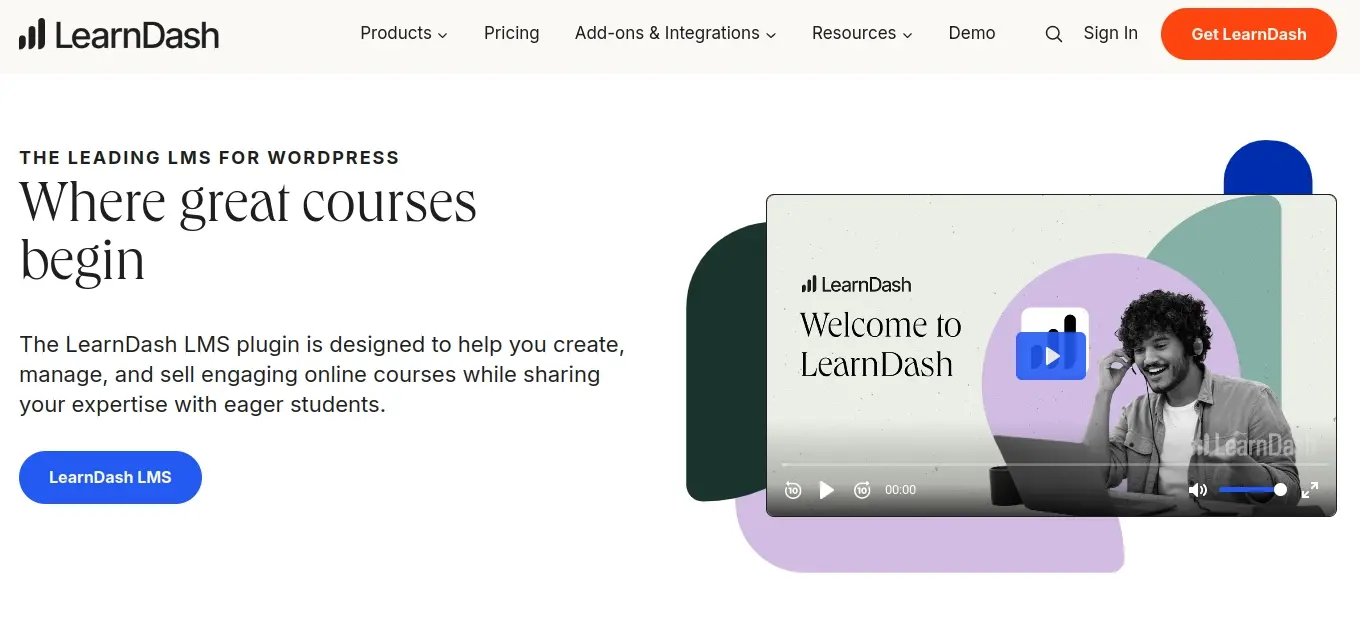
- LearnDash: A robust and feature-rich plugin known for its advanced course building tools, drip-feed content, quizzes, assignments, and integration with various membership and e-commerce plugins. LearnDash is a premium option but offers excellent value for its comprehensive capabilities.
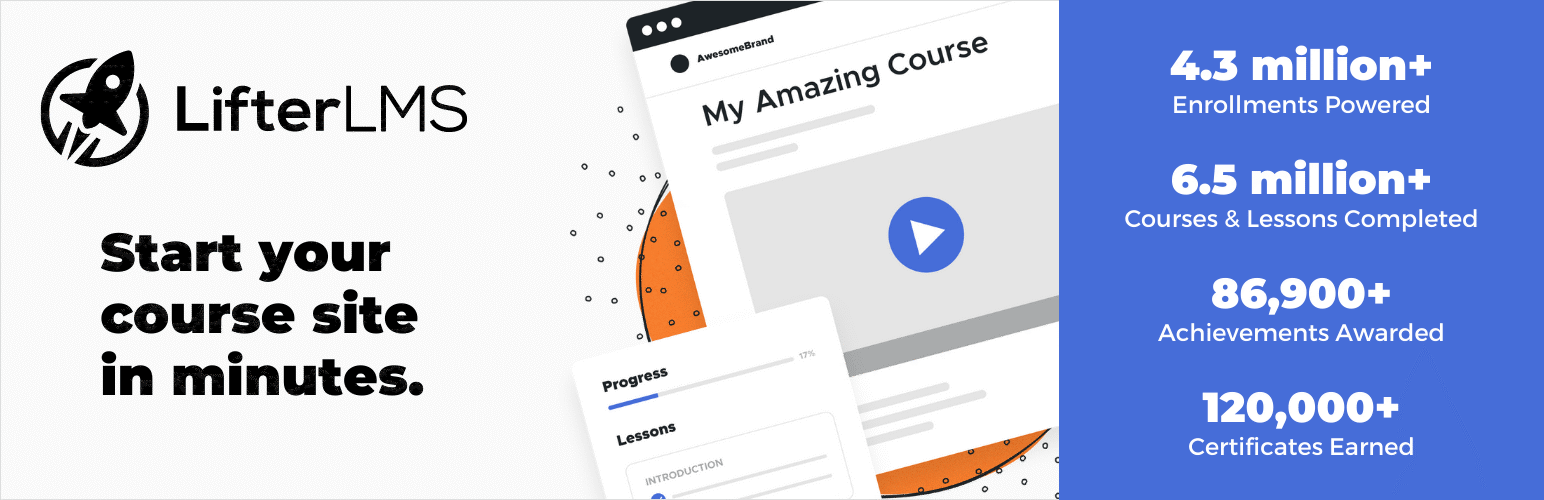
- LifterLMS: Another powerful contender, LifterLMS provides a user-friendly interface and a wide array of features, including course creation, membership management, payment gateways, and student engagement tools. It offers a free core plugin with paid add-ons for advanced functionalities.
- Tutor LMS: A relatively newer but rapidly growing plugin, Tutor LMS boasts a modern interface and a strong set of features, including a drag-and-drop course builder, quiz creation, student dashboards, and reporting. It offers both free and paid versions.
Choosing the Right LMS Plugin
Consider the following factors when selecting an LMS plugin:
Your Budget: Some plugins are entirely premium, while others offer free core versions with paid extensions.
Required Features: Identify the essential features you need, such as course creation tools, quiz types, student management, payment integration, and communication options.
Ease of Use: Opt for a plugin with an intuitive interface that you and your instructors (if applicable) can easily navigate.
Scalability: Ensure the plugin can handle your anticipated growth in students and courses.
Integration Capabilities: Check if the plugin integrates well with other essential WordPress plugins, such as membership plugins, e-commerce platforms, and communication tools.
Crafting Engaging Virtual Course Content
Once you have your LMS plugin installed and configured, the next crucial step is to create engaging and effective course content. Your LMS plugin will provide tools to structure your courses into modules, lessons, topics, and quizzes. Consider the following best practices:
Structure Your Courses Logically: Organize your content in a clear and sequential manner, breaking down complex topics into smaller, digestible lessons.
Utilize Multimedia: Incorporate a variety of media, such as text, images, videos, audio recordings, and interactive elements, to cater to different learning styles and enhance engagement. Most LMS plugins allow you to embed various media types directly into your lessons.
Create Engaging Quizzes and Assessments: Use quizzes to reinforce learning, track student progress, and provide feedback. Explore different question types offered by your LMS plugin, such as multiple-choice, true/false, fill-in-the-blanks, and essay questions. Consider incorporating assignments that require students to apply their knowledge in practical ways.
Drip-Feed Content (Optional): If you want to control the pace at which students access course material, explore the drip-feed content feature offered by many LMS plugins. This allows you to release lessons or modules gradually over time.
Provide Downloadable Resources: Offer supplementary materials like PDFs, worksheets, templates, or links to external resources to enhance the learning experience.
Managing Your Students
A well-rounded virtual classroom needs effective student management tools. Your chosen LMS plugin will provide features for:
Student Enrollment: Allow students to self-enroll, manually enroll them, or integrate with membership plugins for paid courses.
Progress Tracking: Monitor student progress through lessons, quizzes, and assignments. Many LMS plugins offer detailed reports on individual and overall student performance.
Communication Tools: Facilitate communication between instructors and students through built-in messaging systems, discussion forums, or integration with external communication platforms.
Certificates of Completion: Motivate students and recognize their achievements by offering customizable certificates upon successful completion of a course.
Building a Learning Community
A successful virtual classroom goes beyond simply delivering content; it fosters engagement and builds a sense of community among learners. Consider these strategies:
Discussion Forums: Utilize the discussion forum features of your LMS plugin (or integrate with forum plugins like bbPress) to create spaces for students to interact, ask questions, share ideas, and learn from each other.
Live Sessions and Webinars: Integrate your WordPress site with video conferencing platforms like Zoom, Google Meet, or GoToWebinar to conduct live lectures, Q&A sessions, and interactive workshops. Embed recordings of these sessions for students who couldn't attend live.
Interactive Elements: Incorporate interactive quizzes, polls, surveys, and gamification elements (if supported by your LMS plugin or through additional plugins) to make learning more engaging and fun.
Personalized Feedback: Provide timely and constructive feedback on assignments and quizzes to help students understand their strengths and areas for improvement.
Office Hours: Offer virtual office hours where students can connect with instructors for individual support and clarification.
Group Projects and Collaboration: Encourage collaboration among students through group projects and assignments, fostering teamwork and peer learning.
Monetizing Your Virtual Classroom (If Applicable)
If you plan to monetize your virtual classroom, WordPress offers several options:
Direct Course Sales: Integrate your LMS plugin with e-commerce plugins like WooCommerce to sell individual courses or bundles.
Membership Subscriptions: Use membership plugins like MemberPress or Restrict Content Pro to create tiered membership plans that grant access to specific courses or content libraries.
Course Bundles and Discounts: Offer discounted bundles of courses to incentivize enrollment.
Affiliate Marketing: Promote relevant products or services to your students and earn a commission on sales.
You can also Integrate payment gateways such as PayPal or Stripe to allow students to purchase your courses.
Note: Feel free to read our article on How to Create a Profitable Online Course.
Essential WordPress Plugins for Enhancing Your Virtual Classroom
Beyond your core LMS plugin, consider these additional WordPress plugins to enhance your virtual classroom:
Contact Form Plugins: For easy communication and inquiries.
SEO Plugins: To optimize your course pages for search engines and attract more students.
Security Plugins: To protect your website and student data. Caching Plugins (example - WP Rocket, LiteSpeed Cache): To improve website speed and performance.
Analytics Plugins: To track website traffic and student engagement.
Email Marketing Plugins (example - Mailchimp for WordPress, Kit, Aweber): To communicate with students and build your email list.
BONUS: How to Start a Virtual Classroom in WordPress using LifterLMS
Using one of the plugins suggested above, in case you want to go ahead and get started right away on your virtual classroom, here’s the steps for setting up LifterLMS:
- Install and Use LifterLMS Onboarding Wizard
- Access the LifterLMS Course Creation Interface
- Start Creating a New Course
- Enter Basic Course Information
- Configure Course Settings (LifterLMS Course Settings)
- Use the Course Builder to Add Sections and Lessons
- Add Quizzes and Assignments (Optional)
- Publish the Course
- Test the Course
Install and Use LifterLMS Onboarding Wizard
- Go to Plugins, and then Add New, in your WordPress admin area.
- In the search box, look for “LifterLMS”.
- Install and activate plugin.
- Go through the steps in the LifterLMS Onboarding Wizard.
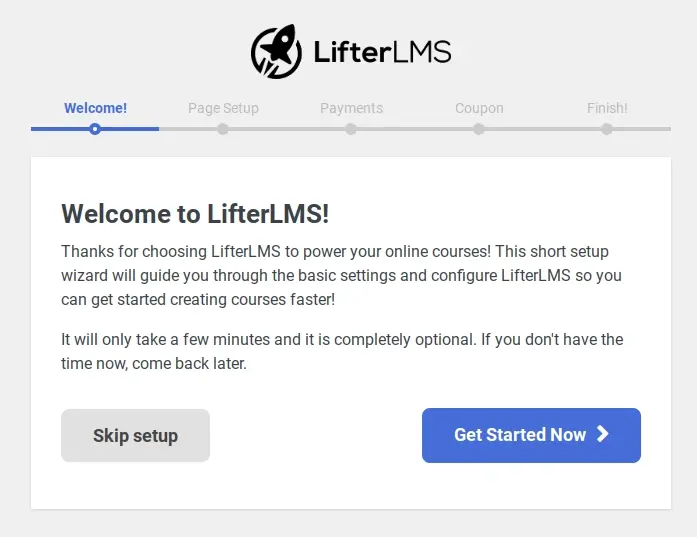
In the Onboarding Wizard, just click the “Get Started Button”.
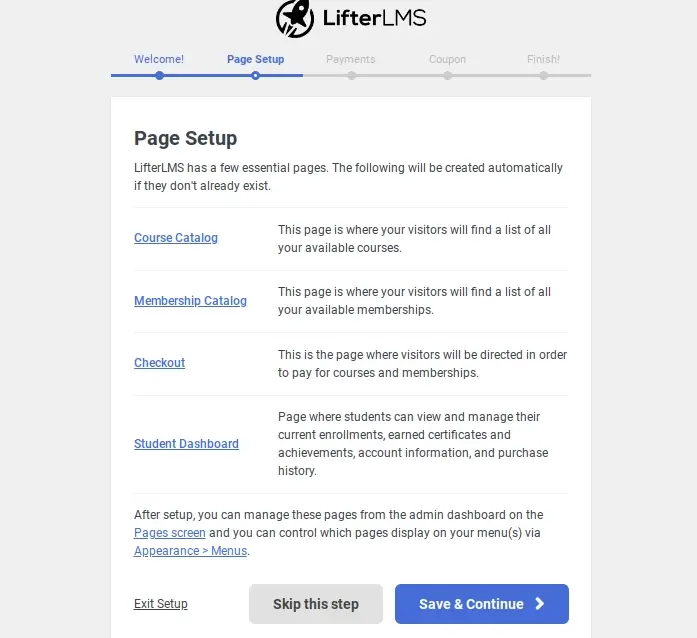
The next screen will lead you to the page setup process. LifterLMS automatically creates pages that will help you with frontend areas to view, purchase, and participate in each course. Just review and then click the button that says Save & Continue.
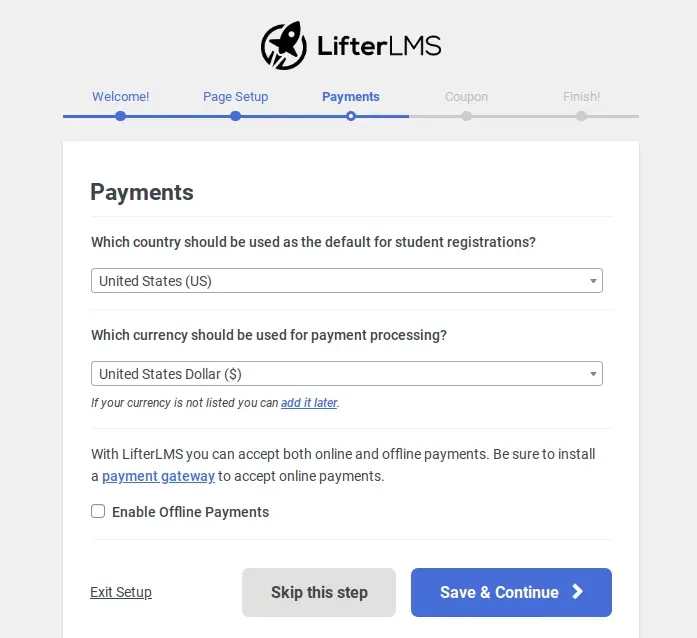
The next screen of the onboarding wizard is about setting your currency and country. You can even accept offline payments. This is great if you do public speaking and have people interested in taking further courses, but they only have cash in hand.
The steps after this are not really necessary unless you wish to watch some of the video guides. You can always view them later.
Access the LifterLMS Course Creation Interface
- Log in to your WordPress admin dashboard.
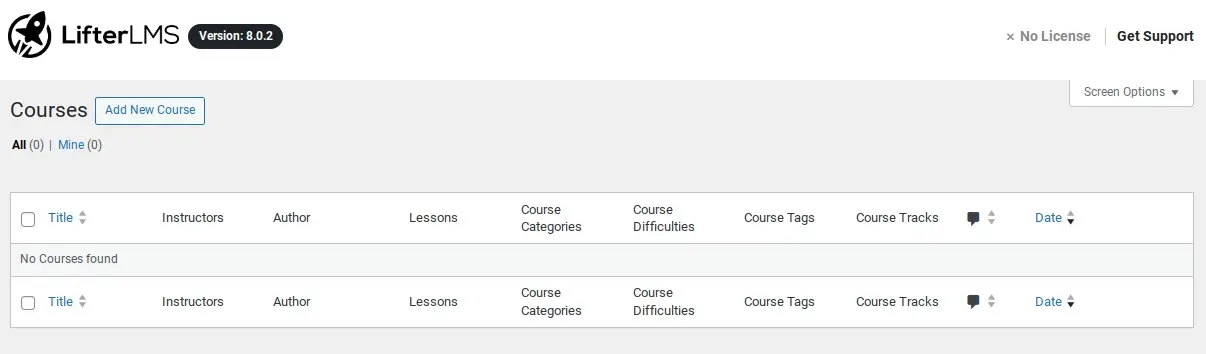
- In the left-hand navigation menu, find "LifterLMS." 3 .Hover over "LifterLMS" and click on "Courses."
Start Creating a New Course
On the "Courses" page, click the "Add Course" button (usually located at the top of the page).
Enter Basic Course Information

Course Title: Enter the title of your course in the title field, just as you would for a regular WordPress post.
Course Description: In the main content editor (the WordPress editor), write a detailed description of your course. This is where you'll explain what the course covers, who it's for, and what students will learn.
Featured Image: Set a featured image for your course. This image will represent your course in course listings and on the course page. You can upload an image or select one from your media library.
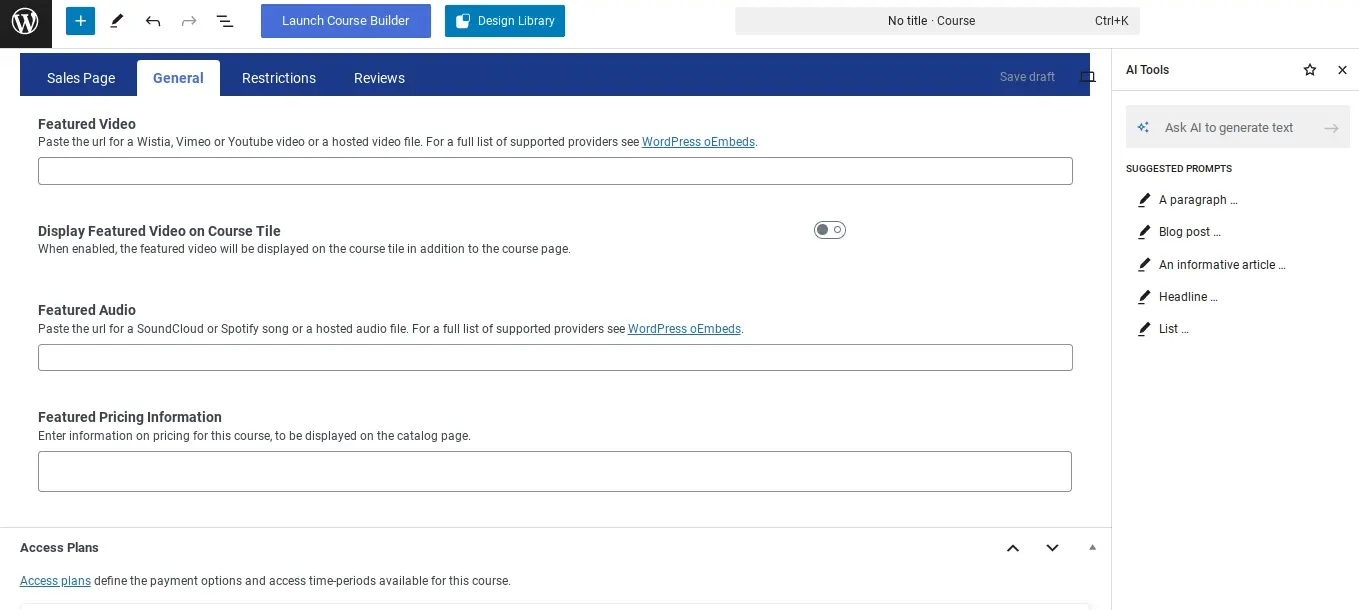
Configure Course Settings (LifterLMS Course Settings)
Scroll down below the content editor to the "LifterLMS Course Settings" section. This is where you'll configure the specific settings for your course.
General Settings:
Course Difficulty: Set the difficulty level (example - Beginner, Intermediate, Advanced).
Course Track: if you are utilizing course tracks, assign the course to the desired track.
Student Limit: If you want to limit the number of students who can enroll, enter the maximum number.
Enrollment Period: if the enrollment period is limited, set the start and end dates.
Course Duration: Specify how long students have access to the course.
Pricing:
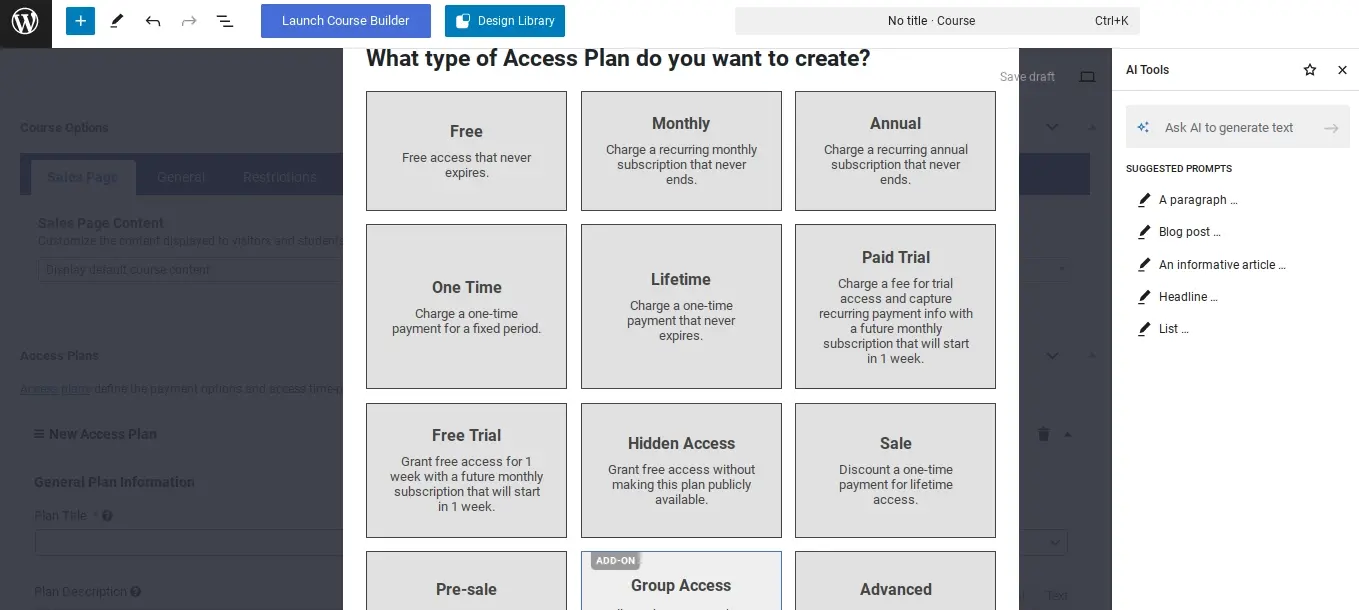
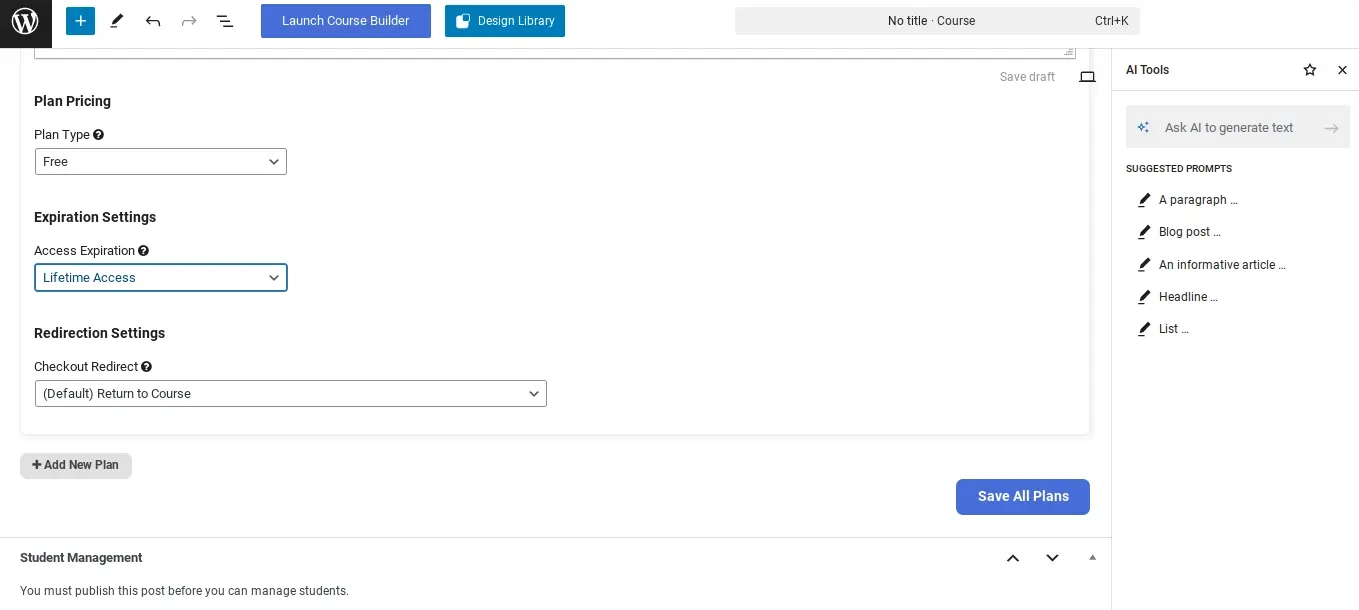
Pricing Type: Choose between "Free," "One-Time," or "Recurring."
If you choose "One-Time" or "Recurring," enter the price and configure payment settings. LifterLMS integrates with various payment gateways.
Restrictions:
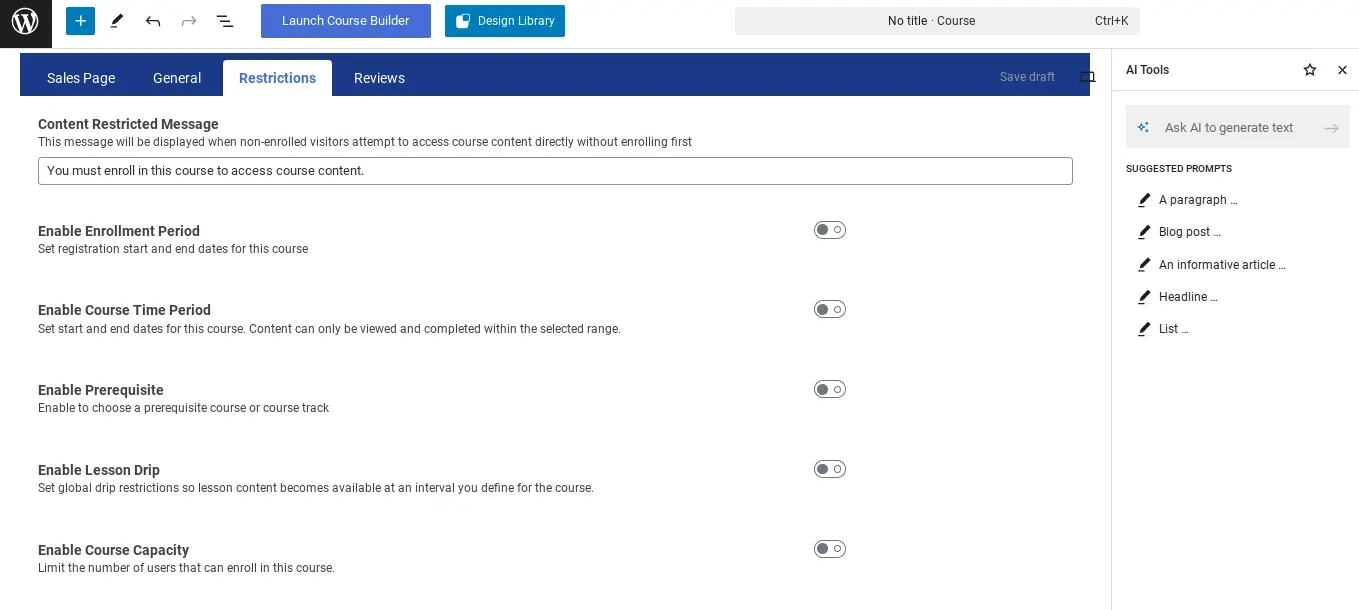
Set restrictions on course access, such as requiring students to complete a prerequisite course.
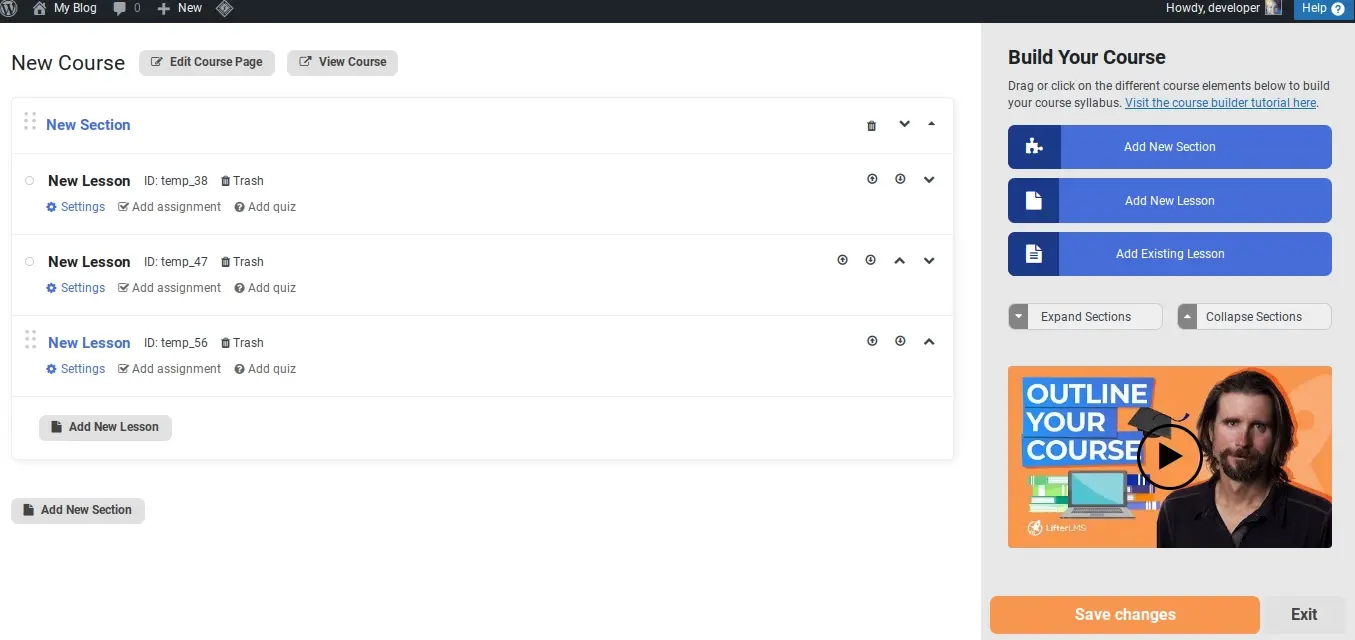
Use the Course Builder to Add Sections and Lessons
Course Builder Interface: The course builder is a drag-and-drop interface that allows you to organize your course content.

By default, LifterLMS has an example mini course that you can work with to launch your first course.
Add Sections:
Click the "Add Section" button to create a new section (example - "Introduction," "Module 1," "Module 2").
Enter a title for the section.
Add Lessons:
- Within each section, click the "Add Lesson" button to create a new lesson.
- Enter a title for the lesson.
- Click on the Lesson title to edit the lesson.
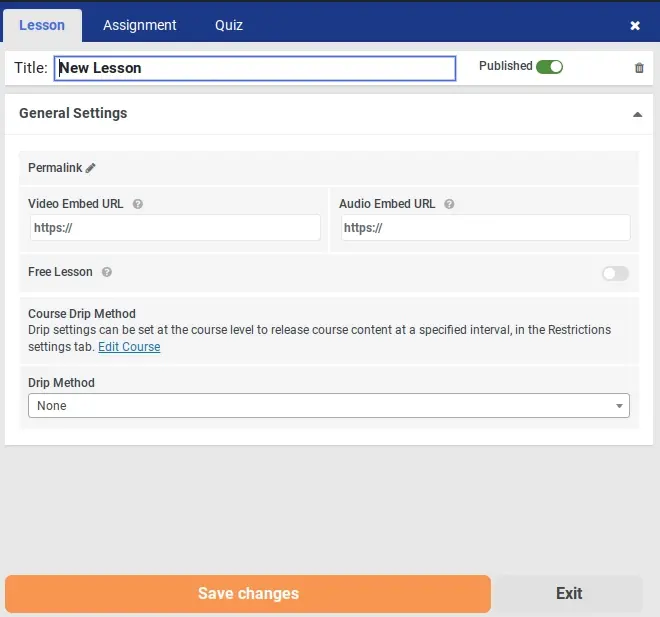
Lesson Content:
In the lesson editor, add your lesson content (text, images, videos, etc.). LifterLMS also supports adding quizzes, assignments, and downloads to lessons.
Lesson Settings:
Within the lesson editor, you can also set lesson settings, such as required time to complete, access restrictions, and more.
Drag and Drop:
Use the drag-and-drop functionality to rearrange sections and lessons as needed. If you hover to the left of the Lesson title, you will be able to drag and move around the lesson.
Add Quizzes and Assignments (Optional)
Within the lesson editor, you can add quizzes and assignments to assess student learning.
Quizzes:
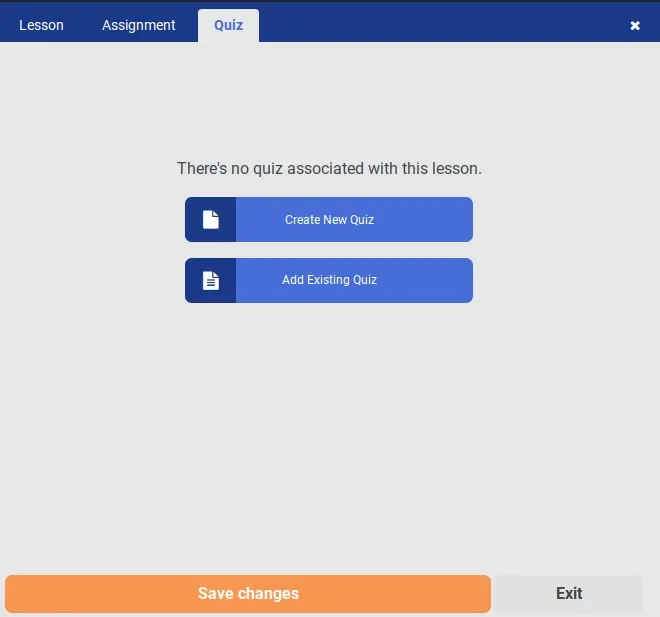

- Create multiple-choice, true/false, and other types of questions.
- Set correct answers and provide feedback.
Assignments:

- Allow students to submit assignments for review.
- Provide feedback and grades.
Please note that this is a paid add-on.
Publish the Course
Once you've added all your course content and configured the settings, click the "Publish" button (or "Update" if you're editing an existing course).
Test the Course
Enroll in your course as a student to test the course flow and ensure everything is working correctly.
Check the payment process, lesson progression, and any quizzes or assignments.
Important Notes:
LifterLMS offers a wide range of add-ons that extend its functionality. Explore these add-ons to enhance your course offerings.
Refer to the LifterLMS documentation for detailed information on specific features and settings.
Ensure that your chosen payment gateway is correctly configured.
By following these steps, you can successfully add a course to your WordPress website using the LifterLMS plugin.

In Summary
When it comes to being able to run a virtual classroom, it requires dedication, planning, and a passion for teaching. By leveraging the right technology, creating engaging content, and building a strong community, you can empower learners worldwide and capitalize on the lucrative opportunities of the online education market. Hopefully this guide and bonus tutorial can help jumpstart your online course business.
Frequently Asked Questions
Are WordPress plugins free?
WordPress has loads of plugins you can install, some of them are free, but some of them you will need to pay for. You can learn how to use WordPress Plugins on our blog.
Why choose hosting for WordPress ?
WordPress is so popular because it allows people to create websites with total customization. With hundreds of apps available for one-click installations, creating something that’s eye-catching and unique is much easier with a CMS like WordPress. Learn more about WordPress optimized Hosting here.
Can I install plugins and themes on DokuWiki hosting?
Yes, DokuWiki supports a wide range of plugins and themes that enhance functionality and design. You can install plugins to add new features, such as authentication integrations, real-time collaboration, and advanced formatting tools. Themes allow you to customize the appearance of your wiki without modifying the core system.
Does SMF hosting support third-party plugins and themes?
Absolutely. SMF hosting fully supports third-party mods, themes, and plugins, allowing you to customize and enhance your forum with additional features and design elements.

Nile Flores is a long time professional blogger, as well as WordPress website designer and developer from the St. Louis Metro East. Nile blogs at NileFlores.com, where she’s passionate about helping website owners, whether they’re small business owners or bloggers. She teaches about Blogging, Social Media, Search Engine Optimization, Website Design, and WordPress. Additionally, Nile loves to speak at WordCamps (WordPress conferences) across the United States. When Nile isn’t knee-deep in coding, she’s a proud mom of a college student, and enjoys oil painting, cigar smoking, nail art design, and practicing traditional Okinawan kempo karate.
View all posts by Nile Flores


