Creating online courses is a great way to share your expertise with others and grow your income. One of the best ways to create your courses is to build an LMS website with WordPress.
There are several ways to set up a learning management system and build your courses. In this post, we’ll see how to build an LMS website with WordPress to help you get started with your online learning platform.
About Domain Names and Hosting for an LMS Website
An LMS platform can be integrated into an existing WordPress website, or you can create a WordPress website specifically to host the LMS. The LMS can be the main focus or just one element of the website. You’ll need a domain name, hosting, and WordPress installed.
A domain name is an important part of your company branding. For information about choosing a domain name, see the article How to Choose a Domain Name in 7 Steps.
Rather than installing WordPress and setting it up yourself, we recommend Managed hosting for WordPress. For information about choosing a hosting plan for WordPress, see the article Cloud Hosting vs Hosting for WordPress - What’s the Right Solution For You?
What is LMS?
LMS (Learning Management System) is a platform that integrates into a WordPress website to create, host, and manage online courses.
The publishing side of an LMS supports multiple types of content including written and video content. The management side of the LMS includes features such as the ability to sign up and pay for classes, a testing platform for grading, student records, and more.
According to Statista, the revenue of online learning platforms is projected to reach US$56.69bn in 2022. Distance learning has continued to grow. In 2020, 45.5% of students took classes online exclusively. Creating online courses with an LMS website can be a great way to grow your business.
Why Integrate LMS into WordPress?
There are lots of popular online course platforms available such as Udemy, SkillShare, Coursera, Teachable, LinkedIn Learning, and more. With so many robust platforms available, why would anyone want to build an LMS into their WordPress website? After all, there are a lot of things involved in marketing and maintaining a website.
First, these are closed platforms. We don’t have access to customization, personal branding is limited, it’s difficult to stand out from the crowd, and we have to share the income.
The greatest advantage of building an LMS platform into your WordPress website is you own your platform. You’re in control and you’re not competing with others on the platform. As the owner of the course, you’d have to do your marketing to stand out from the crowd anyway. Hosting the LMS on your website means your marketing efforts build your platform. This means your students see all of your courses and services. Also, you won’t have to share the money with the platform.
How to Build an LMS Website with WordPress in 6 Steps
Integrating an LMS platform into WordPress is a simple process. You’ll need a good theme and an LMS plugin. Several of the plugins include or offer themes designed for online classes. Fortunately, they do work with any theme.
Step 1: Choose an LMS Plugin
There are several amazing LMS plugins available for WordPress. Each has advantages and includes lots of templates and many include theme builder integration. Here’s a quick look at the most popular LMS plugins. All are great choices. Choose based on the features and the price point that match your needs. This list includes both free and premium options. The premium options include affiliate programs so you can grow your income passively.
LearnPress
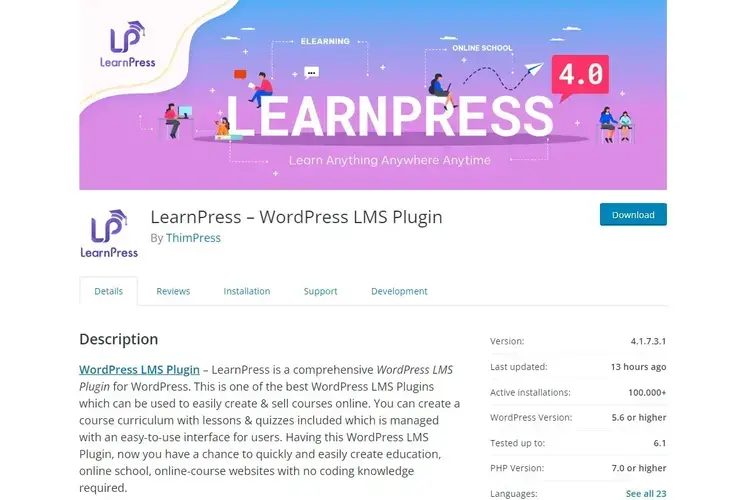
LearnPress has 100,000 active installs with a 4.5-star rating. This is a free plugin with premium features. Create and manage course curriculum with lessons and quizzes. It’s lightweight and has lots of free and premium add-ons available to expand it even further. It integrates with popular payment platforms to sell your courses. Premium themes are available in the dashboard. Communicate with students through BuddyPress.
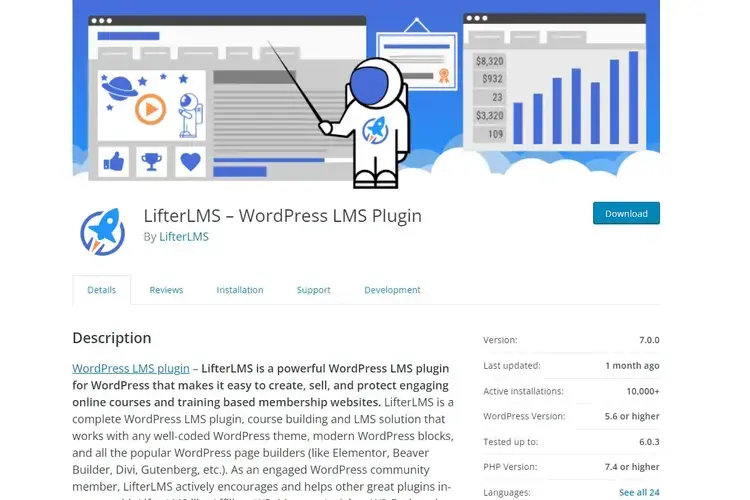
LiferLMS has 10,000 active installs with a 5-star rating. It makes it easy to create, sell, and protect online courses and membership sites. It includes page-building integration with all of the popular page builders. Everything you need is included in a single plugin, and it can be expanded further with premium extensions. LifterLMS has a large community with lots of training on building and growing online courses. It includes payment gateways, quizzes, drip content, graphics, forum integrations, private groups, and more. Create courses and memberships.
MemberPress
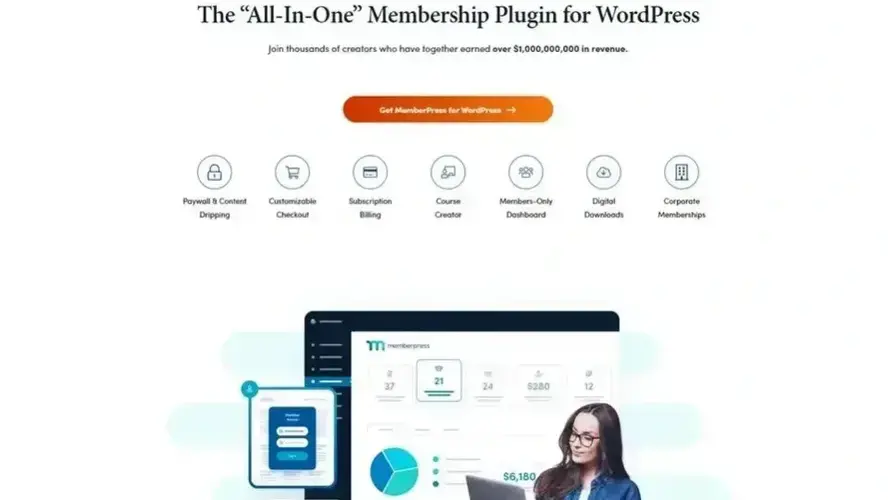
MemberPress is a premium all-in-one membership plugin with a members-only dashboard and course creator. It includes digital downloads, subscription billing, content dripping, coupons, community building, and a customizable checkout. It includes lots of add-ons and integrates with lots of third-party services. There are three subscriptions to choose from. Each subscription provides different add-ons and features.
LearnDash
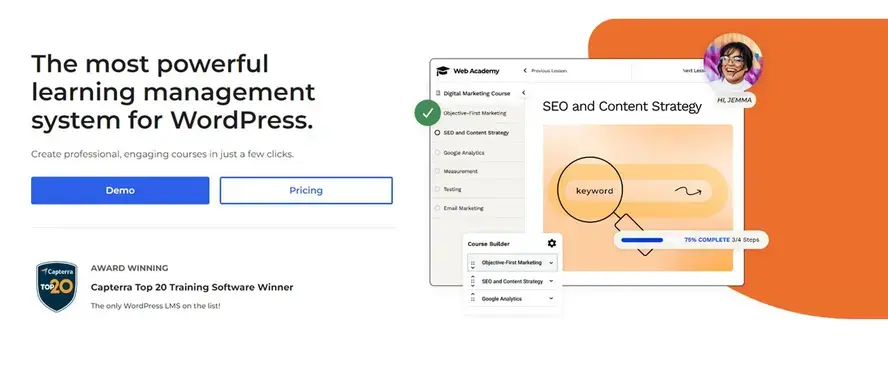
LearnDash is a premium LMS that was designed to grow with you. It integrates with any payment gateway and includes multiple pricing models, renewal reminders, and refund protection. Drip your content, use engagement triggers, and reward students with certificates, points, and badges for individual tasks and course completion. Prices vary based on the number of sites you want to create.
Step 2: Install and Set Up the LMS Plugin
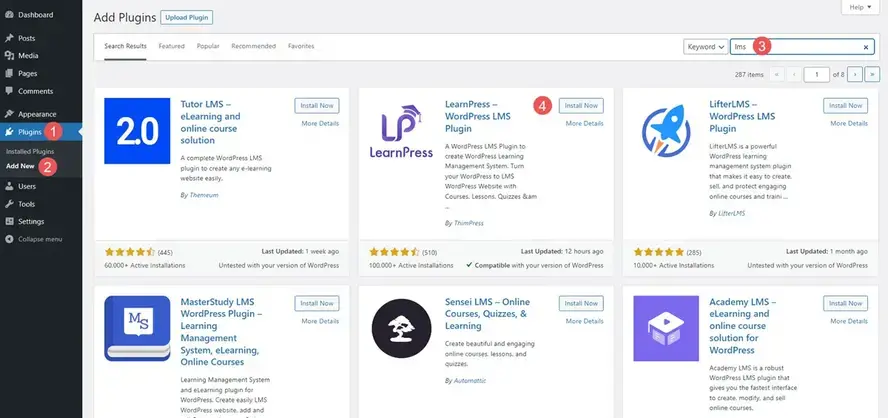
I’m using LearnPress for these examples. It’s the most popular LMS plugin in the WordPress repository and it’s free, so everyone has access to it. The setup for most LMS platforms is similar. To install it, go to Plugins > Add New in the WordPress dashboard. Enter LMS or LearnDash into the search box. Click Install Now on the LearnDash and then click Activate once it installs. Once it’s activated, click Quick Setup.
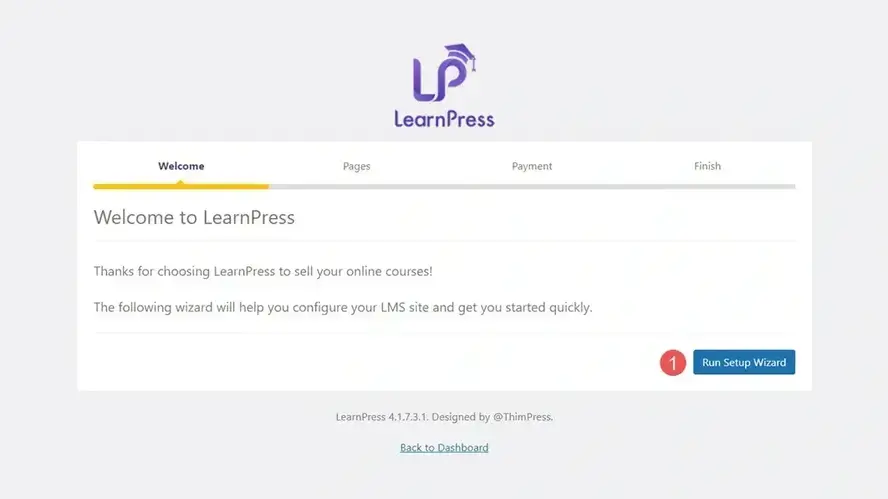
Next, go through the settings and add your information. The settings will include features, design, display options, payment options, etc. Some of the options might require you to have already created the pages, courses, lessons, and quizzes. Skip these settings for now and come back to them when you’re ready. In the case of LearnPress, run the Setup Wizard and choose your pages and payment options. You can also find these settings and more at LearnPress > Settings in the WordPress dashboard.
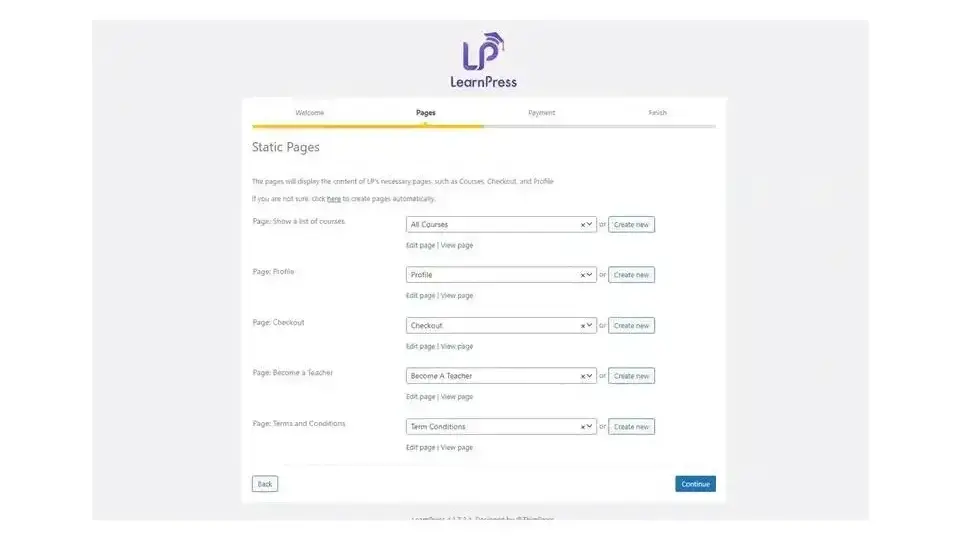
For Static Pages, you can use the pages it provides, select different pages, or create new pages from the wizard. The pages are created automatically with the shortcodes needed to make them work, so you don’t have to worry about creating them yourself. There are a few you might want to create manually, though. We’ll look at those pages in the next step. Click Continue when you’re ready.
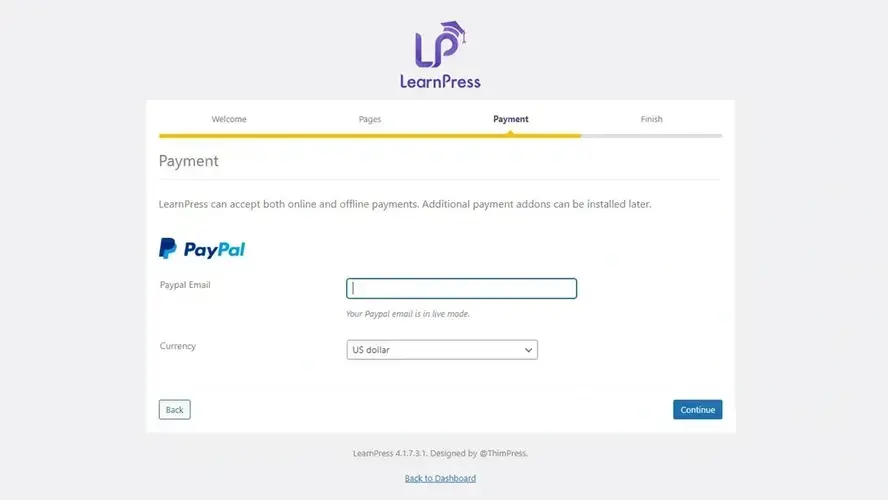
For the Payment option, enter your PayPal email address and select the currency you want to use. Click Continue. You can add more payment options later.
Finally, you can install a demo course, create a new course, view the documentation, or go to the WordPress dashboard. You can also manage the courses and students from this dashboard.
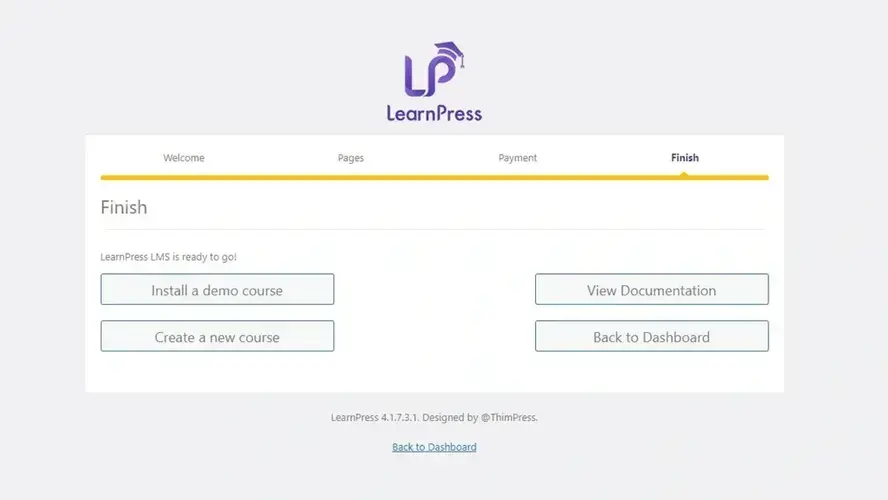
Just in case, here is an extensive guide on How to use WordPress plugins.
Step 3: Create Website and LMS Pages Manually
Once you’ve installed your LMS plugin, gone through the setup wizard, and created the standard pages, you’ll need to create the other pages for your website and courses. Depending on the LMS you choose, they might be included in your theme, be created automatically by the plugin, or you might have to create the pages yourself and add shortcodes to make them work.
I recommend keeping it simple and only building the pages you need. If you’re using Divi to create the website, take a look at the article Divi Review to see how to use and customize layouts.
LearnPress creates the main pages automatically, but there are more you should create. Here are the pages you’ll need:
Course Landing Page
Even if you’re integrating the LMS into your current website, the courses need a landing page to describe them and work as your CTA (call-to-action). It should include information about your courses, testimonials, etc.Courses Page
This is a page that lists all your courses.Individual Course Description Pages
Create a page for each course and include a description, sample, and a link to sign up.Individual Course Pages
This lists the lessons for the course with links to each unlocked lesson.Lesson Pages
This shows the video and written content for the lesson.Quizzes
This displays the quiz for each lesson.Student Pages
This is the student dashboard where students can view their progress, completed courses, upcoming courses, etc.
Step 4: Create the Courses, Lessons, and Quizzes
First, create your course content in writing or video. The courses are a custom post type. Once you’ve added the content, you can publish the course the same way as any post or page. They will include settings such as prerequisites, who can see the course, pricing, etc.
Courses
Create a new course by going to LearnPress > Courses and clicking Add New. LearnPress creates a sample course for you that you can edit or delete.
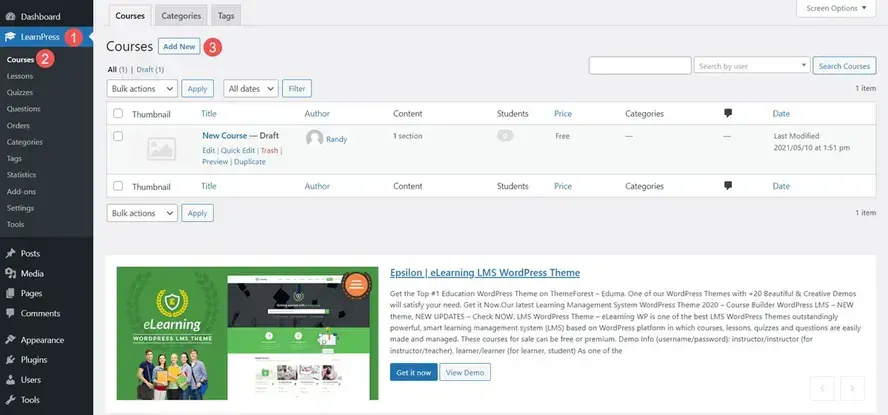
Add the title, written and video descriptions, add a featured image, categories, tags, etc. Once this step is complete, you can add the lessons.
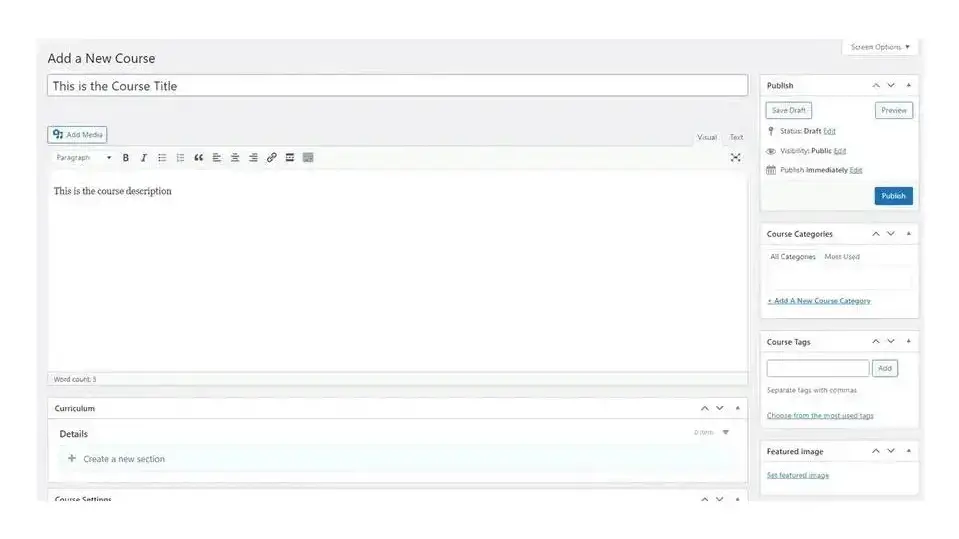
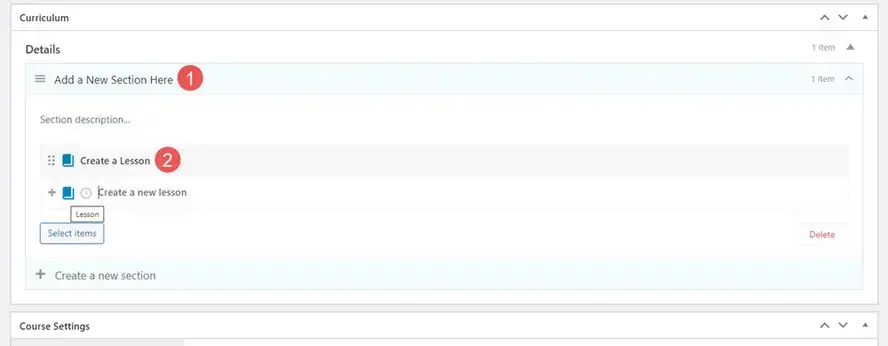
The lessons are created separately. Once you’ve created them, edit the course to connect the lessons to the course. Under Curriculum, add a title in the field labeled Create a new section. This opens a new set of fields where you can add lessons and quizzes.
Under Curriculum are the Course Settings. This includes General Settings, Pricing, Extra Information, Assessment, and Author. These are all the settings that are specific to this course.
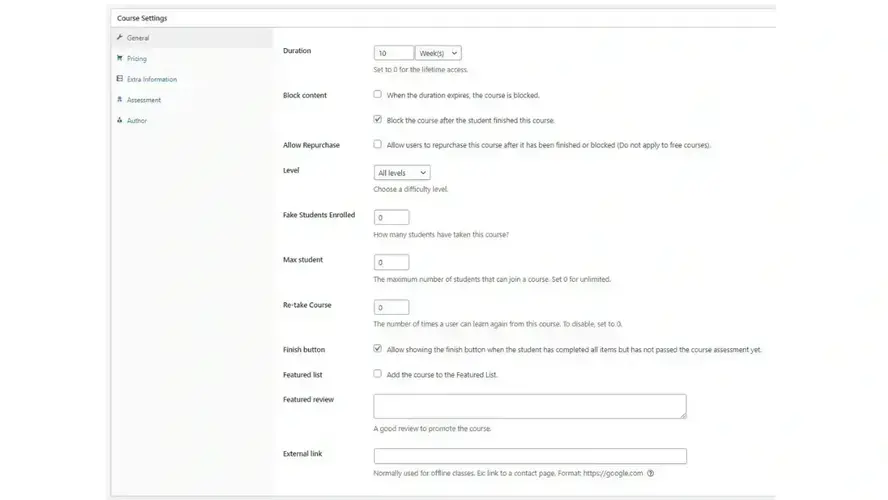
Lessons
To add a lesson, go to LearnPress > Lessons and click Add New.
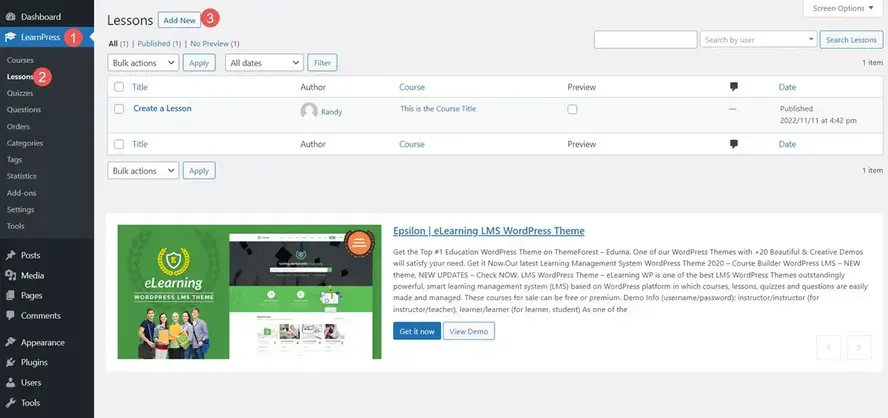
Add your written and video content. Videos can be embedded from YouTube or Vimeo that are restricted from public viewing, or they can be self-hosted. The Lesson Settings allow you to set the duration of the lesson and provide a preview. You can also allow comments. When you’ve finished creating the lesson, publish and add it to the Course as shown above. Continue the process until you’ve added all the lessons for the course.
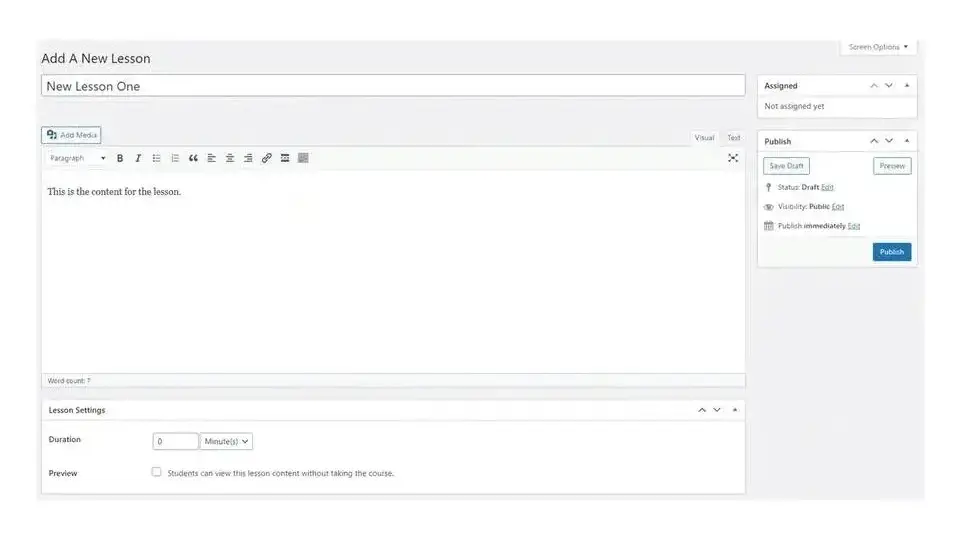
Quizzes and Questions
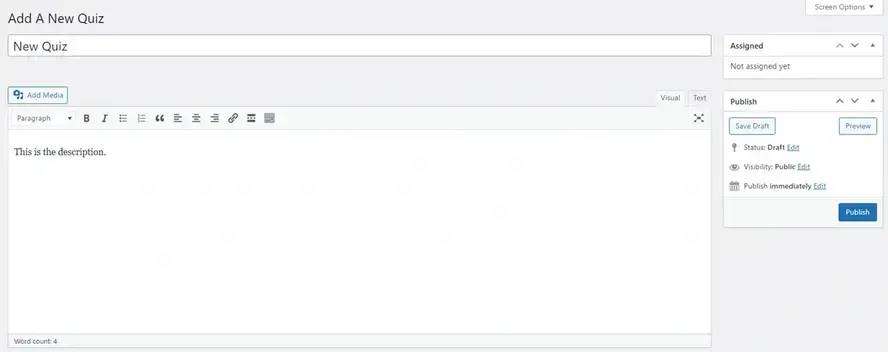
Next, add a quiz for each lesson in the course by going to LearnPress > Quizzes and clicking New Quiz.
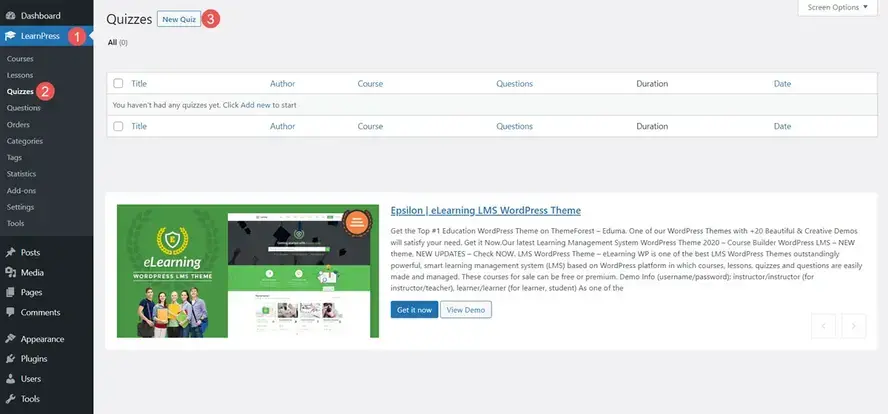
The editor includes an area to add the title and description.
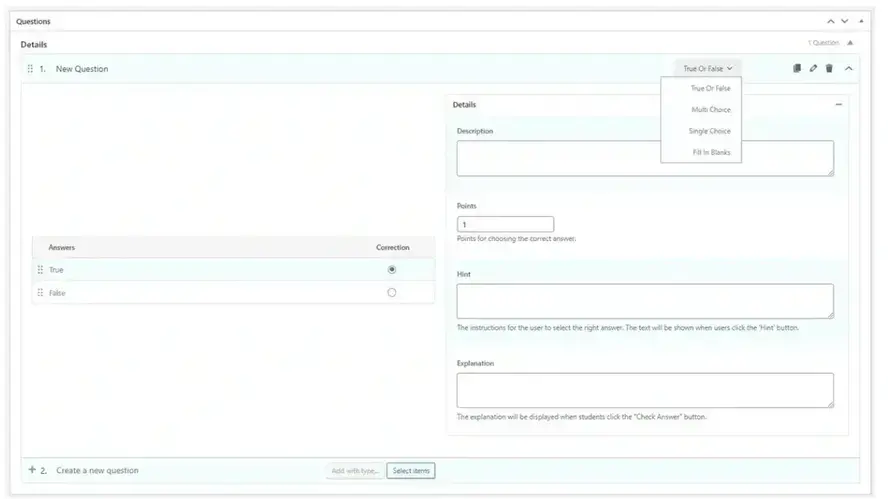
Under the editor, you’ll find the questions. Quizzes can include true/false, multiple choice, single choice, and fill-in-the-blank.
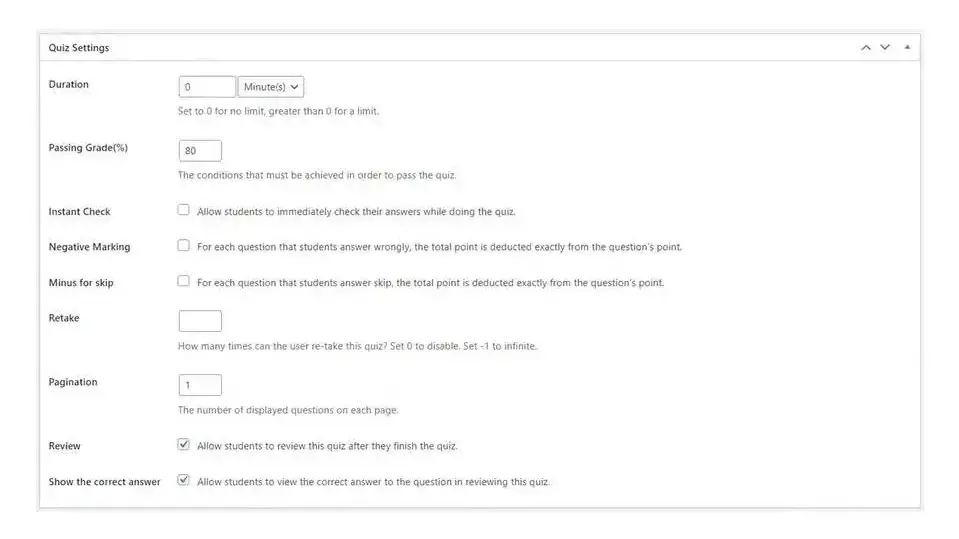
The Quiz Settings let you determine the duration, passing grade, and many other options. When you’re ready, publish the quiz and add it to the course as seen above.
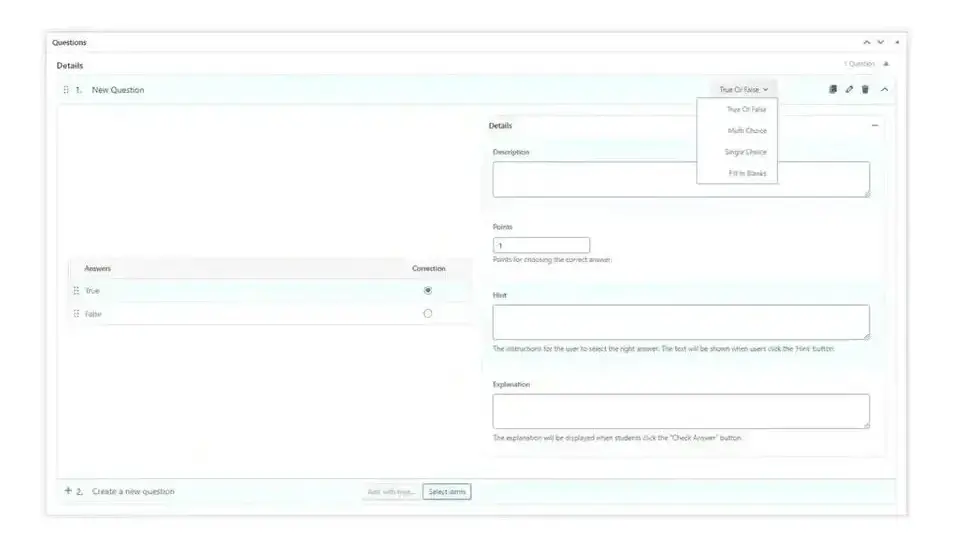
If you choose to create Questions (under Quizzes in the menu), you’ll see Answer Options and Question Settings.
Step 5: Marketing Your Courses
Once your course is tested and ready for students, the final step is to market your course. Depending on the LMS platform you chose, you might have access to marketing tools. If not, you’ll need to do the marketing manually. To get a head start on your marketing efforts, see the article Social Media Marketing in the 2020s.
Step 6: Course Management
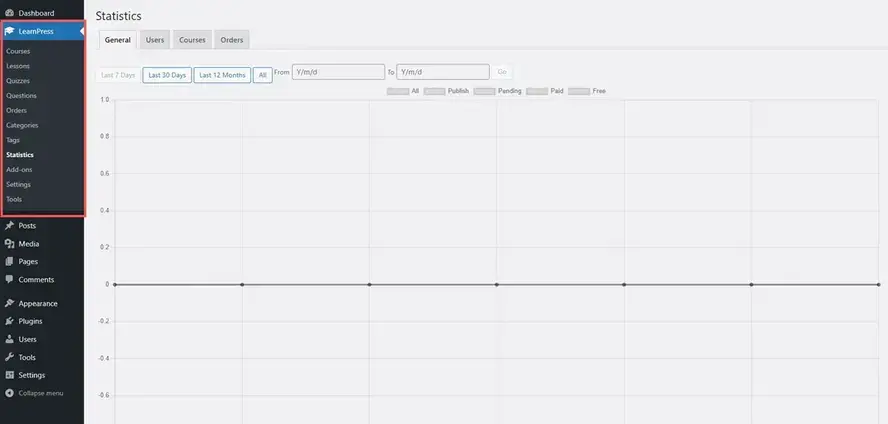
Once you’ve created your courses, lessons, and quizzes, you can manage them in the dashboard. Here, you can view statistics, view orders, add new features with add-ons, etc. The settings also include styling options where you can customize the colors and enable the Gutenberg editor if you want.
Ending Thoughts
Integrating an LMS (Learning Management System) into your WordPress website is a great way to earn money and build credibility on any topic. Following the steps covered in this post, you should have no trouble adding LMS to your current WordPress website or building a new website with LMS in mind.
We want to hear from you. Have you built an LMS website with WordPress? Let us know about your experience in the comments.
Frequently Asked Questions
Does LearnDash offer a free trial?
No, but if you’re not completely satisfied with the platform you can request a full refund within 30 days of purchase.
Are WordPress plugins free?
WordPress has loads of plugins you can install, some of them are free, but some of them you will need to pay for. You can learn how to use WordPress Plugins on our blog.
Is a website on WordPress safe?
Websites on WordPress are safe, however to avoid hacking keep your website up to date.
How do I keep WordPress plug-ins up to date?
In most cases, your plug-ins will scan for updates automatically, but it’s always worth logging into your dashboard on a regular basis and performing a manual scan. This can usually be done in just a few clicks.

Randy A. Brown is a freelance writer from east TN specializing in WordPress and eCommerce. He's a longtime WordPress enthusiast and loves learning new things and sharing information with others. If he's not writing or reading, he's probably playing guitar.
View all posts by Randy A. Brown


