How to hide the featured image in a WordPress post - this is a question I get a lot from my students.
There are many reasons why you might want to hide the featured image on all (or specific) posts on your WordPress blog. For example, you may want more text above the fold, or you may be using a theme that automatically takes the first image inserted into a post.
Whatever the reason, WordPress doesn’t make it immediately clear how to do so, which is why I’ve written this guide to provide you with different methods for hiding (but not removing) the featured image from individual post pages, including:
1. Using a theme
2. Using a plugin
3. Using CSS
4. Using PHP code
With all these options at your disposal, you’ll find answers here to the question of how to disable the featured image. I’ll provide a simple step-by-step walkthrough for each method so you can choose the one that works best for you. With that said, let’s dive right in.
1. Hide the Featured Image with Your Theme Settings
To make your life a lot easier, you can choose a theme that gives you full control over how your featured images are displayed on your WordPress blog.
Fortunately, the majority of WordPress themes allow you to disable featured images on a per-post or site-level basis. This includes themes like:
- Generatepress
- KadenceWP
- Astra
- Hello Theme
- Genesis
- Beaver Builder Theme
- Avada
- X Theme … and many others.
For the majority of themes, you can simply head over to the “Post Settings” on the right sidebar in the post editor.
Scroll down to the “Layout” section and find “Disable Elements”.
Here you can select the checkbox labeled “Featured Image”.
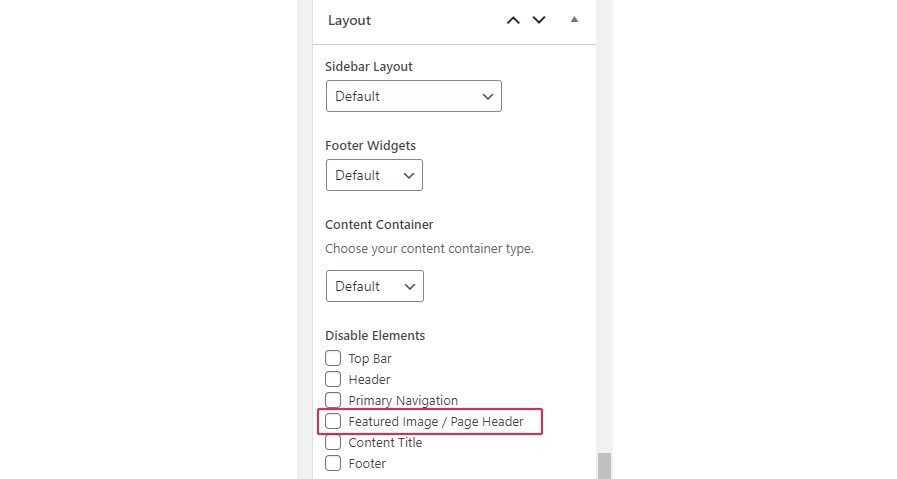
Some themes like Genesis and Astra also give you control over your blog archive pages, as well.
As such your first step is to:
Check for Themes General Settings
If you don’t have the options in your WordPress Editor, it might be because your WP theme settings control things sitewide from a dedicated settings area.
Look for the “Theme Dashboard” on the left sidebar in your admin panel. You’ll find all your theme customizations there.
If your theme doesn’t have any, then the easiest way to hide featured images on your posts is to add a plugin.
2. Hide the Featured Image with a Plugin
If your theme doesn’t support it, one of the easiest ways to control featured images for individual posts is to use a simple WordPress plugin.
You can download and install a plugin that will add the function to your website.
Instead of messing with PHP or CSS, you can use a plugin like Conditionally Display Featured Image.
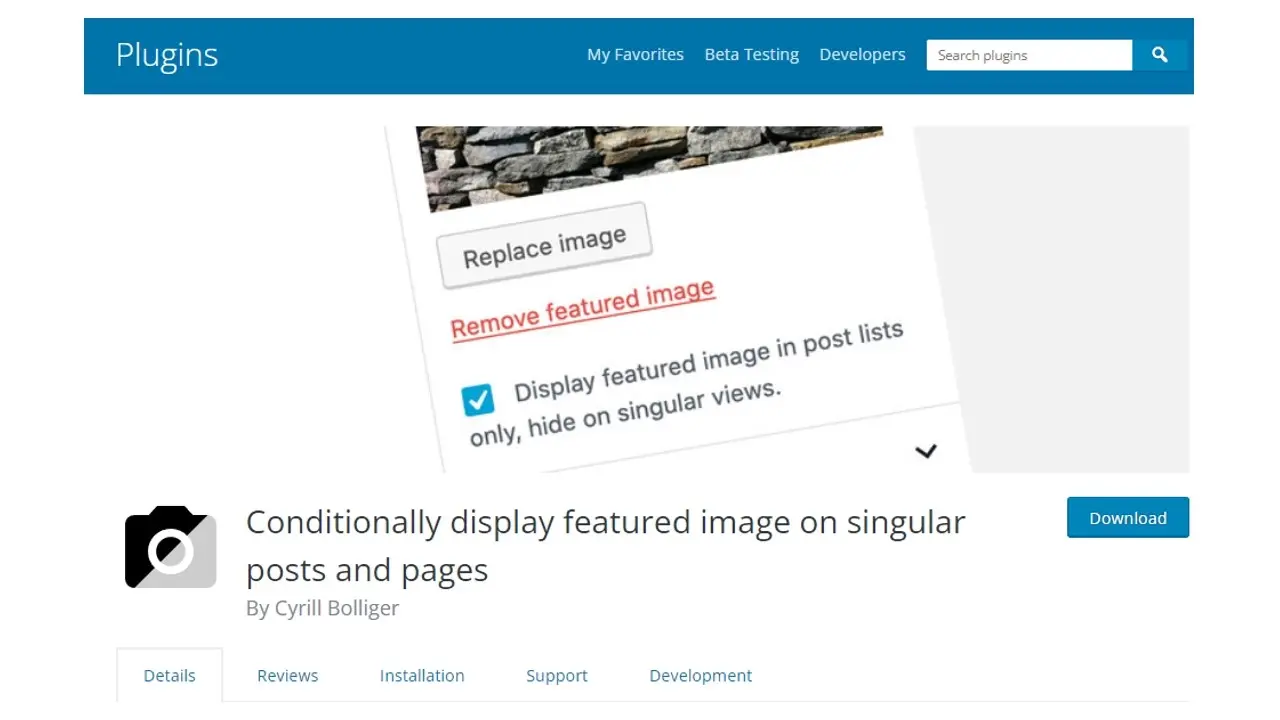
The plugin works perfectly for any WordPress theme that uses WordPress core functions to show the featured image. However, if you use a theme that does a customized call for loading the featured image (for example, the Twenty Seventeen theme), then the plugin probably won’t work.
To use this method, simply download the plugin from the WordPress marketplace and follow the steps below to install it on your website.
Step #1: Visit your WordPress dashboard and click on Plugins > Add New.
Step #2: On the top right search bar, type in Conditionally Display Features.
Step #3: Install the plugin.
Step #4: Activate the plugin.
Step #5: Go to Posts > All Posts.
Step #6: Edit the post whose featured image you want to hide.
Step #7: On the right-hand side, beneath the “Preview”, find the “Featured Image” tab.
Step #8: Check the option “Display featured image in post lists only, hide on singular views”, as shown in the image below:
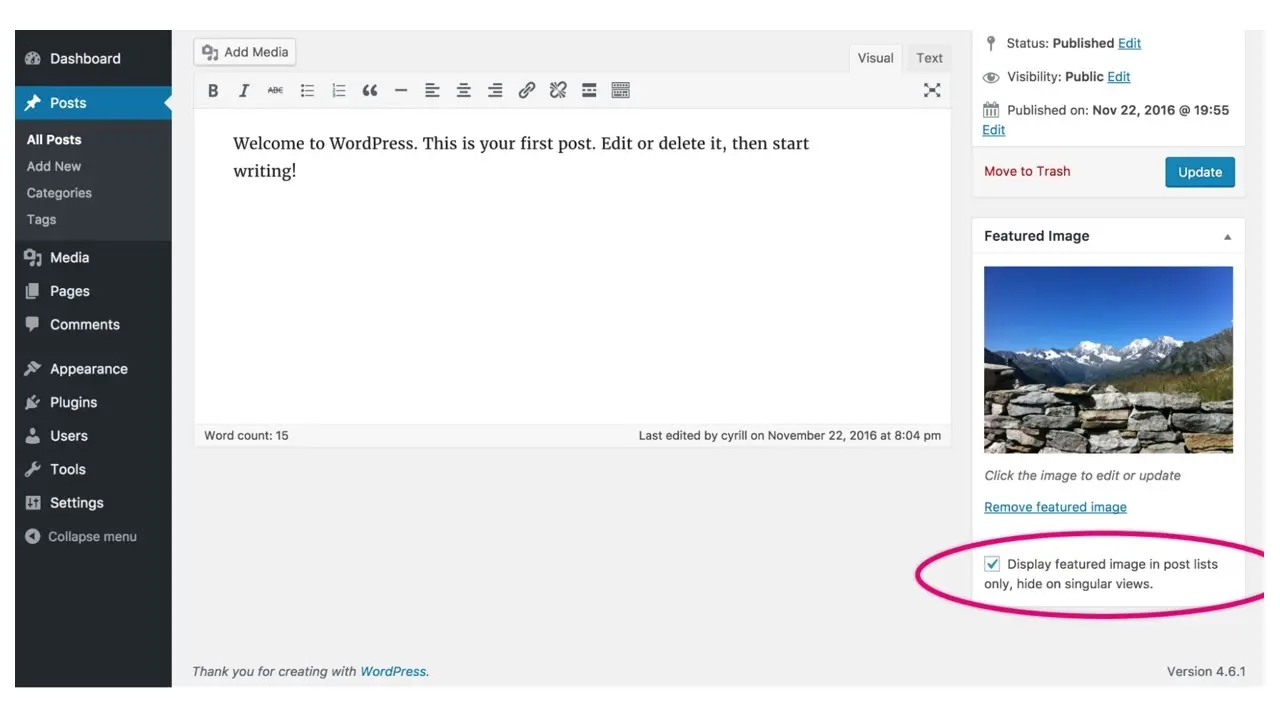
The plugin adds a checkbox to your WordPress featured image section on Gutenberg or the meta box for those using the platform’s classic editor.
You can then choose if you want the featured image to be displayed for each of your blog posts or the post page.
This is a handy feature to use if you want to show thumbnails on the front page or blog archive, but don’t want to show the featured image on every post's view.
Pro Tip: Don’t use plugins that haven’t been updated in a long time. For instance, if the plugin hasn’t been updated for more than a year, avoid installing it.
3. Hide the Featured Image Using CSS Code
If your post images are not behaving the way you want, editing your theme files is the way to go. If everything else fails, you can add CSS to keep them from displaying.
This method has the advantage of being fast and easy, and there’s no risk of white screen errors that can sometimes occur when trying to hide featured images with PHP code.
However, using CSS code to hide the featured image on WordPress posts can result in a slight speed hit since the image is still loaded even though it’s not displayed. For anyone who isn’t obsessed with speed, this method will work great. Here’s how you do it:
Step #1: Find the Featured Image Class
To write the rule, you need the class added to your featured image by the plugin or theme. For this, you can use “Inspector tools” in your browser.
Navigate to the post, right-click on the featured image and select “inspect”, as shown below:
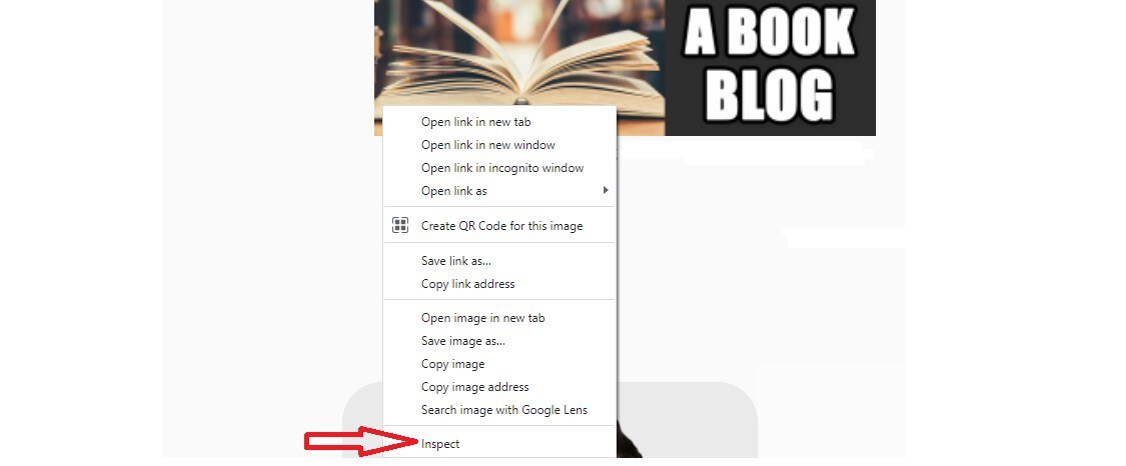
Look at the HTML source to find the class name associated with the featured image. For instance, it might be the .wp-post-image class.
Step #2: Write Your CSS Rule
To hide the featured image for a certain post using CSS, go to “Appearance > Customize”, and then navigate to “Additional CSS”.
Add this bit of code into the Additional CSS field:

To remove all featured images from all your WordPress posts, you can write a CSS rule like the one above then click publish. WordPress will then hide the featured image for the post and no others.
To make it more targeted, you can add body classes for the different categories, and even individual post IDs, as shown in the image below:
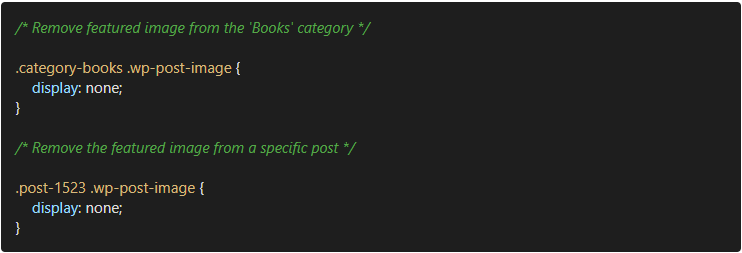
Hiding featured images with CSS code is one of the most technical methods available, which makes it unsuitable for non-technical users. But, it does give you the power to target specific posts on your blog on which you want to hide featured images.
4. Hide the Featured Image Using a PHP Snippet
I put this method last for one simple reason: it’s the most likely one to break something on your website.
The PHP snippet required may be different from one theme to the next. Most tutorials recommend you add PHP code to the functions.php file of your website’s theme or child theme.
However, there are several options I prefer:
- Custom PHP Theme Functionality: Astra and GeneratePress both have a handy ‘hooks’ feature that allows you to add custom PHP code, including conditionals.
- Code Snippets Plugin: A free plugin like Code Snippets is a great tool to add custom PHP, HTML, and Javascript to your WordPress site, and works great for limiting the risk of breaking something on your site from using invalid PHP.
- Custom Functionality Plugin: Rather than tying custom PHP to your site theme, you can hook it in using a simple plugin wrapper.
Below is an example PHP function you can write. It filters the blog post thumbnail HTML, and if it’s a post, it returns an empty string. You also have the option to add a conditional for any custom post type or a specific category if you want to.

Conclusion
There are different methods available to hide or remove the featured image on your WordPress posts. If you need to hide images on many posts, you’re better off using your theme’s functionality or a plugin.
To hide the featured image in a specific category, your Theme’s functionality is your best bet.
If your theme does not have this ability, then simple CSS code makes a good backup option. If you know some basic CSS, you’ll be able to easily adapt these snippets of code to your theme.
I hope this article has answered your question on how to hide a featured image in a WordPress post. If you have any additional questions, leave a comment below and I’ll be happy to answer them.
Frequently Asked Questions
Is WordPress free?
All you need to do to use WordPress is to invest in a web hosting plan since the software itself is free.
Are WordPress plugins free?
WordPress has loads of plugins you can install, some of them are free, but some of them you will need to pay for. You can learn how to use WordPress Plugins on our blog.
Why choose hosting for WordPress?
WordPress is so popular because it allows people to create websites with total customization. With hundreds of apps available for one-click installations, creating something that’s eye-catching and unique is much easier with a CMS like WordPress .
Why choose Verpex for WordPress?
As the leading CMS out there, we’ve made it our mission to offer the most comprehensive and streamlined WordPress solutions on the market. Backed by a responsive customer care team and reliable site enhancement tools, we ensure our users get the full WordPress value and support for a reasonable price.

Ron Stefanski is a website entrepreneur and marketing professor who has a passion for helping people create and market their own online business. You can learn more from him by visiting OneHourProfessor.com
View all posts by Ron Stefanski


