
Building a chat application involves understanding how real-time communication works. Real time communication is the ability of systems to communicate with each other without transmission delay.
Platforms like WhatsApp, Telegram, Microsoft Teams, Facebook Messenger, and others offer this service with various features. Each platform is unique; some include real-time voice and video calls, while others support payments, games, and more.
In this article, we'll build a simple chat application using Node.js and Socket.io to explore how real-time communication works.
How to Build a Chat Application with Socket.io and Node.js Tools.
This application will focus on the communication flow between the front end to the back end, enabling users to chat with each other.
Emphasis will not be on design or advanced security features like end-to-end encryption, data privacy, analytics or logging. Instead, we will keep the focus on the fundamentals of real-time messaging.
The tools required to build the chat application include Node.js and Socket.io. Here’s a brief review of what each tool does.
Node.js: Node.js is a popular JavaScript runtime environment that executes JavaScript code outside a browser. It allows you to use JavaScript for server-side scripting.
Socket.io: Socket.io is a real-time, bidirectional, and event-based library that enables communication between a client and server.
Prerequisite: To follow along with this project, make sure you have a code editor (like VScode), and node.js installed. You should also understand the basics of JavaScript.
If you haven’t installed Node.js yet, visit nodejs.org to download and install. Once installation is complete, confirm Node.js is installed before you proceed.

Step 1: Create folder structure.
In your code editor, create a public folder with index.html, index.css and script.js files. In the root directory, create a server.js file to set up an Express server. Also, create a JSON file by typing the following command in your terminal.
- npm init -y

Step 2: Install dependencies
In your VS Code terminal, install the following dependencies. Then install the following:
- npm i express
- npm i socket.io
- npm i nodemon
Step 3: Set up the Express server in the server.js file**
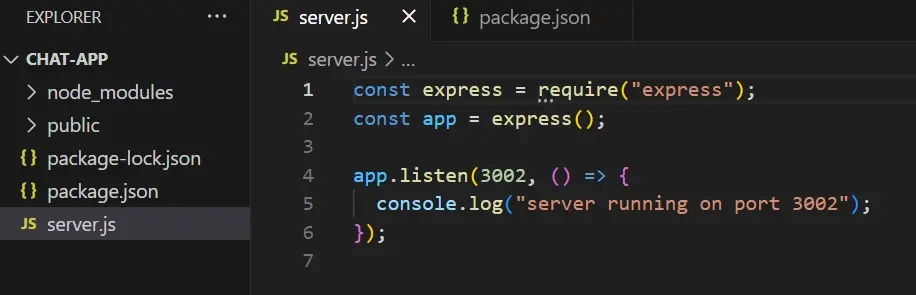
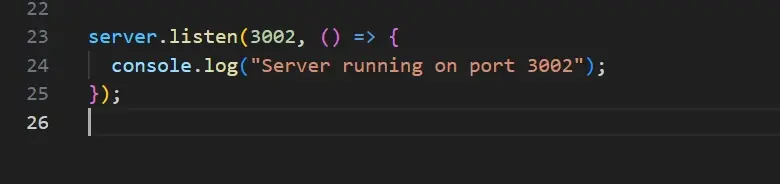
This is an express server running on port 3002.
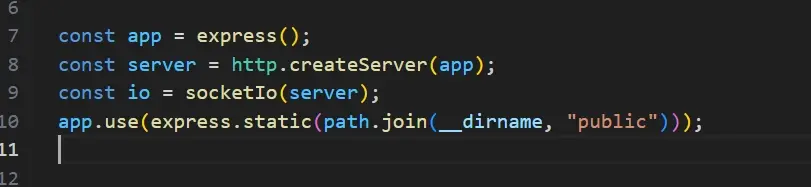
First, we import the Express framework and create an instance of the Express application using the app variable.
The app will be used to define routes (URLs) to send, respond and handle requests.
app.listen(3002,()=>{...}): Starts the server and tells it to listen on port 3002.
### Step 4: Set up nodemon to run the server**
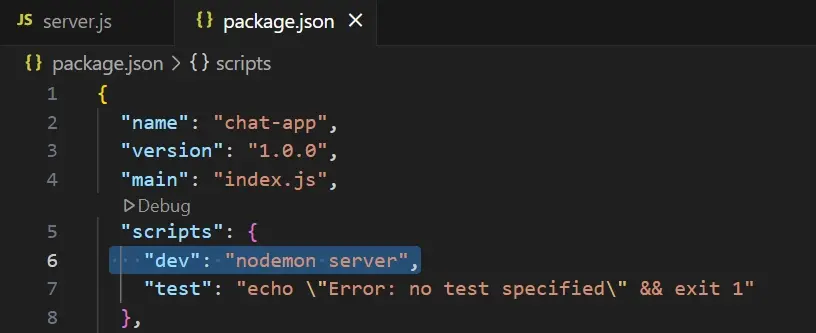
In package.json file, go to scripts section and create a new script called “dev”. Set its value to nodemon followed by the name of the file where you will create your server e.g., “server”.
This allows you run the server using npm run dev. Nodemon reloads the server automatically whenever you make changes so you do not have to do it manually.
Step 5: Start node server using “npm run dev”
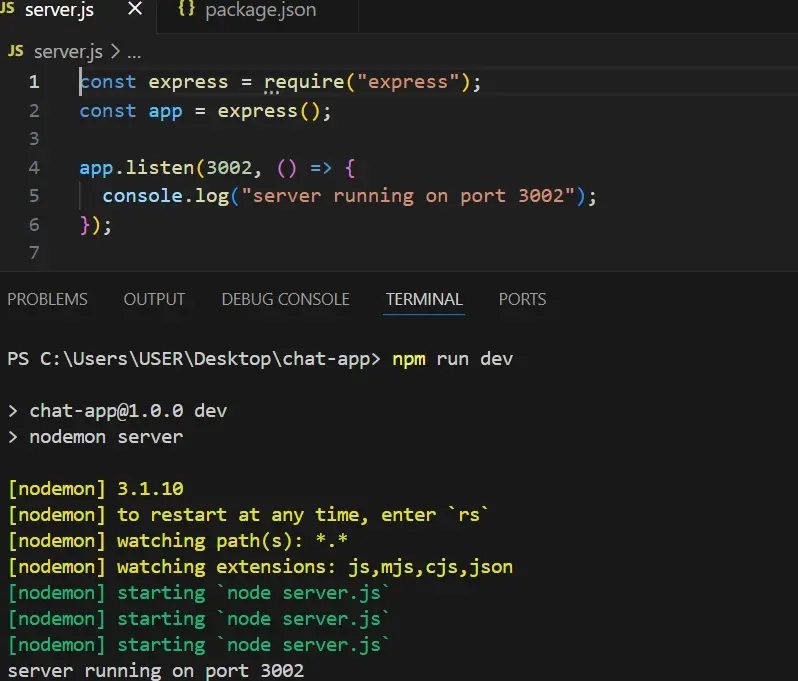
If you see the server running on port 3002 in your terminal with the console message, the server has started running.
Step 5: Test the local host
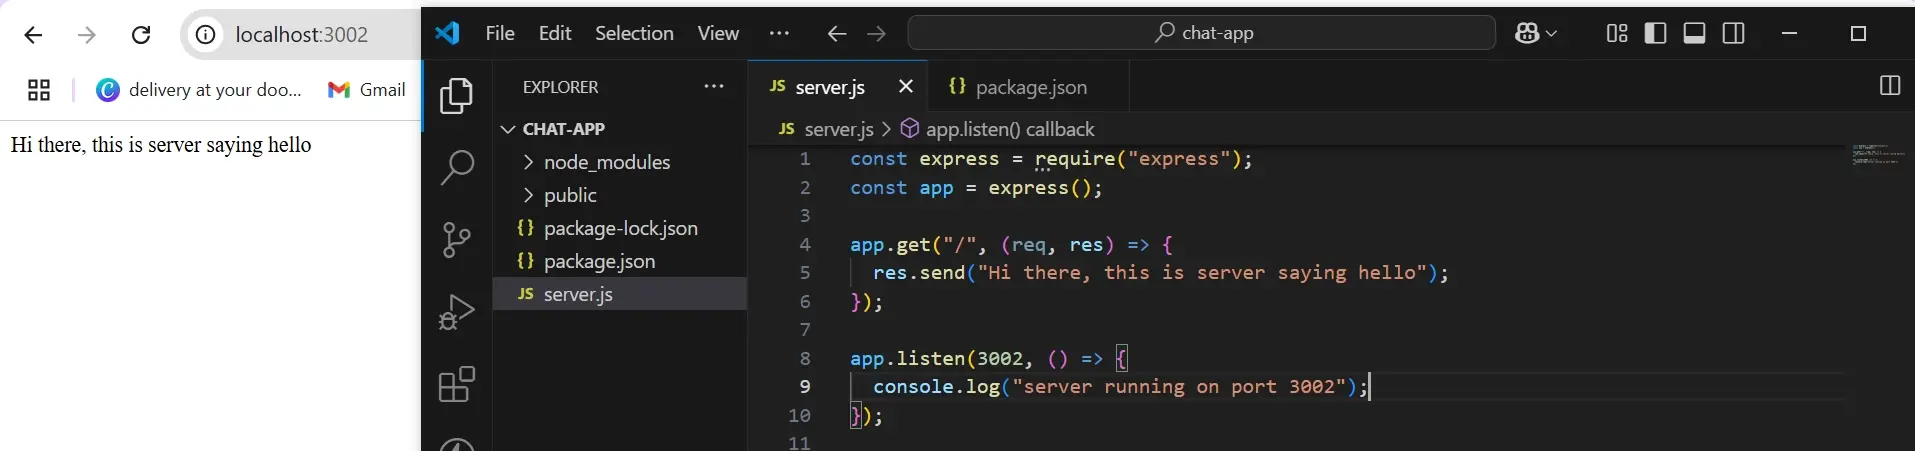
Create a GET route (app.get) for the root URL (http://localhost:3002/) so that when you visit the URL, you get a response from the server.
Step 6: Integrate Socket.io
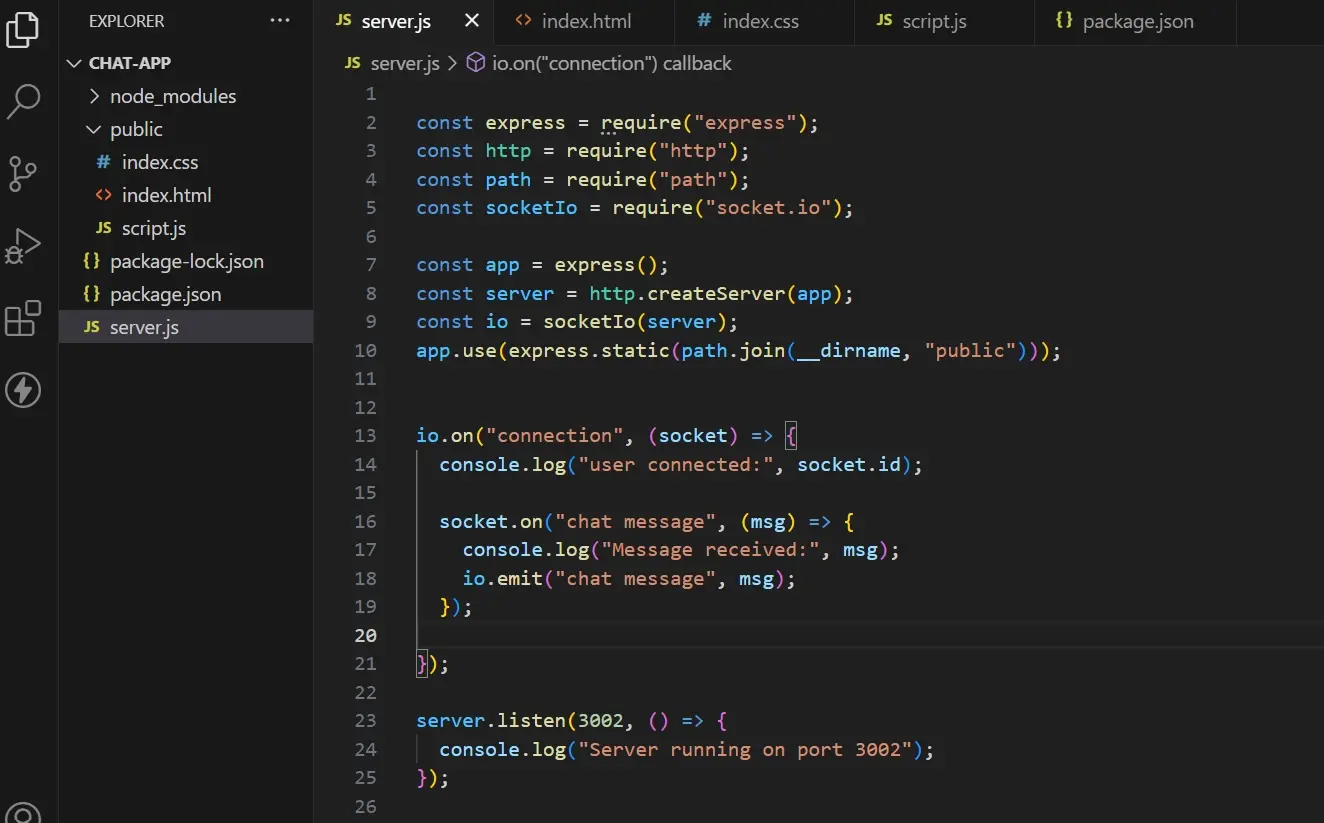
Now that you’ve tested to see that the server is running as it should, integrate socket.io into your server.js file. Let’s go through what the above code is doing.
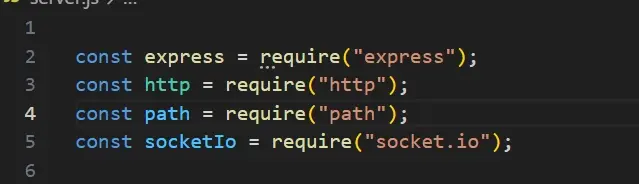
We have installed several modules:
express: Used for building a web server.
http: Node module to create a server.
path: File path resolution.
socket.io: Enables real-time bi-directional communication between client and server.
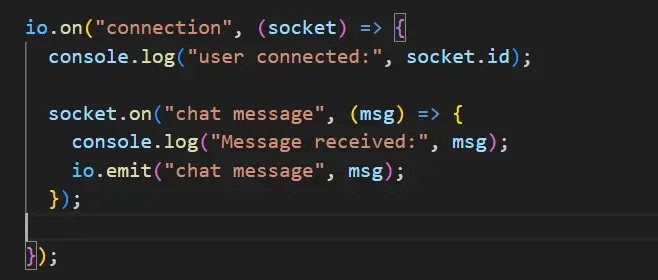
io.on("connection", (socket)=>{ console.log ("user connected", socket.id): listens for a new client connection and gives each client a unique id. It runs when a user connects to the server.
socket.on("chat message", (msg)=>{....}): Listens for chat message events from a client, logs the message, and emits (sends an event with data) to all connected clients, including the sender.
- msg: This is what the user sends.
Step 7: Create an HTML file that connects to the server and allows you to send and receive messages.
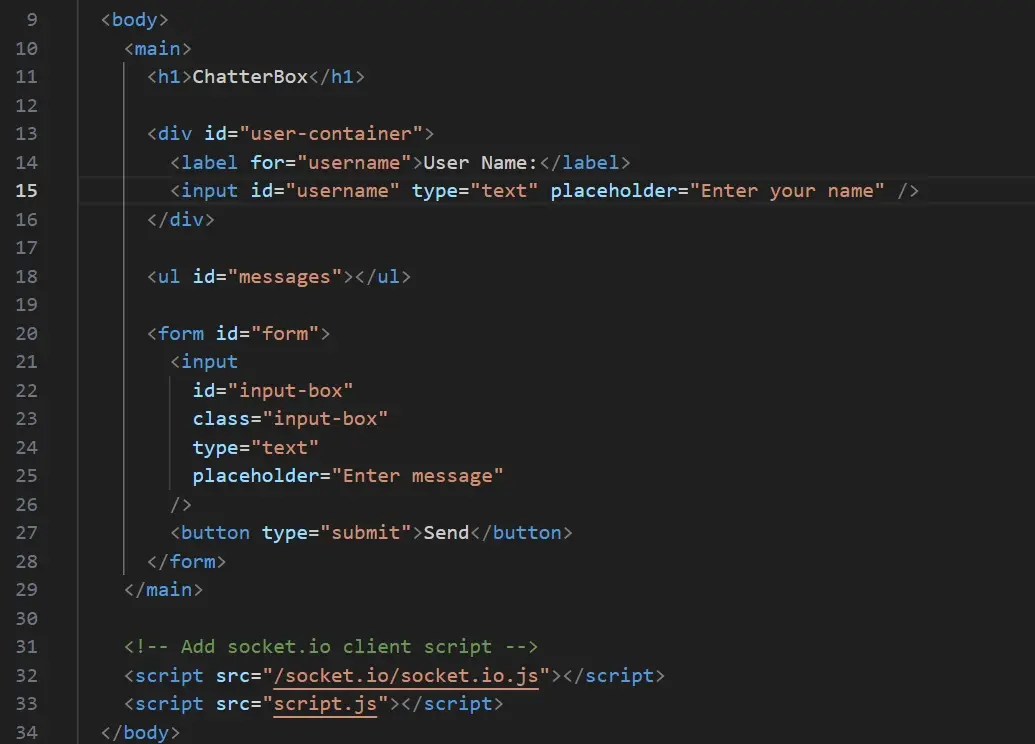
h1: This is the chat app name located at the top of the page
user input: Allows users to enter their name. This would help you associate messages to each user.
- :
- elements using JavaScript. The messages will appear like a list item.
form: This would allow a user submit messages. The input box is where the user types the message. When you submit the form, it will send the message to the server using Socket.io
/socket.io/socket.io.js: This is the client-side socket.io library that connects the front-end and back-end using Websockets, which is what enables real-time communication.
script.js: This JavaScript file connects to the server, sends and receives the messages, and updates the DOM by adding messages to the
- element.
Step 8: Style HTML elements
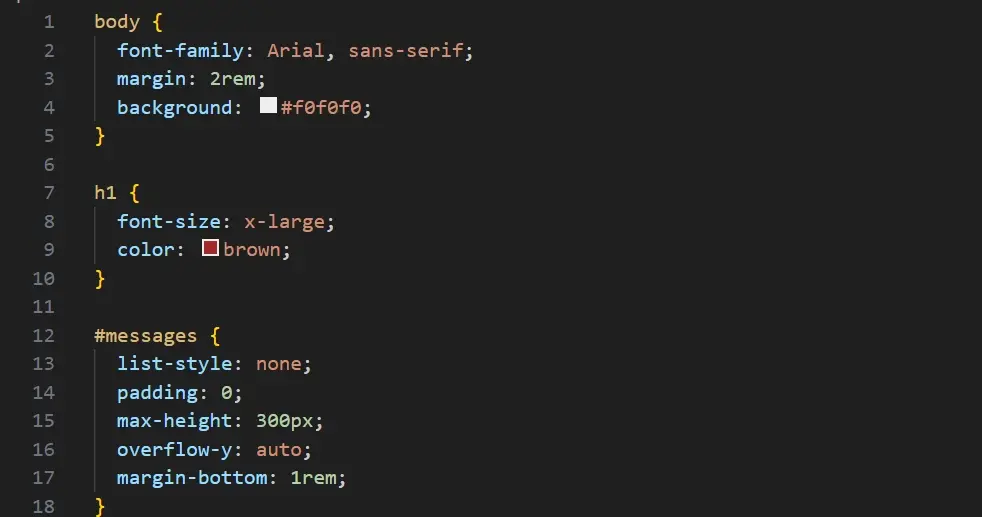
- Body Style: Sets a font, adds spacing around the page, and applies a background colour.
- Heading(h1) Style: Applies a large font size and a specific colour.
- Message Style: The message is what we send from the input. Styling remove bullet points, sets a fixed height, enables scrolling, and adds space after each message list for readability.
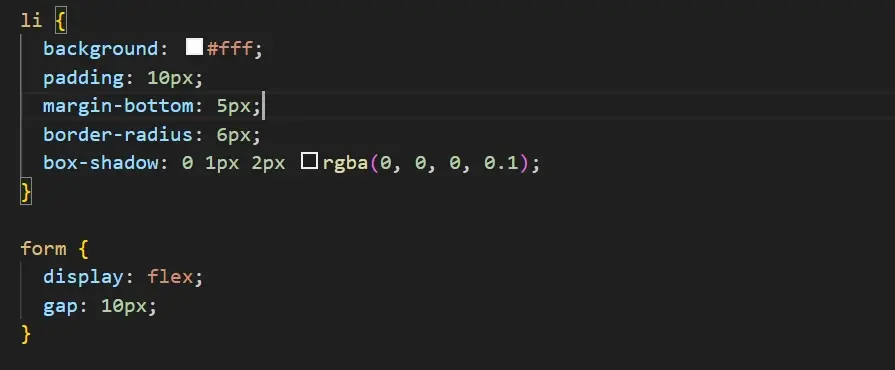
- List Style: Styles the message list so each message look like a card. Adds a padding for spacing, a border radius for rounded corners, and shadow.
- Form Style: Styles the form to make input and the button sit side by side, and a gap for spacing.
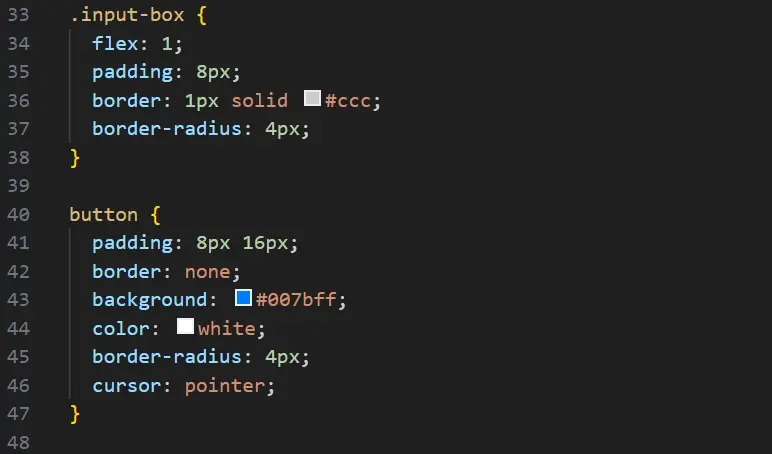
Input Style: Styles the input field to grow using flex, adds padding for spacing, and border radius.
Button Style: Styles the button with a blue background, pointer cursor, white text, and a border-radius.
Step 9: Connect to the Socket.io server, send and display messages
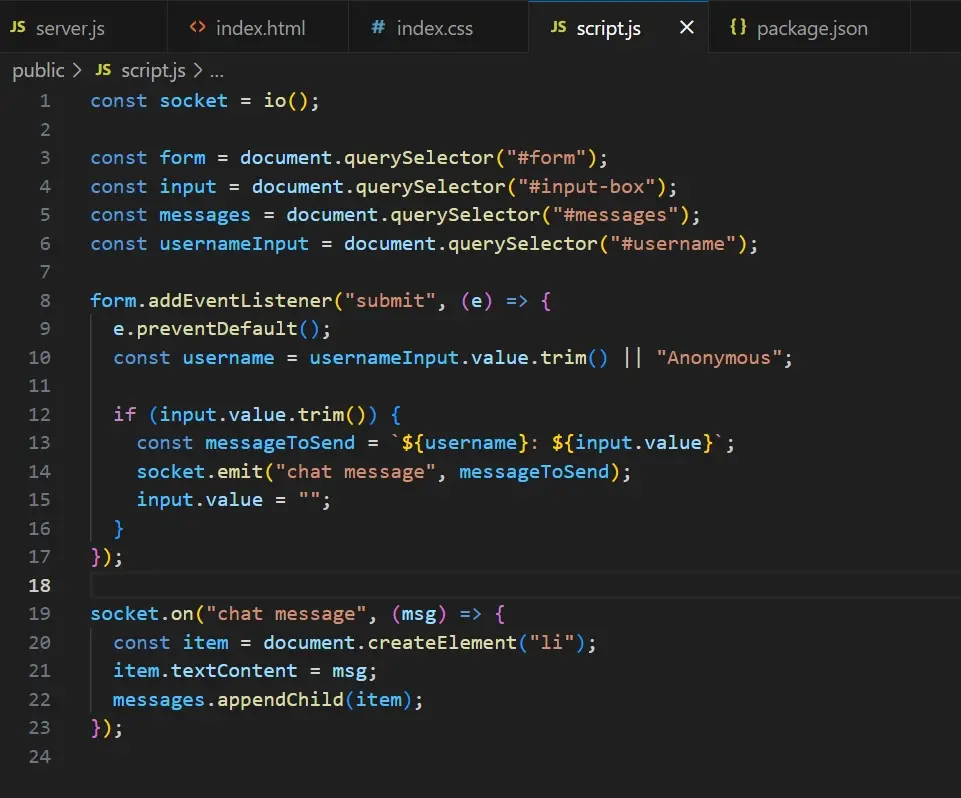
Code breakdown:
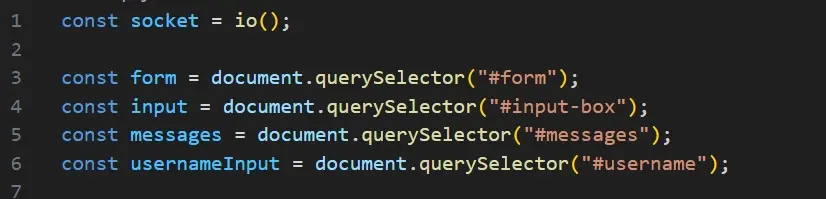
- socket = io(): Connects the front-end to Socket.io server.
Select elements by their ID from the HTML document using querySelector
form: Where the user submits a message.
Input: The input field for typing a message.
messages: Where
- messages will be displayed.
usernameInput: Input field for users to type their name.
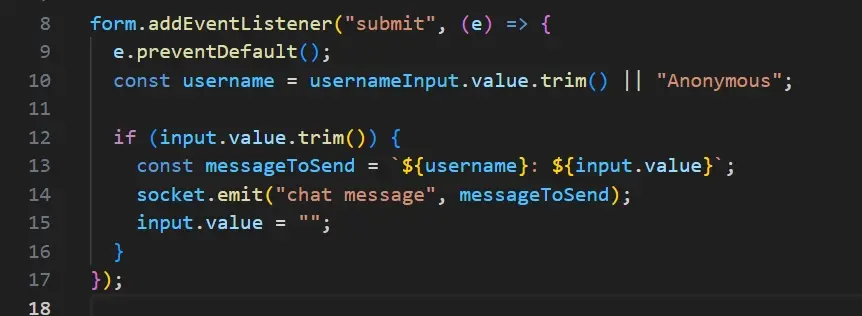
form.addEventListener("submit" (e) =>{...}): Listens for form submission.
e.preventDefault(): Prevents default submission behaviour, which causes the page to reload.
username = usernameInput.value.trim() || "Anonymous": Checks if the username is empty; if yes, defaults to "Anonymous".
if(input.value.trim() checks if the input field contains any value. trim() removes whitespace from the string
if there's a value or message, const messageToSend=
${username}: ${input.value}combines the username and message into a string.socket.emit("chat message", messageToSend): sends the message to the server with the "chat message" event, which the server sends to all connected clients
Input.value = " ": clears the input field
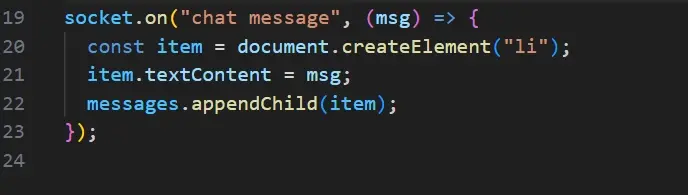
socket.on("chat message”, (msg) =>{..}): Listens for incoming "chat message" events from the server. The msg represents data sent by the server when it emits the "chat message" event.
A new list item
- is created and appended to the
- when a message is received from the server.
messages.appendChild(item): Adds the new message to the list.

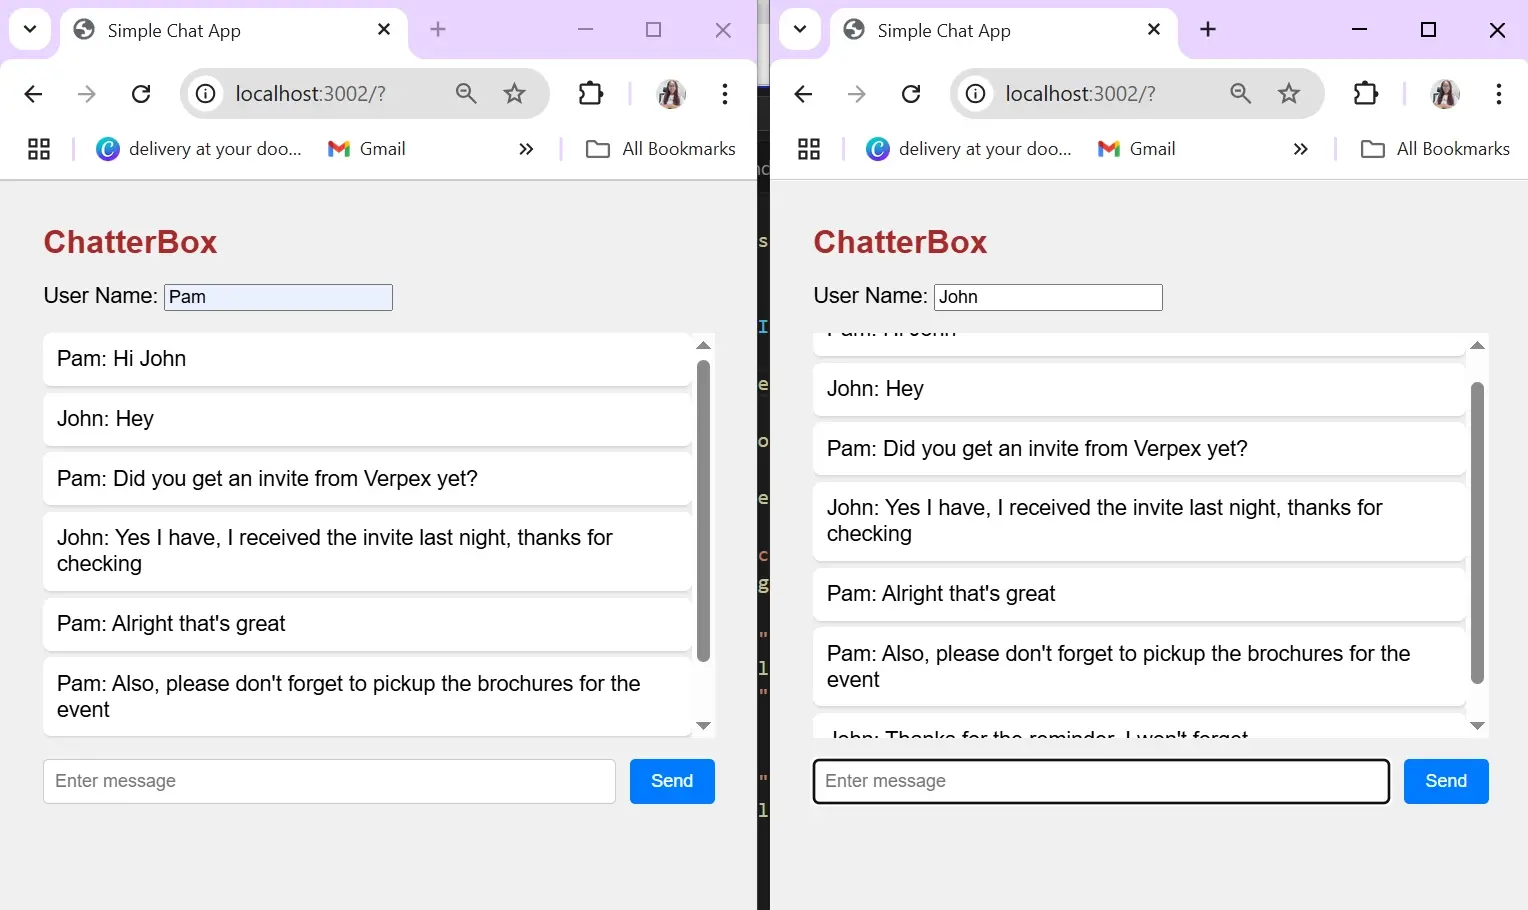
Step 10: Test the chat app
Open two browser tabs, enter different usernames in each user input, and start sending messages. You'll see messages appear in both tabs in real-time.
Summary
Building a chat application can be complex, with many factors to consider, like authentication, database persistence, security, performance, and more. This basic real-time chat demonstrates how real-time communication works using Node.js, Express, and Socket.io.
Frequently Asked Questions
What type of apps is Node.js VPS Hosting best for?
It’s ideal for applications requiring high concurrency, such as chatbots, real-time data streaming, or API backends.
What operating systems are supported for Node.js VPS hosting?
Our VPS hosting supports popular Linux distributions such as Ubuntu, CentOS, and Debian, offering the flexibility to choose the environment you prefer.
Can I host multiple Node.js applications on one VPS?
Yes, with full root access, you can configure your VPS to host multiple Node.js projects, each with custom environments.
How does Verpex ensure the security of Node.js applications hosted on their platform?
Verpex employs a multi-layered security approach for Node.js applications, including regular security updates, firewall configurations, intrusion detection systems, and security enhancements tailored to Node.js. We also offer SSL certificates for encrypted data transmission.

Jessica Agorye is a developer based in Lagos, Nigeria. A witty creative with a love for life, she is dedicated to sharing insights and inspiring others through her writing. With over 5 years of writing experience, she believes that content is king.
View all posts by Jessica Agorye

