Have you ever seen a website’s navigation stay on the screen when you scroll the entire page? Kinda cool, right? Well, that’s a sticky header. In this article, you’ll learn how to create the Elementor sticky header using the free version.
What is a Sticky Header?
A sticky header is a web design feature that allows you to take an image or an area of the web site, and allow it to follow the user down the page, as they scroll.
It is used to keep important website elements in front of the user, like say, a navigational menu, in order to help your website visitor go through your website without getting lost.
What is Elementor?
Elementor is a WordPress page builder plugin designed to make it easier to create the look of the website.
The plugin allows you to edit and add design elements to the site, and see the changes as they’re being made. You can use the plugin to design every bit of the site, even the header and footer. You can also do cool stuff like turn your header of your site into an Elementor sticky header.
Tips for creating a web accessible friendly and responsive sticky header
- Keep your header area simple.
- Keep your navigation simple and organized.
- Make sure the header isn’t big.
- Test your sticky header while logged into and logged out of WordPress.
Keep your header area simple.
Your header shouldn’t have a lot of design elements. If you’re wanting a sticky header to just follow the web design trend, make sure you carefully plan out what you want in your header area, rather than all of the things.You should keep it simple with a logo, menu, and at the most, phone number, search box, or social icons.
Keep your navigation simple and organized.
Your navigation menu for your website doesn’t need to have everything. Add what’s important, and organize your site in a way that any excess sub-pages should be linked in other places.
Make sure the header isn’t big.
If your header is half the size of your device’s screen, that’s going to be a problem for your visitors when they scroll the website. Make sure the header is as small as you can make it, without making text or your branding look too tiny. In larger devices like tablet, desktop, and laptop, your header should be no more than 150 pixels tall. On the mobile version for smartphones, you should consider creating a header that is no taller in height, than the width of your pointer finger.
Test your sticky header while logged into and logged out of WordPress.
Before launching your design with the sticky header, you should test it while logged in and logged out of WordPress. The reason for this is that sometimes your CSS styling might make the sticky header show up a small gap at the top. You can fix this with some CSS styling.
6 Steps to Create the Elementor Sticky Header
Before getting into this tutorial, you can use any theme, but you may want to use the Hello Elementor theme, as it was designed to work with the Elementor plugin. Additionally, this tutorial will only be using the free version of Elementor.
- Install and activate the Elementor Plugin.
- Install ElementsKit Elementor addons.
- Install Sticky Header Effects for Elementor.
- Create a main menu for your header.
- Create your header area using the Header Footer section of the ElementKits plugin.
- Create the Elementor sticky header effect.
1. Install and activate the Elementor Plugin

You can find the Elementor plugin here. Just a note - if you’re using another page builder plugin, you might want to stick with searching for a tutorial to achieve the same effect using that plugin.
2. Install ElementsKit Elementor addons

When you install ElementsKit Elementor addons, you’re going to want to go to the plugin and go through their setup wizard. Make sure the Header option is at least set to ON. Once you get past that step in the wizard, you can keep clicking through until the end.
3. Install Sticky Header Effects for Elementor

You can find the Sticky Header Effects for Elementor plugin here, or install from your plugin section in your WordPress admin by searching for the name.
4. Create a main menu for your header
Go to Appearance > Menus and create a main menu. You can label the menu whatever you wish. You will need this for the Elementor sticky header that you’re building.
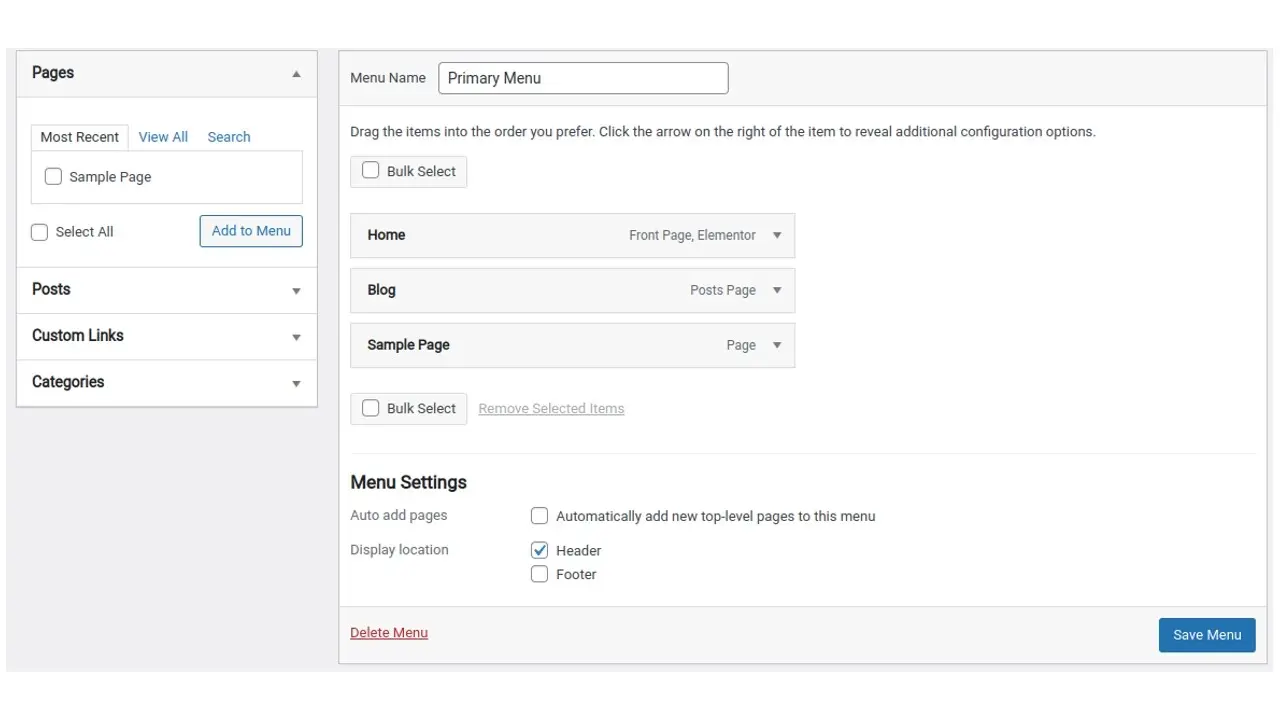
5. Create your header area using the Header Footer section of the ElementKits plugin
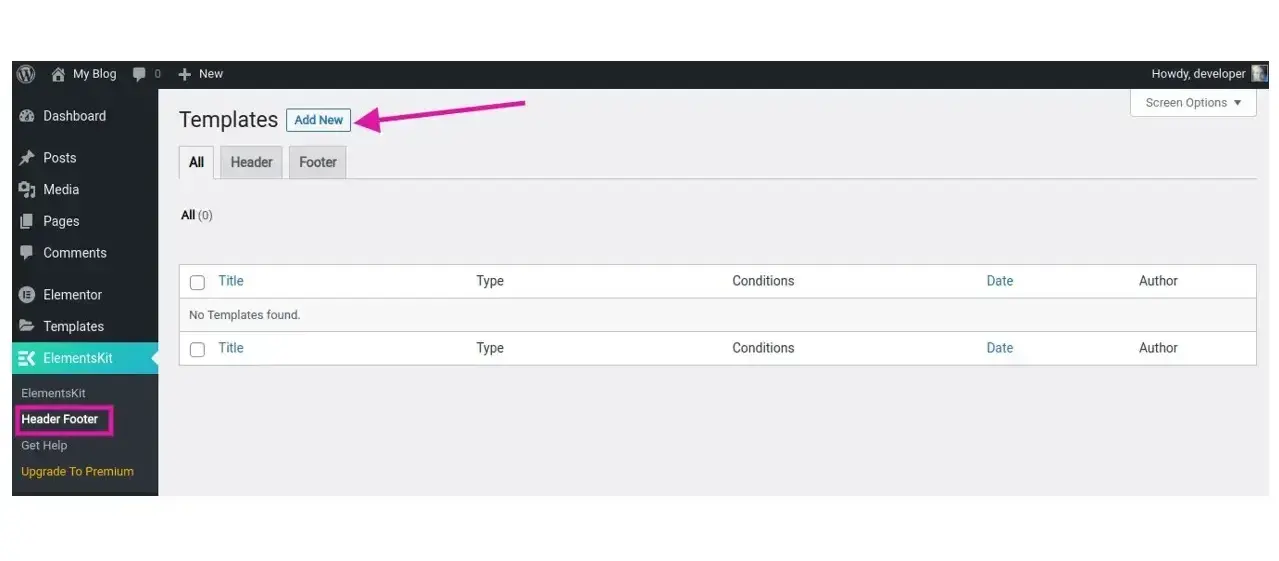
Go to the ElementsKit section of your WordPress admin area, and click on the Header Footer sub-section. Click “Add New” to begin creating your custom header template.
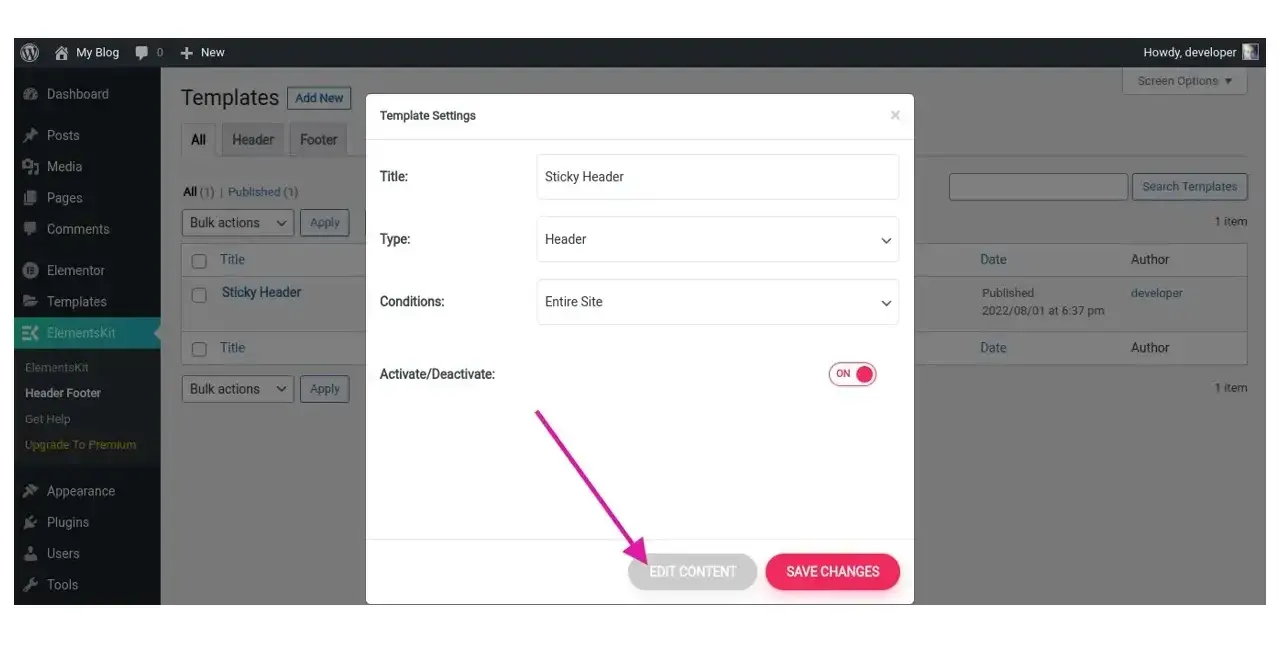
You’ll want to label your header, make sure “Header” and “Entire site” is selected. Make sure to save the changes. Once you’ve done that, click the gray “Edit Content” button.
After clicking the “Edit Content” button, you’ll be sent to a somewhat blank Elementor canvas, where you can design your header. Click on the last button, as you’ll be using that to select a header template to work with.
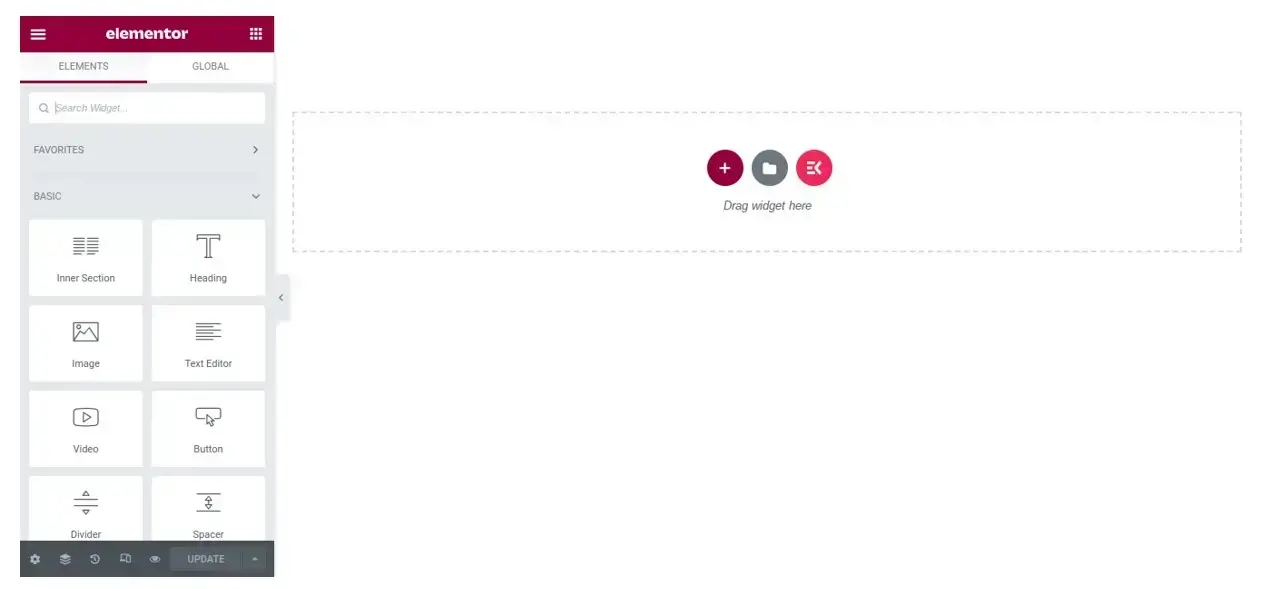
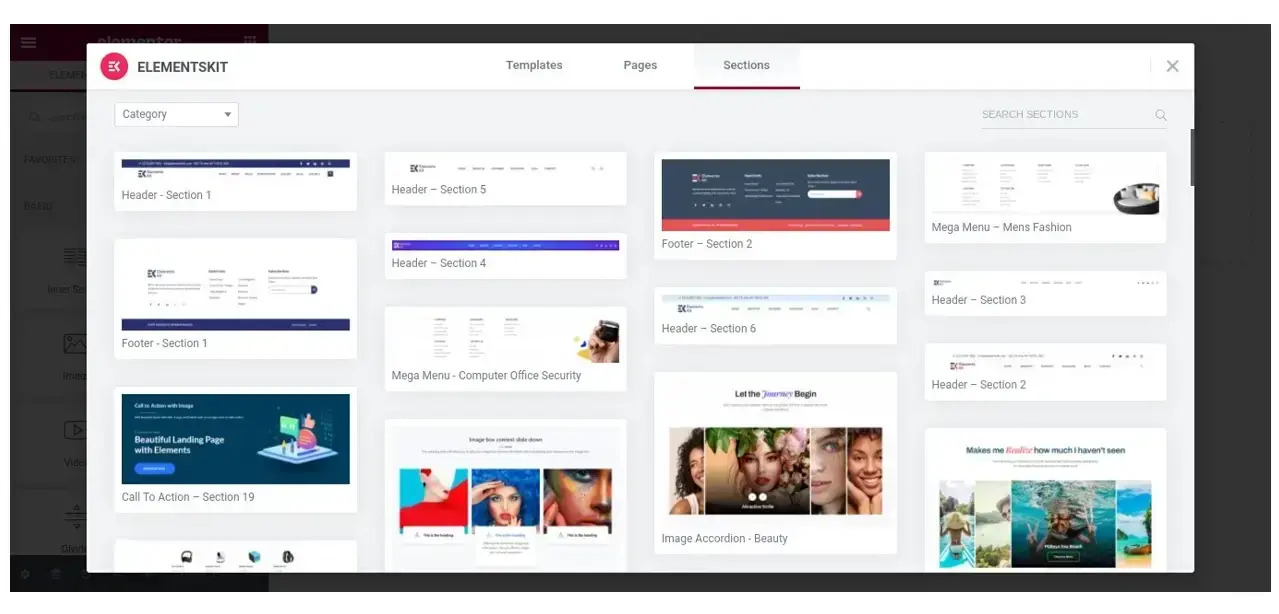
For this tutorial, we’ll want to make it easy and choose one of ElementsKit templates. Go to the Sections tab and select a header that you like. For this tutorial, the Header Section 5 was selected.
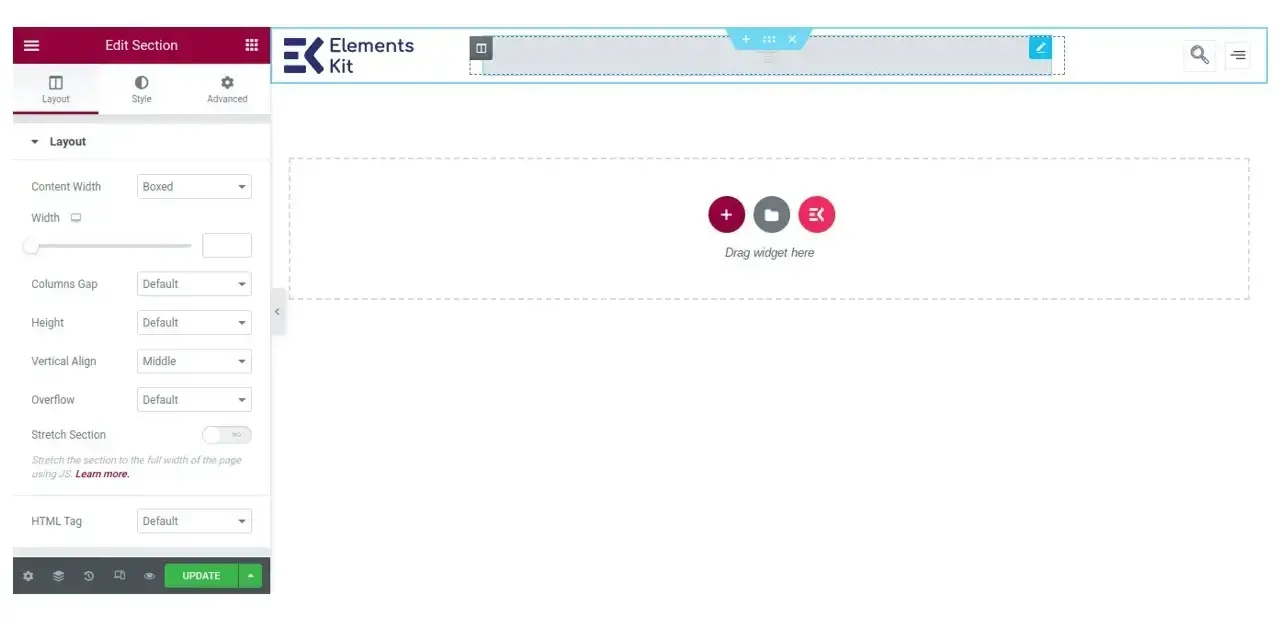
Once you’ve selected a template, the window will reload back to the Elementor canvas and allow you to see how it looks. To add your menu, you want to click on the middle box.
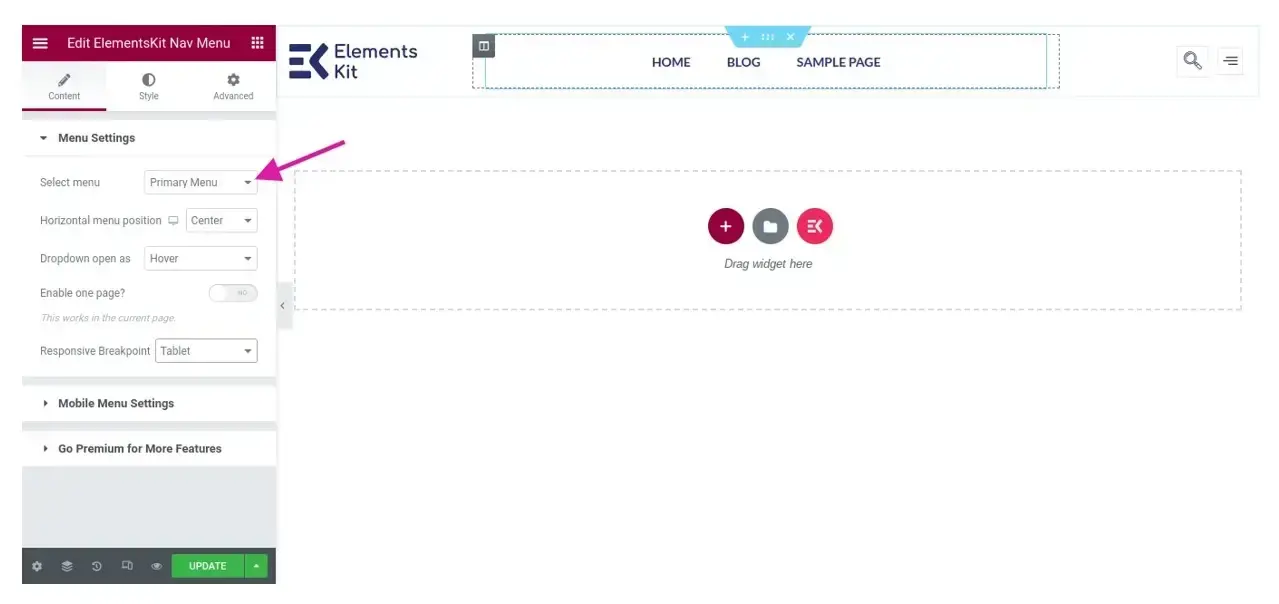
You can select your menu and customize it more on the left sidebar. Make sure to save your changes.
6. Create the Elementor sticky header effect
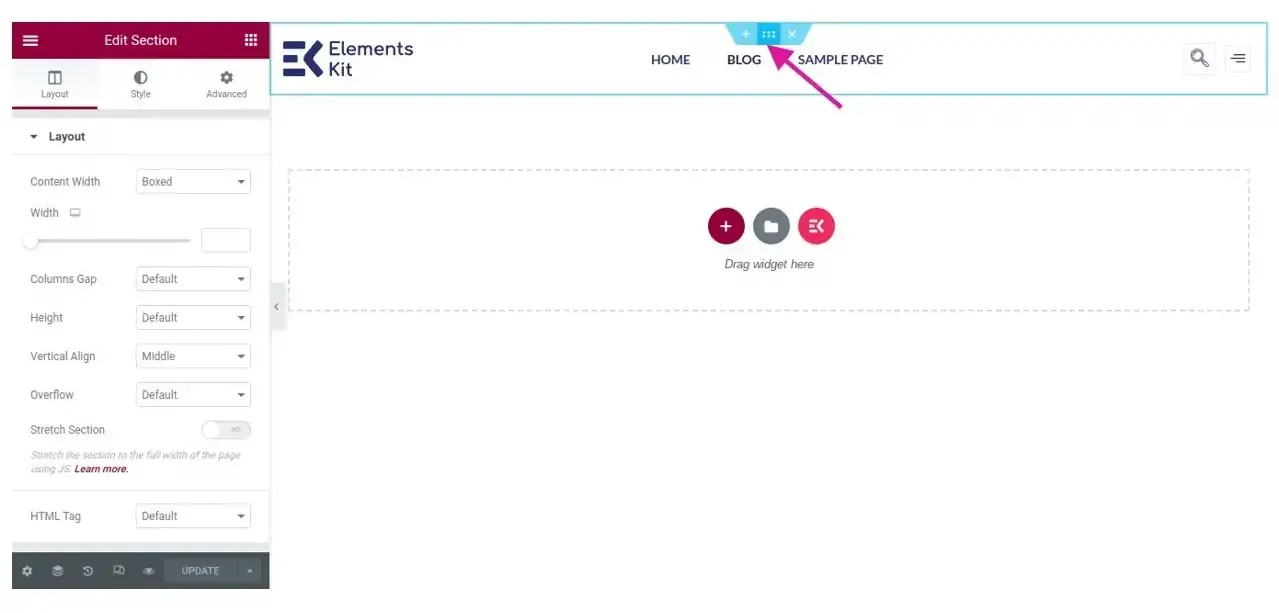
Now that your custom header is completed, you need to make it sticky. To do that, click on the 6 dots at the top middle of the header.
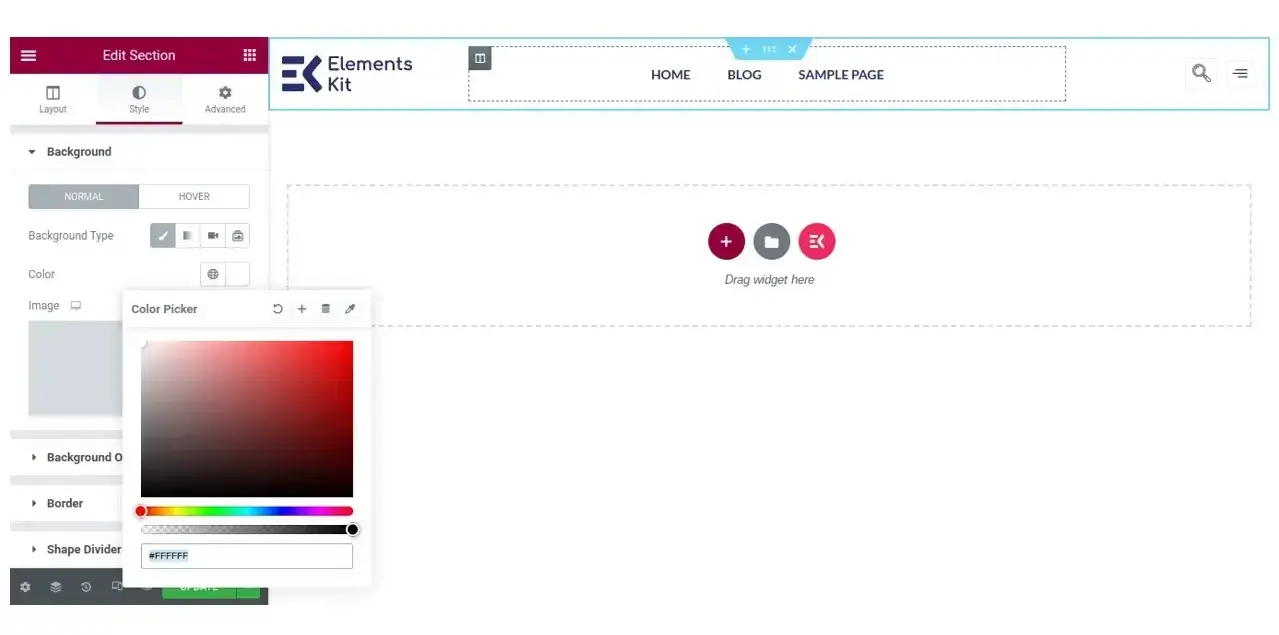
In most cases, your header’s default background will be transparent, so you’ll probably want to set a background color. You can do that from the Style tab, and the section that says color. The last box, when you click on it, will pop up a color picker. From there choose what background color you wish.
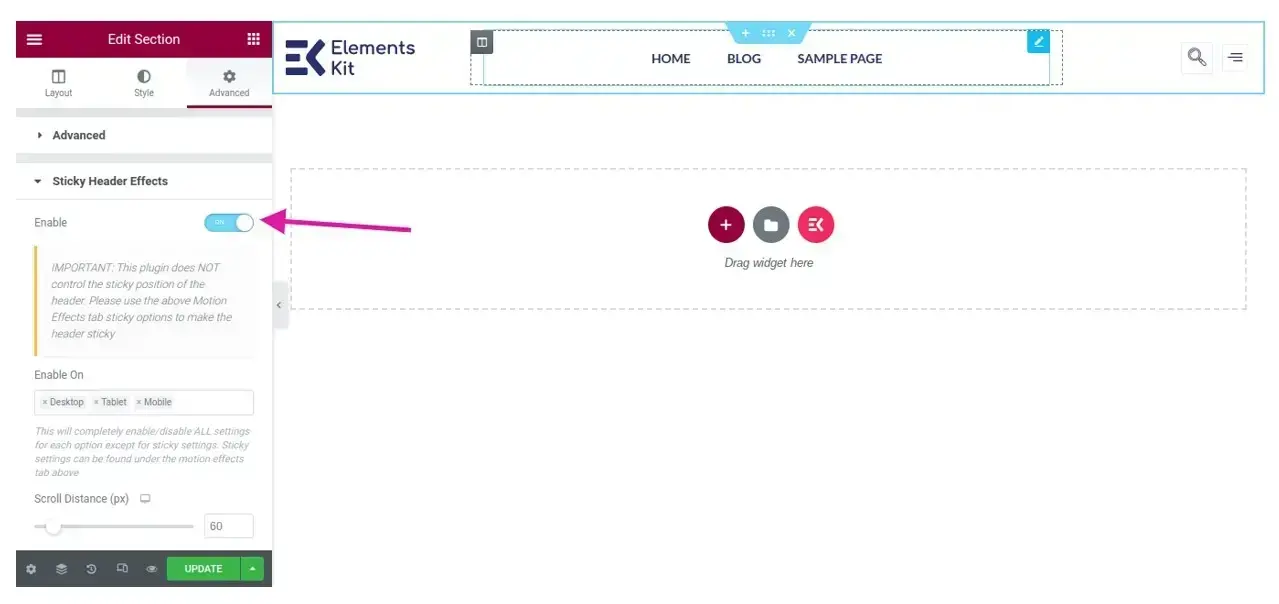
Now that you’ve selected a background color for your header, you can go to the Advanced tab, and there’s a setting for the Sticky header. Toggle box to ON, and then save your changes. Once you have, go check out your site to see if the Elementor Sticky header is working for you.
In Summary
Hopefully this tutorial on how to create the Elementor sticky header has helped you. When used right, the sticky header can be a great design element. If not executed right, or if it’s too big, it may cause some web accessibility issues for your website users.
Frequently Asked Questions
Is WordPress free?
All you need to do to use WordPress is to invest in a web hosting plan since the software itself is free.
Are WordPress plugins free?
WordPress has loads of plugins you can install, some of them are free, but some of them you will need to pay for. You can learn how to use WordPress Plugins on our blog.
Why choose Verpex for WordPress?
As the leading CMS out there, we’ve made it our mission to offer the most comprehensive and streamlined WordPress solutions on the market. Backed by a responsive customer care team and reliable site enhancement tools, we ensure our users get the full WordPress value and support for a reasonable price.
Do I need to know how to code to use WordPress?
Definitely not. There’s no need to learn coding, since most WordPress users aren’t developers. There’s many plugins and themes you can use to customize your website without coding.

Nile Flores is a long time professional blogger, as well as WordPress website designer and developer from the St. Louis Metro East. Nile blogs at NileFlores.com, where she’s passionate about helping website owners, whether they’re small business owners or bloggers. She teaches about Blogging, Social Media, Search Engine Optimization, Website Design, and WordPress. Additionally, Nile loves to speak at WordCamps (WordPress conferences) across the United States. When Nile isn’t knee-deep in coding, she’s a proud mom of a college student, and enjoys oil painting, cigar smoking, nail art design, and practicing traditional Okinawan kempo karate.
View all posts by Nile Flores


