WooCommerce, a super popular ecommerce plugin for WordPress, empowers millions of online stores worldwide. This WordPress ecommerce plugin is designed to help you sell products, and an important aspect of successful online retailing is effective product organization. Imagine a physical store where products are strewn haphazardly, making it impossible for customers to find what they need. The same principle applies to your online store. Without a well organized system for categorization, tagging, and attributing your products, you risk frustrating your customers, hindering their Browse experience, and ultimately, losing sales.
In this article, you’ll dive into learning the world of WooCommerce product organization, guiding you through how to add product tags, attributes and categories. You also learn a bit on best practices, to make sure your online store is user-friendly, and optimized for conversions.
Why Product Organization Matters
Before you learn the "how-to," let's understand the "why." Effective product organization in WooCommerce offers numerous benefits:
Enhanced User Experience (UX): A well-organized store allows customers to quickly and easily find the products they are looking for. This reduces frustration, increases satisfaction, and encourages them to explore more of your offerings.
Improved Search Engine Optimization (SEO): Categories, tags, and attributes provide valuable semantic information to search engines like Google. This helps search engines understand the context of your products, leading to better rankings for relevant searches and driving more organic traffic to your store.
Streamlined Navigation: Clear categories and intuitive filtering options (powered by attributes) make it simple for customers to navigate your store, even if you have a vast product catalog.
Effective Marketing and Merchandising: By segmenting your products, you can run targeted marketing campaigns, highlight specific product lines, and create compelling landing pages that resonate with different customer segments.
Better Inventory Management: While not directly tied to front-end organization, a well-structured product catalog simplifies internal inventory management and reporting.
Increased Website Conversions: Ultimately, all the above benefits contribute to a smoother, more enjoyable shopping experience, which directly translates to higher conversion rates and increased sales.

Understanding WooCommerce Product Organization: Categories, Tags, and Attributes
While often used interchangeably by beginners, product categories, tags, and attributes serve distinct but complementary roles in WooCommerce. Let's clarify their definitions:
Product Categories
Think of product categories as the main departments or sections of your online store. They represent broad classifications that group similar products together. For example, in a clothing store, categories might include "Men's Apparel," "Women's Apparel," "Footwear," and "Accessories."
Hierarchical Structure: Categories are hierarchical, meaning you can create parent categories and subcategories. This allows for a logical and drill-down navigation path. For instance, "Women's Apparel" could have subcategories like "Dresses," "Tops," "Pants," etc.
Primary Navigation: Categories typically form the primary navigation menu on your website, guiding customers through your product offerings.
SEO Value: Category pages are often optimized for specific keywords, acting as landing pages for broader searches.
Product Tags
Product tags are like keywords or micro-categories that describe specific features, characteristics, or themes associated with a product. Unlike categories, tags are non-hierarchical and offer a more flexible way to connect related products.
Non-Hierarchical: Tags do not have parent-child relationships. A product can have multiple tags, and tags can be applied to products across different categories.
Enhanced Discovery: Tags help customers discover products through internal site search and by clicking on related tags. For example, a "red dress" might be in the "Dresses" category but also have tags like "red," "floral print," "summer," and "party wear."
Long-Tail SEO: Tags can contribute to long-tail SEO by capturing more specific search queries.
Product Attributes
Product attributes define the specific characteristics of a product that can vary, such as size, color, material, or brand. Attributes are crucial for creating product variations and enabling powerful filtering options for customers.
Defining Variations: Attributes are essential for creating variable products (e.g., a t-shirt available in different sizes and colors). Each combination of attributes forms a unique product variation.
Product Filtering: Attributes power the "Shop by" or "Filter by" options on your category and shop pages, allowing customers to narrow down their search results based on specific criteria. For example, a customer can filter all "dresses" by "size: large" or "color: blue."
Global vs. Custom Attributes: WooCommerce allows for both global attributes (defined once and applicable to multiple products) and custom product attributes (defined individually for a specific product).
How to Add Product Tags, Attributes, and Categories to WooCommerce
Now, let's get hands-on and walk through the process of adding these organizational elements to your WooCommerce store.
Part 1: Adding Product Categories
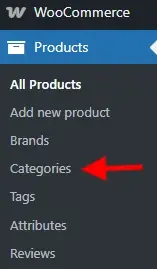
- Navigate to Product Categories: From your WordPress dashboard, go to Products > Categories.

Add New Category Form: On the left side of the screen, you'll see the "Add New Category" form.
a. Name: Enter the name of your new category (example - "Beets for dogs").
b. Slug: This is the URL-friendly version of the name, usually lowercase with hyphens instead of spaces (example ‘beets-for-dogs’). WooCommerce will automatically generate this for you if you leave it blank, but you can customize it for SEO purposes.
c. Parent Category: If this is a subcategory, select its parent from the dropdown (example - for "Men's T-Shirts," the parent might be "Men's Apparel"). If it's a top-level category, leave it as "None."
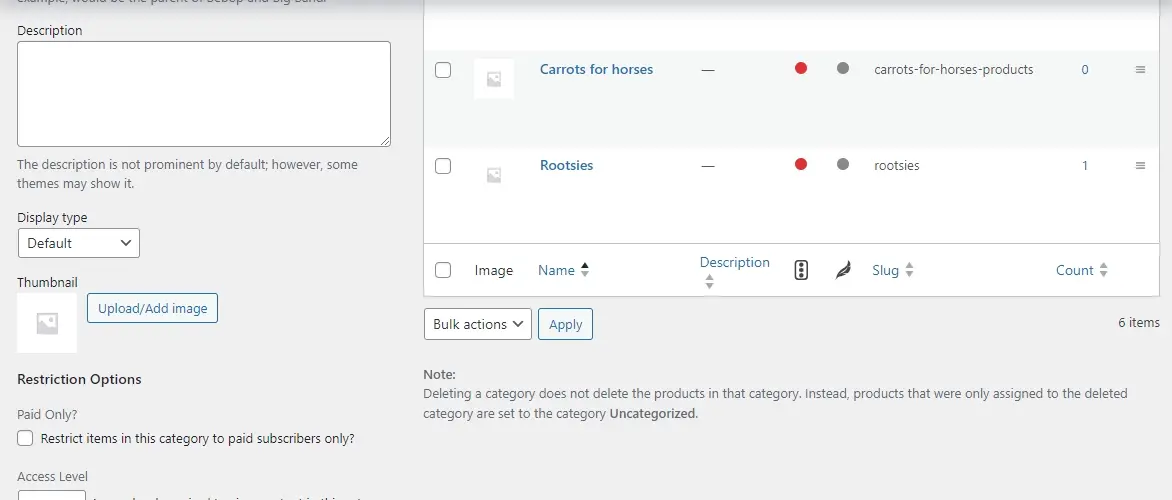
d. Description: Provide a brief description of the category. This can be displayed on your category page and is also valuable for SEO.
e. Display type: This option controls what is displayed on the category archive page.
f. Default: Shows products.
g. Products: Shows products.
h. Subcategories: Shows subcategories.
i. Both: Shows both products and subcategories.
j. Thumbnail: Upload an image to represent your category. This can be displayed on your shop page or in navigation menus, adding visual appeal.
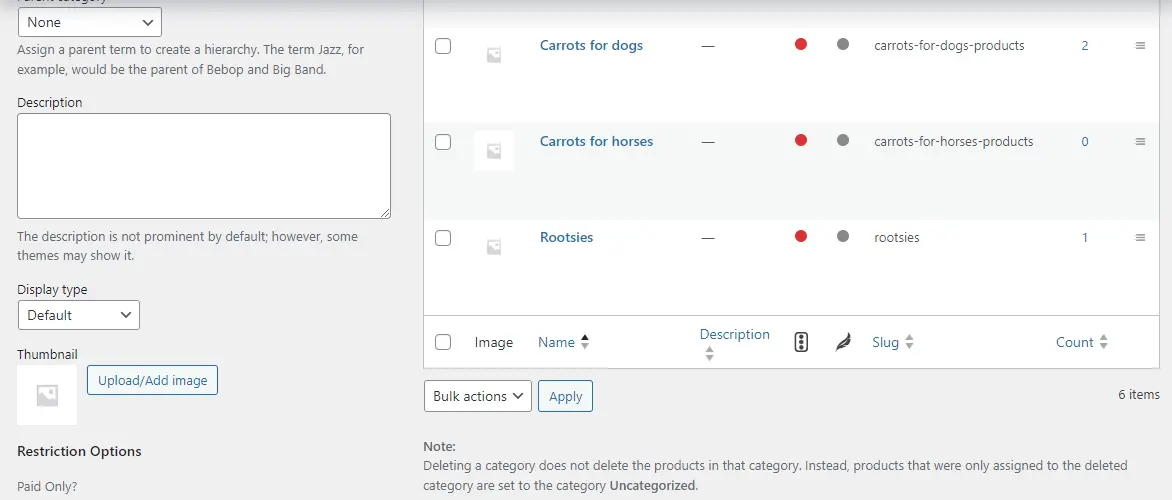
Add New Category: Click the "Add New Category" button. Your new category will appear in the list on the right.
Repeat for All Categories: Continue adding all the categories and subcategories you need to structure your product catalog logically.
Part 2: Adding Product Tags
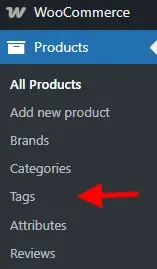
- Navigate to Product Tags: From your WordPress dashboard, go to Products > Tags.
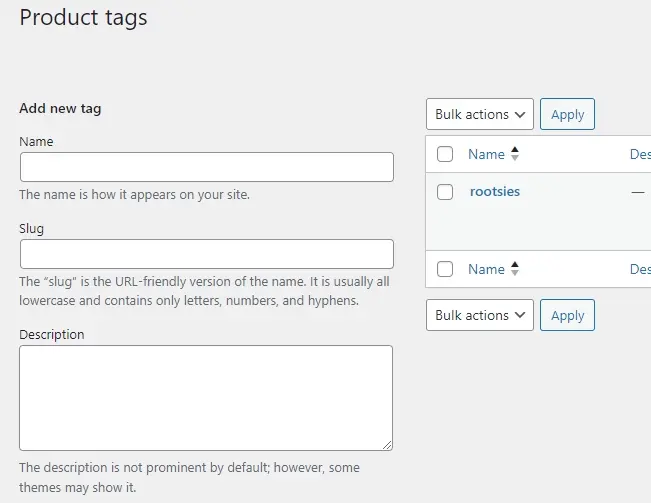
Add New Tag Form: Similar to categories, you'll find an "Add New Tag" form on the left.
a. Name: Enter the name of your tag (example - "rootsies").
b. Slug: (Optional) WooCommerce will generate this automatically.
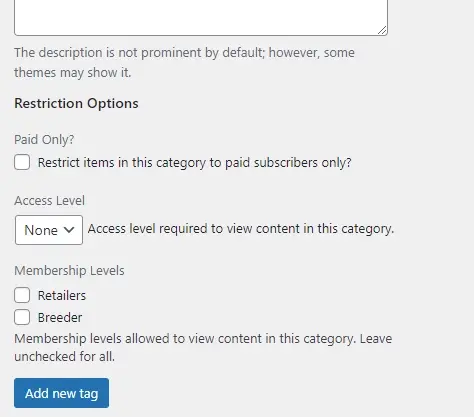
c. Description: (Optional) A brief description for internal reference or potential display on tag archive pages.
Add New Tag: Click the "Add New Tag" button.
Repeat for All Tags: Add all the relevant tags you anticipate using to describe your products. Remember, tags are granular, so think about specific keywords customers might use to find products.
Part 3: Adding Product Attributes
Adding attributes is a two-step process: first, you define the attribute itself, and then you define its terms (the specific values for that attribute).
Step A: Defining Global Attributes
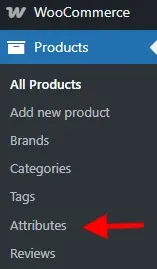
Navigate to Product Attributes: From your WordPress dashboard, go to Products > Attributes.
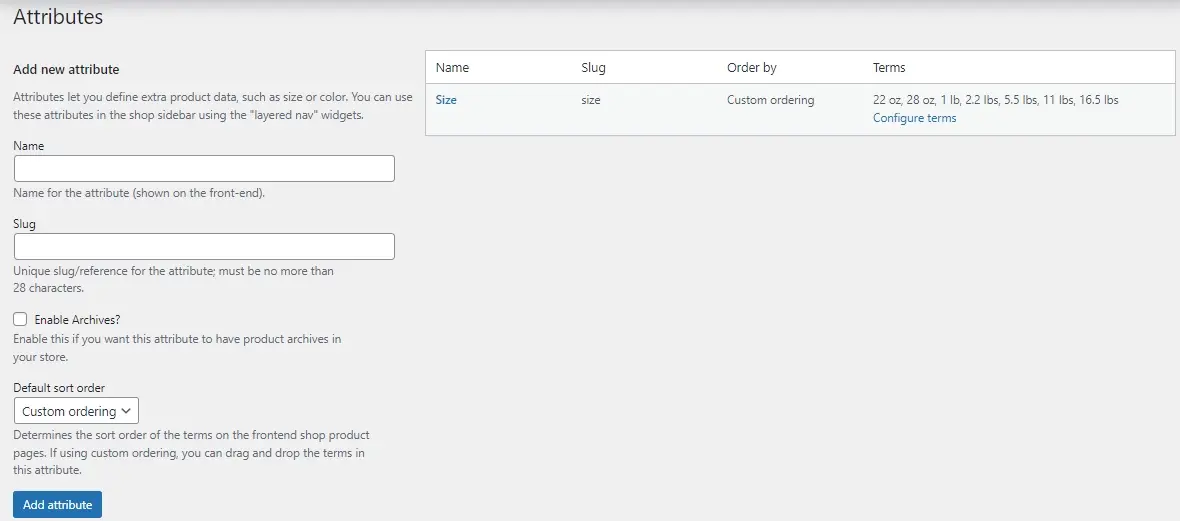
Add New Attribute Form: On the left, you'll see the "Add New Attribute" form.
a. Name: Enter the name of your attribute (example - "Color," "Size," "Material," "Brand"). In this case, the attribute is “Size”.
b. Slug: (Optional) WooCommerce will generate this.
c. Enable Archives: Check this box if you want to create an archive page for this attribute (example - a page showing all products with "Blue" as a color). This is generally recommended for attributes you want to use for filtering.
d. Sort Order: This defines how the terms within this attribute will be displayed on the front-end.
e. Name: Alphabetical order by term name.
f. Name (numeric): Treats numerical names as numbers for sorting (example - "1, 2, 10" instead of "1, 10, 2").
g. Term ID:** Sorts by the internal ID of the term.
h. Custom ordering: Allows you to manually drag and drop the terms into your desired order (highly recommended for attributes like "Size" where you want "Small, Medium, Large" instead of alphabetical).
Add Attribute: Click the "Add attribute" button. Your new attribute will appear in the table on the right.
Step B: Configuring Attribute Terms

Configure Terms: Once an attribute is created, click on the "Configure terms" link next to it in the table. This will take you to a new screen where you can add the specific values (terms) for that attribute.
Add New Term Form: On the left, you'll add the terms for your attribute.
a. Name: Enter the specific value (example for "Color," you'd add "Red," "Blue," "Green"). For "Size," you'd add "Small," "Medium," "Large" or specific size or weight. In this example, weight in ounces was used.
b. Slug: (Optional)
c. Description: (Optional)
Add New [Attribute Name]: Click the "Add New [Attribute Name]" button (example "Add New Size").
Repeat for All Terms: Add all the necessary terms for that attribute.
Repeat for All Attributes: Go back to Products > Attributes and repeat Steps A and B for all the attributes you need.
Part 4: Assigning Categories, Tags, and Attributes to Products
Once you've created your organizational elements, it's time to apply them to your products.
- Edit or Add a New Product: Go to Products > All Products and either edit an existing product or click "Add New" to create a new one.
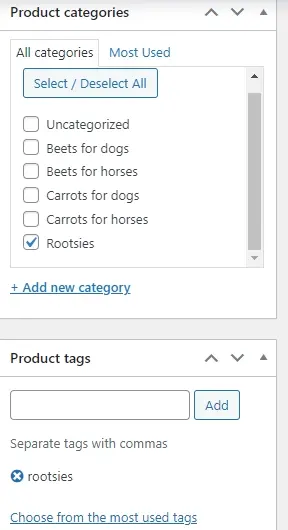
Assign Categories: On the right sidebar, locate the "Product categories" metabox.
a. Check Boxes: Check the boxes next to the categories (and subcategories) that apply to your product. A product can belong to multiple categories.
b. Add New Category: You can also quickly add a new category directly from here by clicking "Add New Category" (though it's generally better to set them up beforehand for better organization).
Assign Tags: Below the "Product categories" metabox, you'll find the "Product tags" metabox.
a. Type and Select: Start typing the name of a tag you've already created. WooCommerce will offer suggestions. Click on the tag to add it.
b. Add New Tags: You can also add new tags directly by typing them and pressing Enter or clicking "Add."
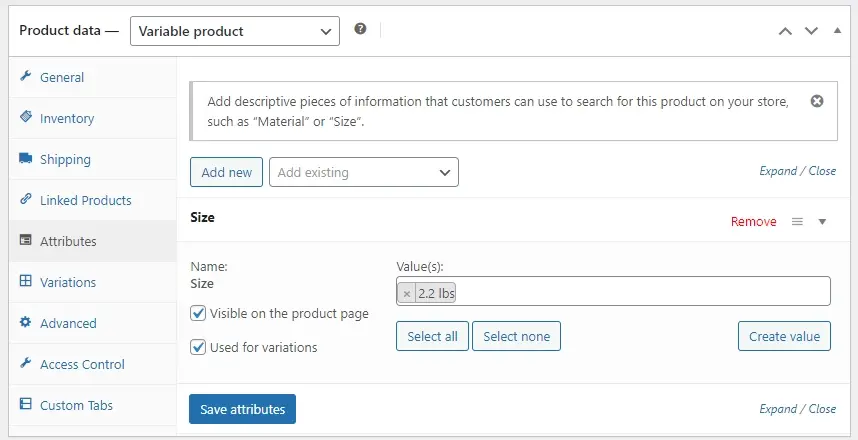
Assign Attributes (and Create Variations if Applicable): Scroll down to the "Product data" metabox (usually below the main content editor).
a. Select "Attributes" Tab: Click on the "Attributes" tab on the left within the "Product data" box.
b. Add Existing Attributes: From the "Custom product attribute" dropdown, select one of your globally defined attributes (example - "Size").
c. Click "Add."
d. Select Terms: In the newly added attribute row, click in the "Value(s)" field. A dropdown will appear, allowing you to select the terms you've defined for that attribute (example - "Red," "Blue," "Green" if you use those terms). You can select multiple terms.
e. "Visible on the product page": Check this box if you want the attribute to be displayed on the product's front-end page (example - "Color: Red").
f. "Used for variations": SUPER IMPORTANT for Variable Products. Check this box if this attribute will be used to create product variations (example - different sizes of a t-shirt).
g. Add Custom Product Attributes (for one-off attributes): If an attribute is unique to this product and you don't need to use it globally, you can select "Custom product attribute" from the dropdown and click "Add." Then, manually type the name (example - "Special Feature") and its value(s) (example - "Handmade, Limited Edition"). Note: Custom attributes cannot be used for product variations or global filtering.
h. Save Attributes: After adding and configuring your attributes, click the "Save attributes" button.
Creating Product Variations (if "Used for variations" was checked): After saving attributes that are "Used for variations," switch to the "Variations" tab within the "Product data" metabox.
a. Generate Variations: From the dropdown, select "Create variations from all attributes" and click "Go." WooCommerce will automatically generate all possible combinations of the selected attributes.
b. Configure Each Variation: For each generated variation, you can set its:
c. Image: A specific image for that variation (example a blue t-shirt image for the blue variation).
d. SKU: A unique Stock Keeping Unit for the variation.
e. Regular Price: (Required)
f. Sale Price: (Optional)
g. Stock status: In stock/Out of stock
h. Weight, Dimensions, Shipping Class: Can override the parent product's settings.
i. Save Changes:Click "Save changes" after configuring your variations.
Update/Publish Product: Once you've assigned all categories, tags, and attributes (and configured variations if applicable), click the "Update" button (for existing products) or "Publish" button (for new products) on the right sidebar.
Best Practices for Product Organization
Now that you’ve been walkthrough the process on how to add product tags, attributes, and categories to WooCommerce, you should keep the following tips in mind:
Plan Your Structure: Before you start adding anything, take time to plan your categories, subcategories, and key attributes. Sketch it out on paper or use a spreadsheet.
Keep Categories Broad, Tags Specific: Remember the distinction. Categories are for broad grouping, tags for granular details. Avoid creating too many categories or overly specific ones that resemble tags.
Use Descriptive Names: Ensure your category, tag, and attribute names are clear, concise, and easily understandable by your customers.
Consistency is Key: Use consistent naming conventions for your categories, tags, and attributes. "T-shirts" and "Tees" for the same category will confuse both customers and search engines.
Leverage Subcategories: Use subcategories to refine your product hierarchy and improve navigation.
Don't Overuse Tags: While flexible, too many tags can become overwhelming and less effective. Focus on relevant keywords.
Keyword Research: Integrate relevant keywords into your category names, descriptions, and tag names.
Unique Descriptions: Write unique and helpful descriptions for your category and tag archive pages.
SEO Plugins: Use an SEO plugin like Yoast SEO or Rank Math to further optimize your category and tag pages.
Regularly Review and Refine: As your product catalog grows, periodically review your organization structure. Are categories still logical? Are tags still relevant? Adjust as needed.
Utilize Widgets: WooCommerce provides widgets to display product categories, tags, and attribute filters on your shop and archive pages. Ensure these are prominently displayed for easy navigation.
Consider Your Target Audience: Think about how your customers search for products. What terms would they use? What filters would they expect to see?

In Summary
Mastering on how to add product tags, attributes and categories to WooCommerce is not just about organizing your products; it's about optimizing your entire online store for discoverability, usability, and ultimately, sales. By carefully structuring your product catalog, you create a seamless and enjoyable shopping experience for your customers, while simultaneously boosting your store's visibility in search engines.
Lastly, after this, you should look into mastering managing inventory in WooCommerce. Additionally, if you plan to run a larger eshop, you may want to look into our hosting for WordPress, or even VPS hosting here at Verpex. This will allow your shop to stay up and scale up as your business grows.
Frequently Asked Questions
Does WooCommerce have security issues?
WooCommerce itself doesn't have security issues, but every platform is susceptible to attacks. You can use WooCommerce's core security features, which are derived from WordPress – but you also need to take the initiative.
How does WooCommerce VPS Hosting handle multiple online stores?
VPS hosting can support multiple WooCommerce installations, providing isolated environments for each store, which is ideal for managing multiple businesses or market segments.
How do I ensure GDPR compliance in my WooCommerce theme?
Ensure compliance by implementing privacy features, obtaining user consent, and providing data access options.
What is the difference between hosting for WordPress and WooCommerce hosting?
Hosting for WordPress is optimized for general WordPress sites, focusing on speed, security, and updates.
WooCommerce hosting on the other hand is specifically designed for online stores, offering additional features like enhanced performance for eCommerce, pre-installed WooCommerce, and tools for managing products and payments.

Nile Flores is a long time professional blogger, as well as WordPress website designer and developer from the St. Louis Metro East. Nile blogs at NileFlores.com, where she’s passionate about helping website owners, whether they’re small business owners or bloggers. She teaches about Blogging, Social Media, Search Engine Optimization, Website Design, and WordPress. Additionally, Nile loves to speak at WordCamps (WordPress conferences) across the United States. When Nile isn’t knee-deep in coding, she’s a proud mom of a college student, and enjoys oil painting, cigar smoking, nail art design, and practicing traditional Okinawan kempo karate.
View all posts by Nile Flores