Google Analytics lets you track and measure your performance online. Although there are enough Alternatives to Google Analytics on the market, it remains one of the most popular tools for traffic tracking and analysis.
The software allows you to identify patterns and trends in the way visitors engage with your website so you can make improvements as necessary.
If you’re wondering how to share access to Google Analytics, you’ve come to the right place. GA has built-in features that allow you to give access to multiple users so you can share data or grant permissions to complete tasks such as managing users, editing settings, etc.
Read the rest of this guide to discover the step-by-step tutorial for how to add a user to Google Analytics.
And you can also check out our guide on how to add Google Analytics to WordPress.
Step #1: Open the Correct Access Management Section
Your first step in adding a new user to Google Analytics is to open the appropriate access management section from the Admin page.
You can find the “Admin” tab from anywhere in your GA account.
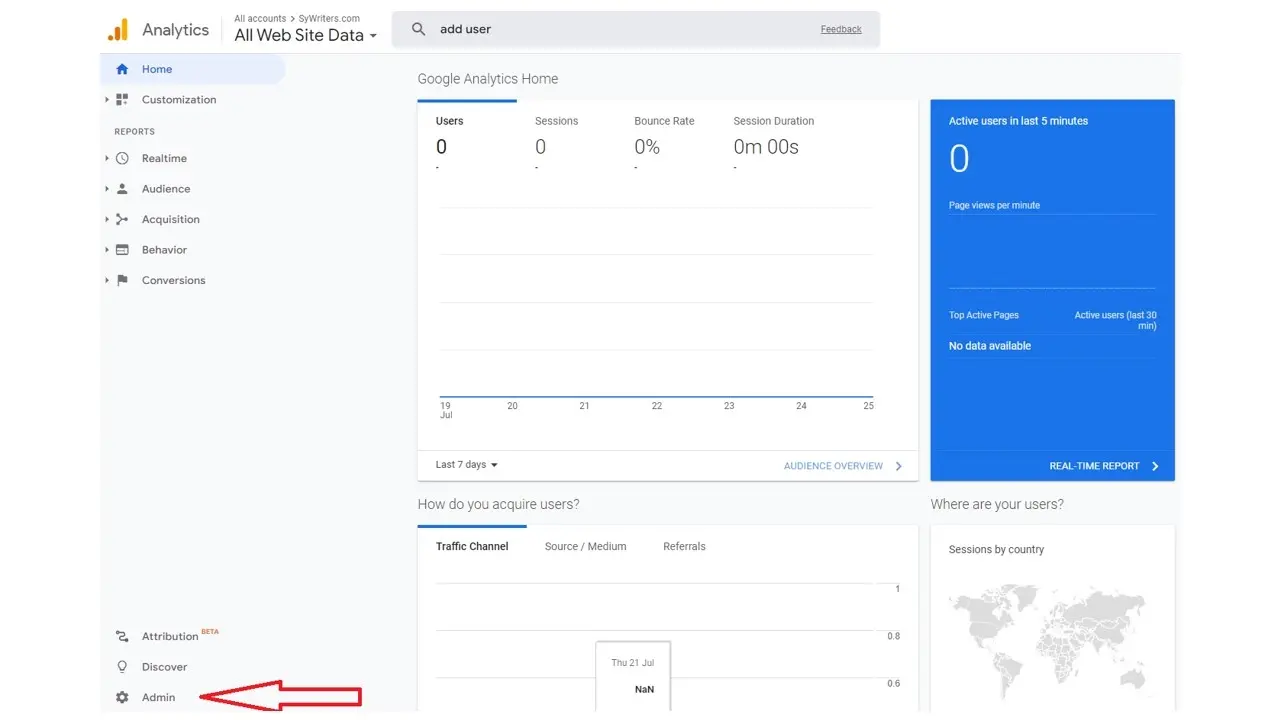
Click it and you’ll be taken to a page that looks like the one below where you’ll find a list of Admin settings, including Account, Property, and View settings.
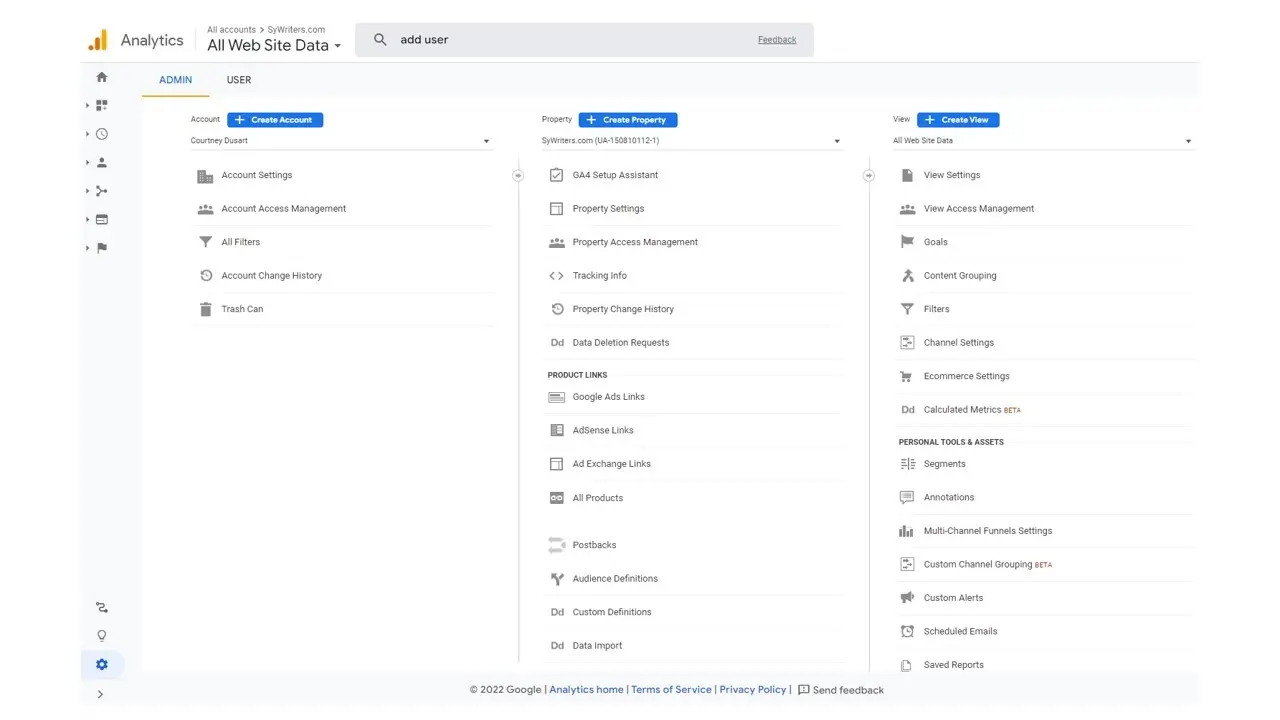
Each one of them has “Access Management” options:
Account Access Management
Property Access Management
View Access Management

A quick note about GA user account permissions. Your choice of where to add the new user dictates some of the initial user roles, as shown below:
- Accounts are like the grandfather. They are the highest in the hierarchy and you should only grant this level of access to trusted partners because whoever has access to the account automatically has access to all properties and views.
- Properties are like the parents. Typically, a property is a website or mobile app, and for most businesses, there's just one, which is the company website. This level of access is appropriate for digital marketing partners. Access granted to property automatically gives access to all views for that property.
- Views are like the kids. They are the lowest in the hierarchy. There should be at least two views for each property. One view with filters and the other with raw, unfiltered data. Since data can't be altered once it goes into Analytics, having a view of raw data is a good idea in case someone messes up your filters.
Step #2: Add Emails for the New User(s)
GA lets you add as many users as you want. For each new user, you need to add an email on GA.
In the Access Management tab, you'll find a list of current users. Click the blue “+” button located on the top right-hand side of the page.

You’ll be presented with two options:
Add users
Add user groups

Click “Add users”.
You can then type in the email address of the new user. You have the option of adding multiple emails in the email addresses field.
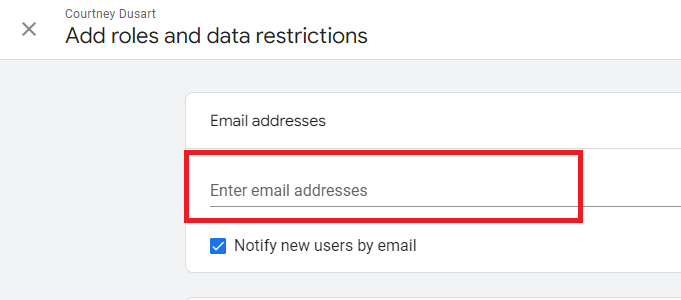
Step #3: Set Direct Roles and Data Restrictions
Immediately beneath the email address fields, you'll find the direct roles and data restrictions.
Direct permissions refer to the role (GA, GA4) and data restrictions (GA4) that a user is assigned specifically for the current resource (e.g. account, property, view, attribution project).
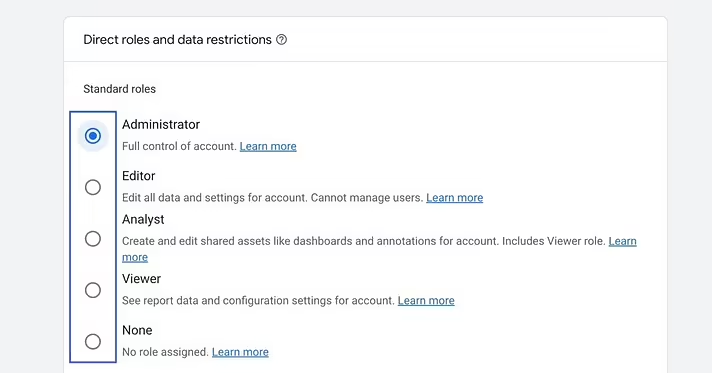
Under “Standard roles”, choose a role to assign to the new user from the list of available options which are as follows:
Administrator
Full control of the account.Editor
Edit all data and settings for the accounts. Can not manage users.Analyst
Create and edit shared assets like dashboards and annotations for accounts. Includes the Viewer role.Viewer
See report data and configuration settings for the account.
Step #4: Add Data Restrictions
Your next step is to add data restrictions. You'll find this section by scrolling down a little further in the same module.
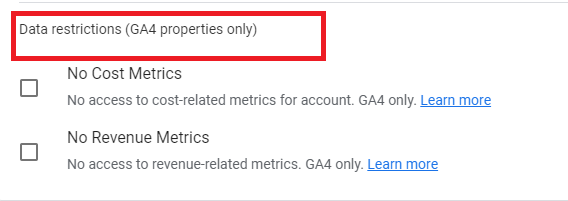
These settings allow you to hide some of your most sensitive data from users.
This includes:
- Cost Metrics
Block access to cost-related metrics for the Google Analytics account. This feature is only available in GA4.
- Revenue Metrics
Deny user access to revenue-related metrics. This feature is also available in GA4 only.
Keep in mind that if you give someone the Administrator role, they have the ability to come and change their own data restrictions.

Step #5: Add the New User to GA
Once you're done adding the rules and restrictions, click "Add" at the top right-hand side of the page.
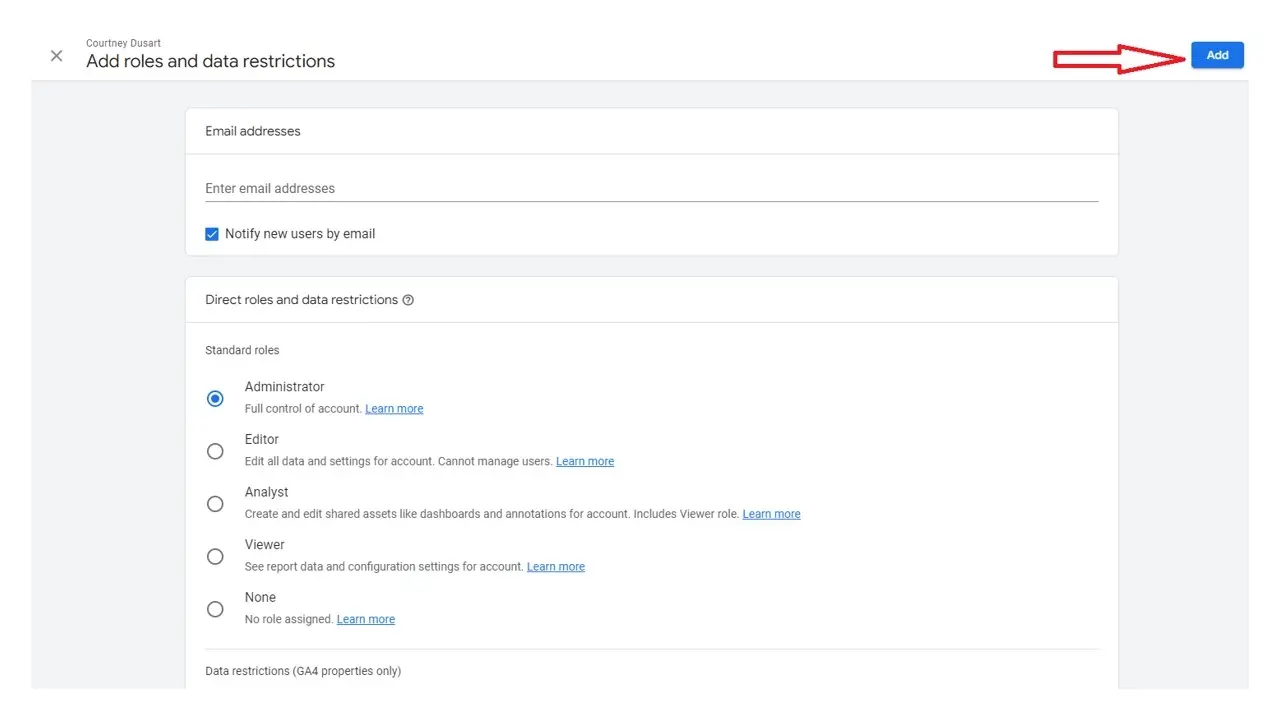
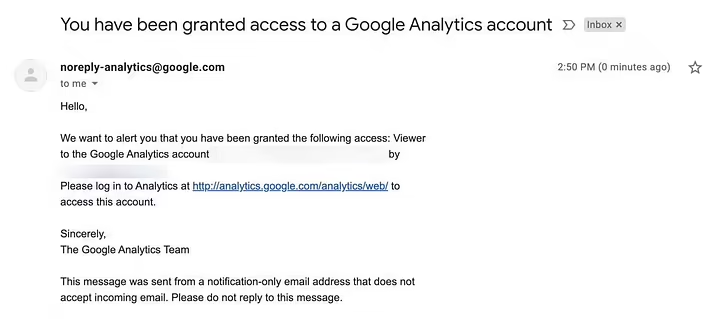
If you check the "Notify new users by email" box, then each new user you add will receive an email explaining their new role, together with information about who granted them the role and how they can access the Google Analytics dashboard.
At this point, you will be able to see the new user in the access management panel together with all other users with the same roles.
This user now has access to every part of the GA account that you allowed, whether it's "read-only" reports as a viewer or everywhere within the dashboard as an administrator.
Different GA Roles and Use Cases
There are many reasons why you might want to share your GA account with another user. To help make these reasons clearer, here are some use cases and different GA roles you might choose:
- Administrator
This role gives the user complete control over the entire Google Analytics dashboard. This includes the account, property, and view levels so you need to be extremely careful about who you assign this to.
- Editor
This allows the user to edit all data and settings for the GA account with the exception of user settings. They cannot manage users, but you should still be careful about who you give this role to.
- Analyst
This role works like a viewer role, but has the ability to create and edit shared items, such as dashboards and annotations for accounts.
- Viewer
This user can see report data and configuration settings for the Google Analytics account. However, they cannot edit or share anything.
- None
This is a role but with no abilities whatsoever. You might use this for someone that you consider adding in the future.
These four types of permissions allow users to edit, collaborate, read and analyze, and manage other users.
It's important to consider the level of trust before signing permissions to each user. For example, marketing/IT managers and trusted partners can have “account” access, a set of "master keys" which allows them to manage users.
Marketing team members, contractors, and vendors can be granted “property” access which allows them to create filters, edit goals, change settings, etc. They can also create new properties and views.
For temporary helpers and people you don't really trust, use the "view" level of access which allows them to collaborate effectively without too much risk. Users can create and share dashboards, segments, annotations, and saved reports. In this way, they can get their work done, but they can't break anything.
Conclusion
Whether you use Google Analytics for data collection, analysis, tracking, visualization, monitoring, reporting, or integration with other applications for deeper website insights, you may need to share your account with others.
Use the information in this guide to help you determine the right level of access to provide to different users so you can share your account securely.
Has this article answered your question on how to add a user to Google Analytics and ensure they access the right data and functionality? Let us know below!
Frequently Asked Questions
Does Google have free web hosting?
Google doesn’t provide free hosting; however, they do provide PAAS (Platform As A Service), known as GAE (Google App Engine).
How much traffic can my WordPress site handle?
Most shared plans can manage around 1,000 to 2,000 visitors per day. If you expect more than this we’d recommend opting for VPS or dedicated WordPress hosting.
How much does it cost to build a website for a church?
Church websites can cost from $0 to $50,000, and some might even go higher.

Ron Stefanski is a website entrepreneur and marketing professor who has a passion for helping people create and market their own online business. You can learn more from him by visiting OneHourProfessor.com
View all posts by Ron Stefanski


