
cPanel is a widely used web hosting control panel that simplifies website management, offering an intuitive interface for tasks like file handling, domain settings, and email configurations.
One of the key tasks you may need to perform is uploading HTML files, which is essential for updating existing web pages or adding new content. By learning how to upload HTML files using cPanel, you can easily manage and update your website’s content, ensuring it stays current and functional without hassle.

Step-by-Step Guide to Uploading an HTML File Using cPanel
Before uploading your website files using cPanel, ensure your cPanel account is active, and you have the necessary login credentials. Ensure your HTML and CSS files are ready and your domain is properly pointed to the web server.
Familiarize yourself with the cPanel interface, especially the File Manager, which is essential for handling your website’s files. Understanding static website management will also help streamline the upload process.
Verpex simplifies the process by offering a seamless cPanel interface for handling website management, file uploads, and more.
Uploading Files Using CPanel's File Manager
Follow these steps to upload an HTML file to your website using cPanel:
- Open your web browser and enter the URL for your cPanel login page, typically
https://yourdomain.com/cpanelorhttps://yourdomain.com:2083. If you are using Verpex Hosting, you can log in directly through their user-friendly portal.
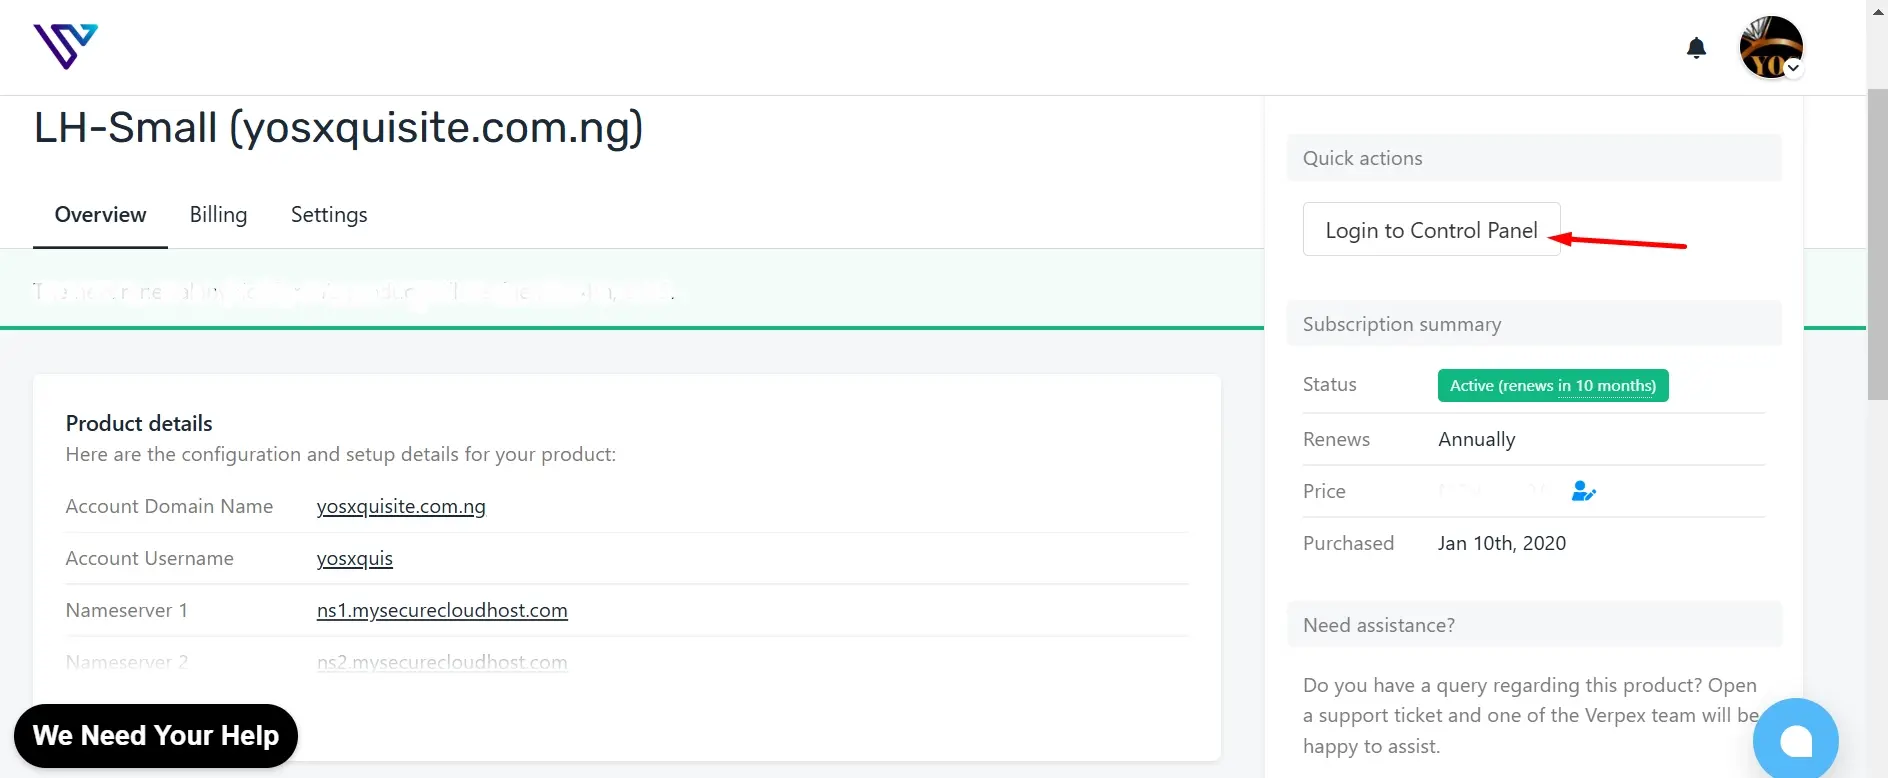
Enter your cPanel username and password, then click Log In to access your cPanel dashboard.
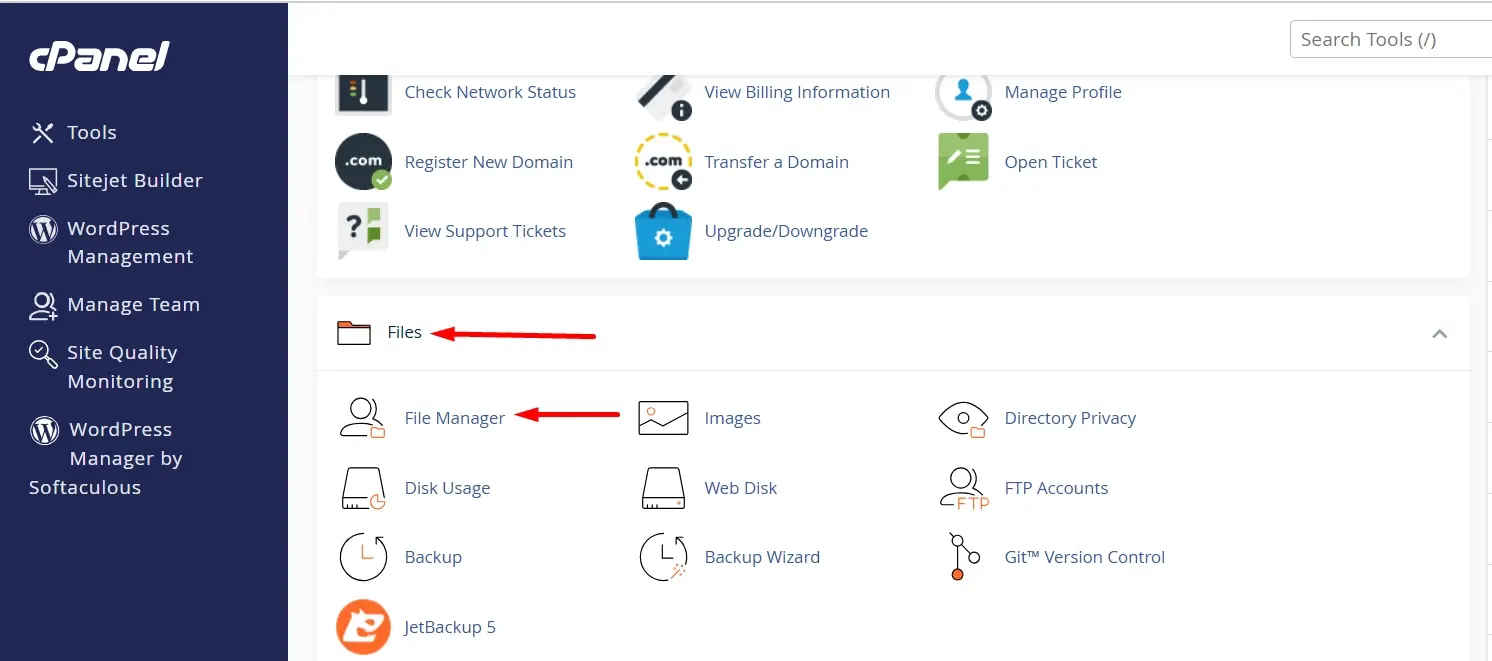
In the cPanel dashboard, locate and click on File Manager under the "Files" section. This tool allows you to manage and upload files to your website.
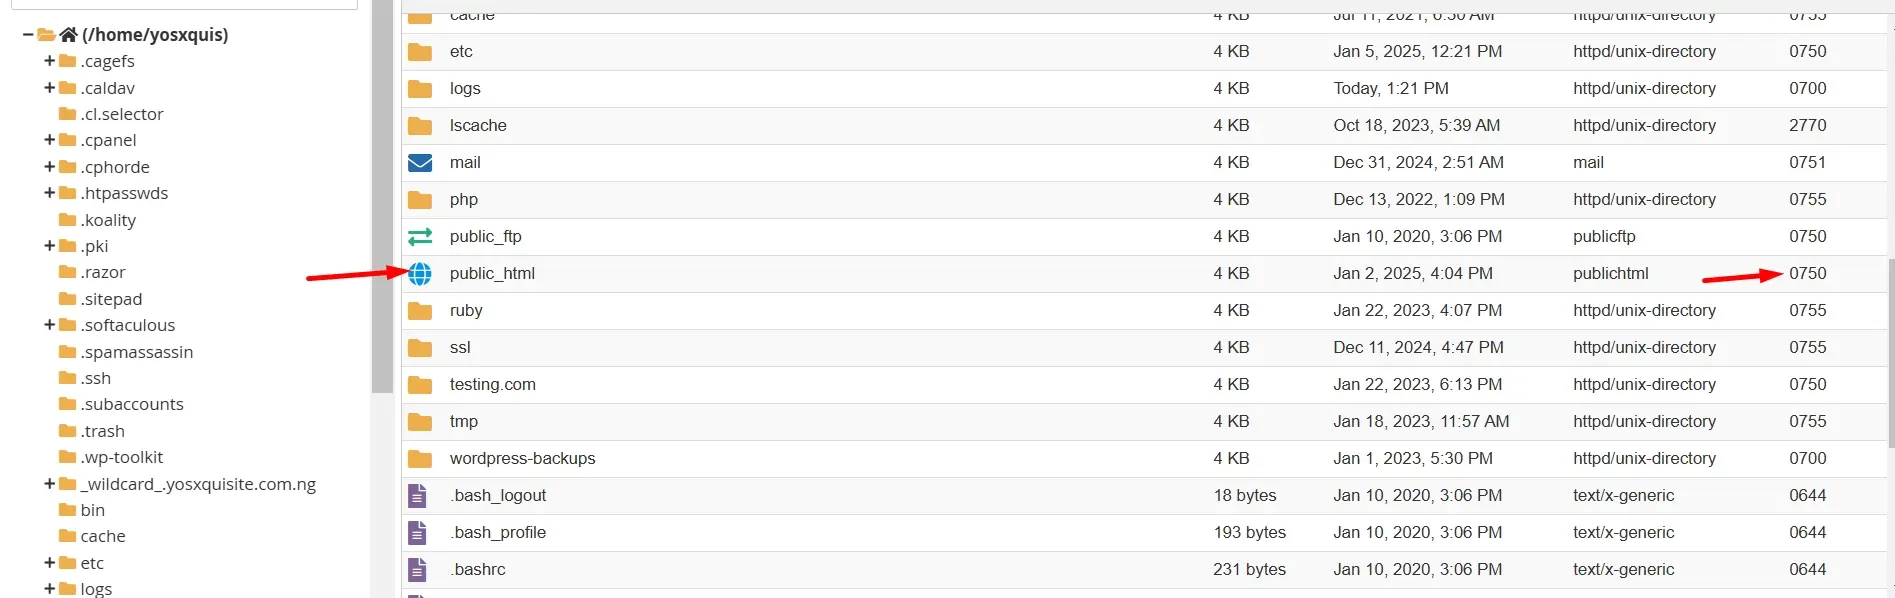
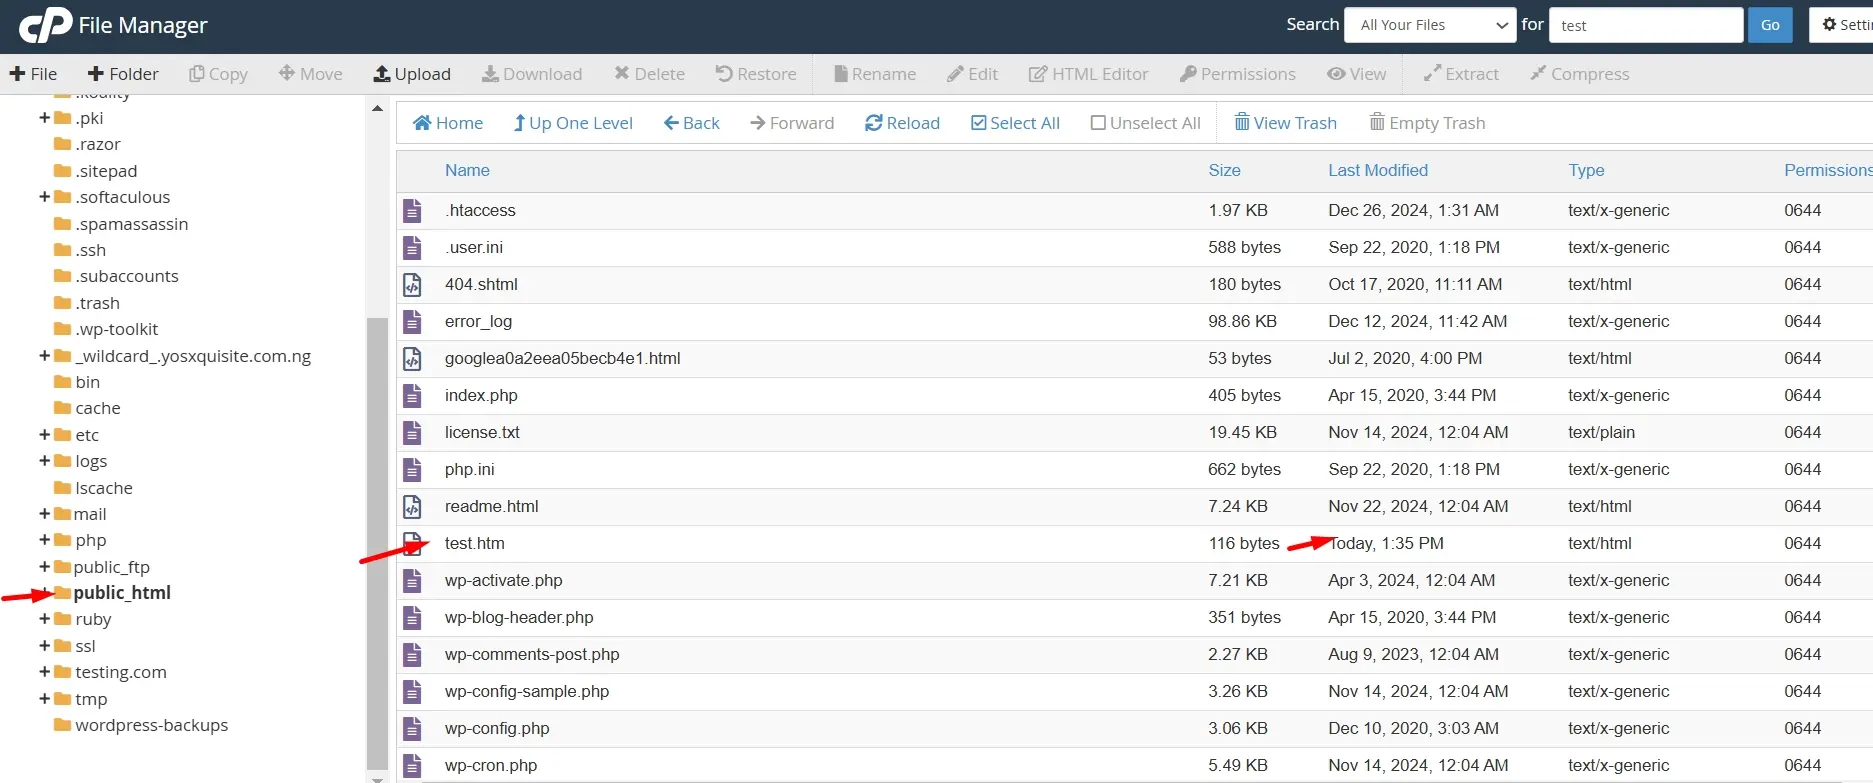
Within the File Manager, find and open the public_html directory. This is the document root for your website where your website files need to be uploaded to make them accessible to visitors. The public_html folder is crucial because it contains the files served to the public when someone visits your site.
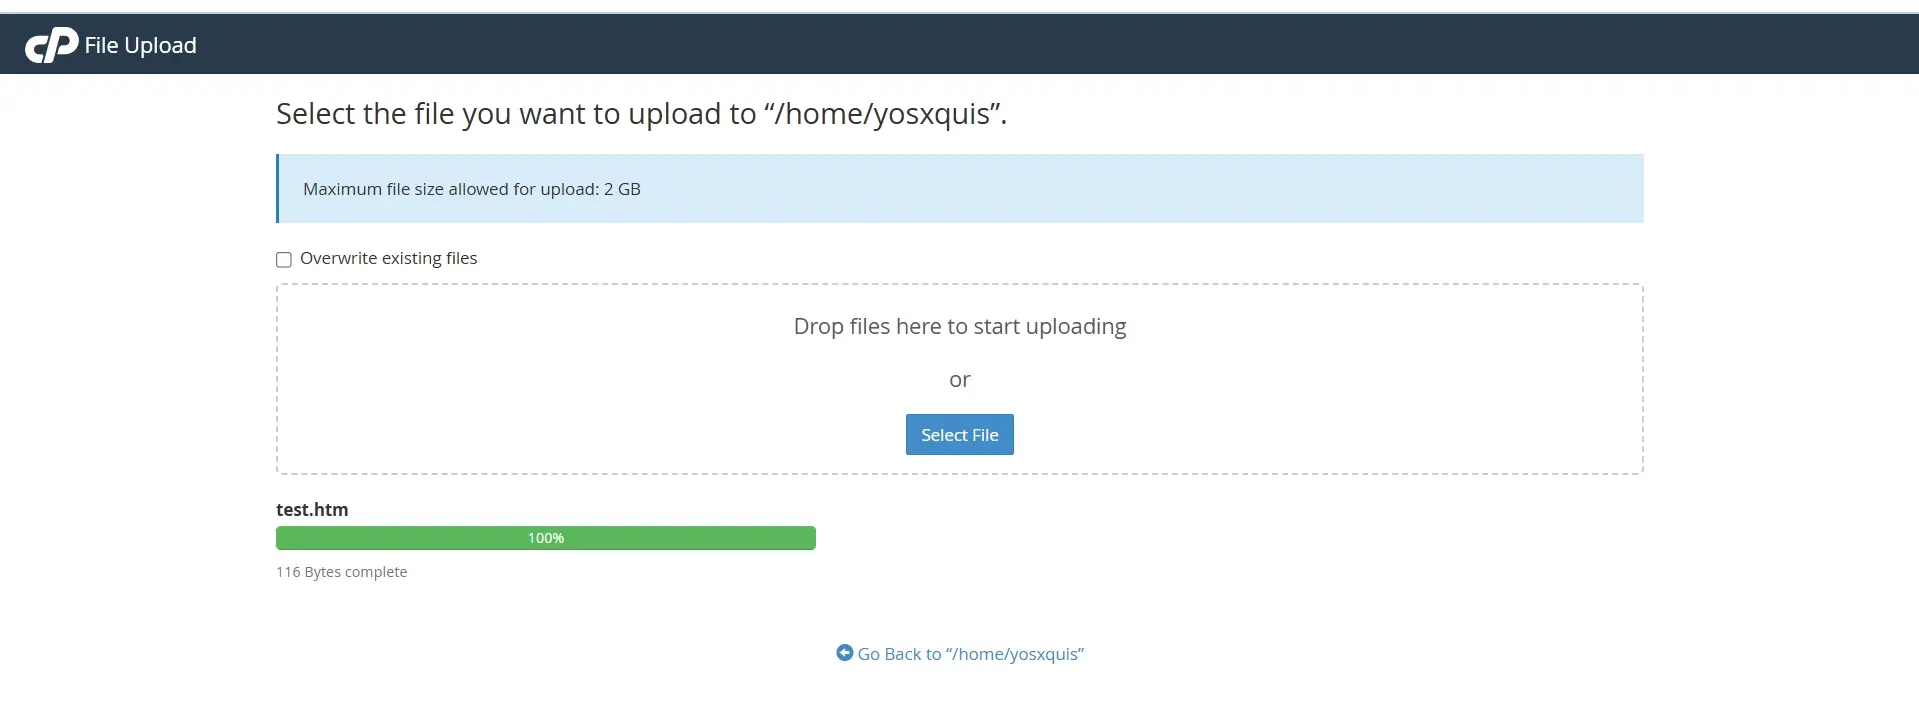
- Click the Upload button at the top of the File Manager interface. In the upload window, click Select File to browse your computer for the HTML file you want to upload. Select the file and wait for the upload process to complete.
- Once the upload is finished, return to the File Manager and confirm that your HTML file appears in the
public_htmldirectory. Ensure that the file has been uploaded successfully and is listed among other files in this directory.
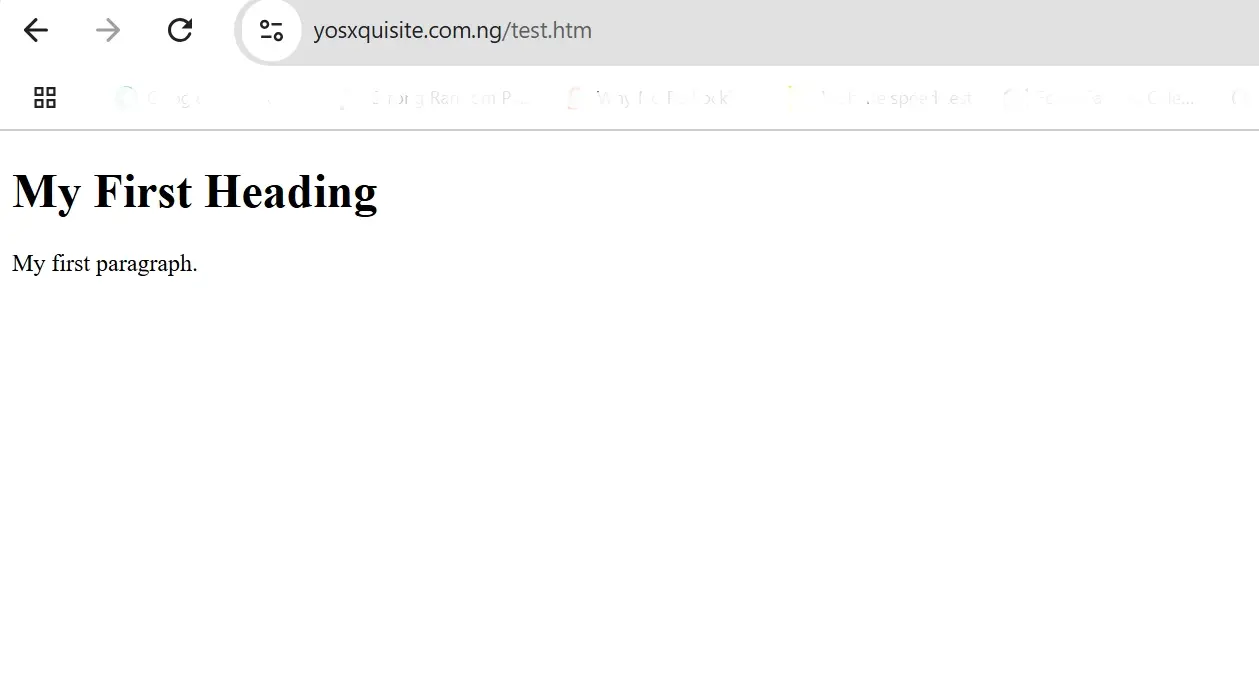
- Open a new browser tab and enter your website's URL followed by the file name (e.g.,
https://yourdomain.com/yourfile.html). Check that the file is accessible and displays correctly as expected. This step ensures that your HTML file is live and functioning on your website.
By following these steps, you can successfully upload your website files and manage them via cPanel’s File Manager.
Using File Transfer Protocol (FTP) for Uploads
FTP is a reliable method for transferring files and folders from your local computer to your web server. Here’s how to use file transfer protocol to upload your files:
Download and install an FTP client like FileZilla. This tool will help you connect to your web server and manage file transfers.
Open your FTP client and enter the FTP connection details for your web server. This typically includes:
Host: Your web server’s address (e.g.,
ftp.yourdomain.com). Port: The port number (default is usually21). Protocol: Choose FTP or SFTP (depending on your server's configuration). Logon Details: Your username and password for FTP access.Click Connect in your FTP client to establish a connection with your web server.
Once connected, navigate to the
public_htmldirectory on your server using the FTP client. Drag and drop your files and folders from your local computer into this directory to upload them.
By following these steps, you can efficiently manage and upload your website files using FTP.
Common Issues and Troubleshooting
1. File Size Exceeds Limit
When users attempt to upload files that are larger than the server's configured limits, they may encounter an error. To resolve this, check the server configuration settings for upload_max_filesize and post_max_size. If necessary, increase these values to accommodate larger files. Additionally, ensure that client-side validation, such as JavaScript file size checks, aligns with the server's limits.
2. Unsupported File Type
Uploads may fail or be rejected due to unsupported file formats. To address this, verify that the server permits the file types you wish to upload. Ensure client-side validation settings allow the same file types. If necessary, update both server and client-side validation rules to accept required formats and apply them consistently.
3. File Validation Errors
Errors related to file validation, such as incorrect file types or sizes, can cause issues during the upload process. Troubleshoot by reviewing and adjusting the validation rules on both the server and client-side for allowed file types and sizes. It's also important to provide users with clear, user-friendly error messages when validation fails, and log these errors for more detailed diagnosis.
4. Server Timeout or Connection Errors
Uploads can fail due to server timeouts or connection interruptions, especially with large files. To fix this, increase the server's timeout settings and ensure a stable network connection. Consider implementing chunked uploads or using temporary storage solutions to handle large files more efficiently and prevent timeouts.
5. File Path or Permission Issues
Incorrect file paths or permissions can prevent uploaded files from being accessed or saved. Check that file paths are generated correctly and that the directories used for file storage have the proper permissions. Ensure the server's file system has the necessary read/write access to avoid permission-related upload issues.
Managing and Troubleshooting File Uploads
To ensure your file uploads are successful and manage any issues, follow these steps:
Verify Uploads: Check the File Manager to ensure all expected files are visible in the public_html directory. If needed, click the Refresh button to update the file list and confirm the upload was successful.
Troubleshoot Permissions: If files are inaccessible or returning errors, check and adjust the file permissions. Use cPanel’s permissions tool to set files to 644 and directories to 755, ensuring they can be read or executed as required.
Handle Upload Errors: Pay attention to any upload errors, such as timeouts, incorrect file paths, or file size issues. Troubleshooting these issues may involve increasing server limits for upload size, verifying correct directory paths, or adjusting server timeout settings to handle large files.
Edit Files as Needed: If a file requires modifications after being uploaded, use the “Edit” button in the File Manager to make changes directly on the server without needing to re-upload files. This feature streamlines content updates.
Best Practices for Website File Management
1. Organize Files and Folders: Structure your website files and folders logically and consistently. This helps you easily locate and manage your files, reducing confusion and making maintenance more efficient.
2. Use Consistent Naming Conventions: Adopt a consistent naming convention for your files and folders. This practice ensures clarity and helps avoid conflicts or errors, especially when dealing with multiple files and directories.
3. Compress Large Files: Utilize the Zip feature to compress large files or folders before uploading them. This method not only speeds up the upload process but also makes managing and transferring multiple files more convenient.
4. Regularly BackUp Files: Perform regular backups of your website files to prevent data loss. Regular backups ensure that you have a recent copy of your site’s content in case of accidental deletion or other issues.
5. Leverage Content Delivery Networks (CDNs): Store static files like images, videos, CSS, and JavaScript on a CDN to enhance website speed and reduce server load.

Conclusion
Uploading your website files using cPanel is a straightforward process, whether you use the File Manager or FTP. By following the outlined steps, you can efficiently get your website up and running.
Remember to regularly manage and troubleshoot file uploads to maintain a seamless web development experience. Do not hesitate to explore and experiment with other cPanel tools to enhance your website management skills. Embracing these practices will help you keep your site well-organized and functional, ensuring a positive experience for your visitors.
Frequently Asked Questions
How do I access the cPanel File Manager?
To access the cPanel File Manager, log into your cPanel account using your hosting provider's login page. Once inside the dashboard, click on File Manager from the left sidebar. This will open the File Manager screen, where you can manage your website files and folders.
Can I upload HTML and CSS files using cPanel File Manager?
Yes, you can upload HTML and CSS files directly through the cPanel File Manager. Navigate to the public_html folder (or your domain’s public folder), click on the Upload option, and select your HTML and CSS files from your computer. Once the upload is complete, the files will be ready for use on your site.
How do I compress or upload a ZIP file in cPanel File Manager?
To upload a ZIP file in cPanel, go to the File Manager screen, navigate to the desired folder (like the public_html folder), and click the Upload button. After uploading, you can extract the contents of the ZIP file by right-clicking it and selecting "Extract.

Yetunde Salami is a seasoned technical writer with expertise in the hosting industry. With 8 years of experience in the field, she has a deep understanding of complex technical concepts and the ability to communicate them clearly and concisely to a wide range of audiences. At Verpex Hosting, she is responsible for writing blog posts, knowledgebase articles, and other resources that help customers understand and use the company's products and services. When she is not writing, Yetunde is an avid reader of romance novels and enjoys fine dining.
View all posts by Yetunde Salami


