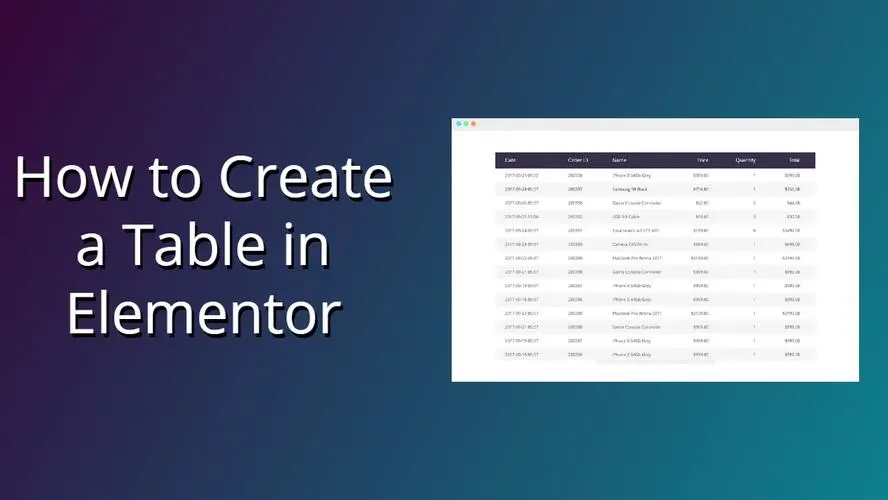
Do you use Elementor? Ever need to display a table on your WordPress site, but don’t know how? And no, not the table that you sit at for dinner. There are a lot of ways to approach this solution. In this article you’ll learn all about tables for content, as well as how to create a table in Elementor for WordPress.
What is Elementor?
Elementor is a robust page builder plugin for WordPress.
This plugin has a free and premium version. Out of the box, you can re-design a theme, or add more dynamic looking content to your site. You can edit your theme from the front or back using Elementor’s really user-friendly interface.
What is a Table?
A table, in terms of HTML, is a way that a web designer or developer can arrange and display data in rows and columns.
In WordPress, a table could be either one you use for showing data.
This data could be:
- Numbers
- Comparing items
- Organizing data
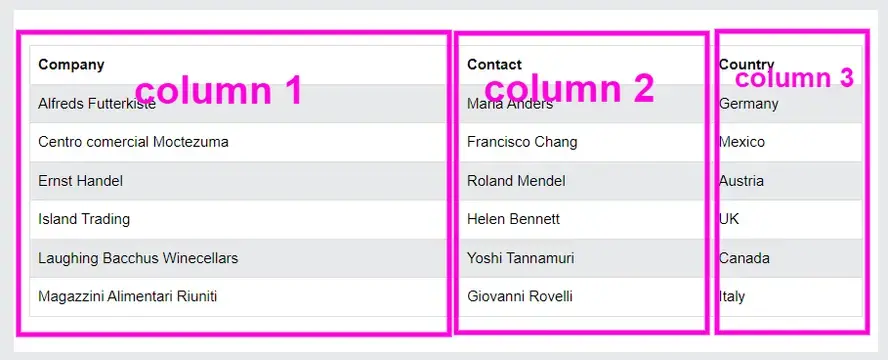
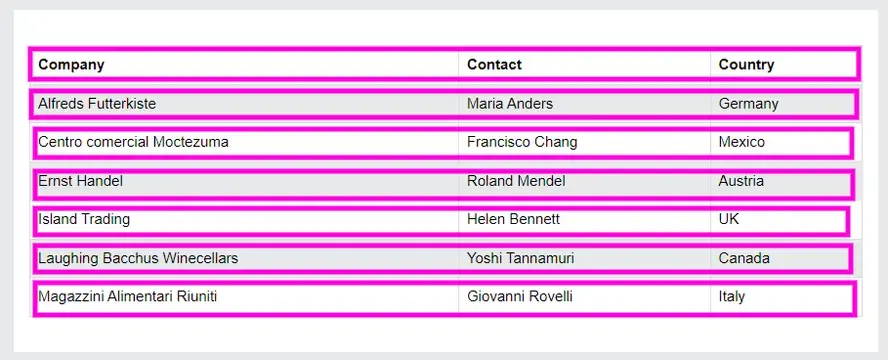
Tables consist of rows and columns.
Example of columns:
Example of rows:
Tables should never be used as a means to design a website. This was a trend back in the early 2000s, and a lot of websites didn’t render properly in the browser, and was a responsive design and accessibility nightmare.

When to Use Tables in WordPress?
So, when should you use tables in WordPress? Well, you can use it for things like pricing tables, or side-by-side feature comparison tables. You can use it to display data for a product’s weight and dimension.
Example of a pricing table:
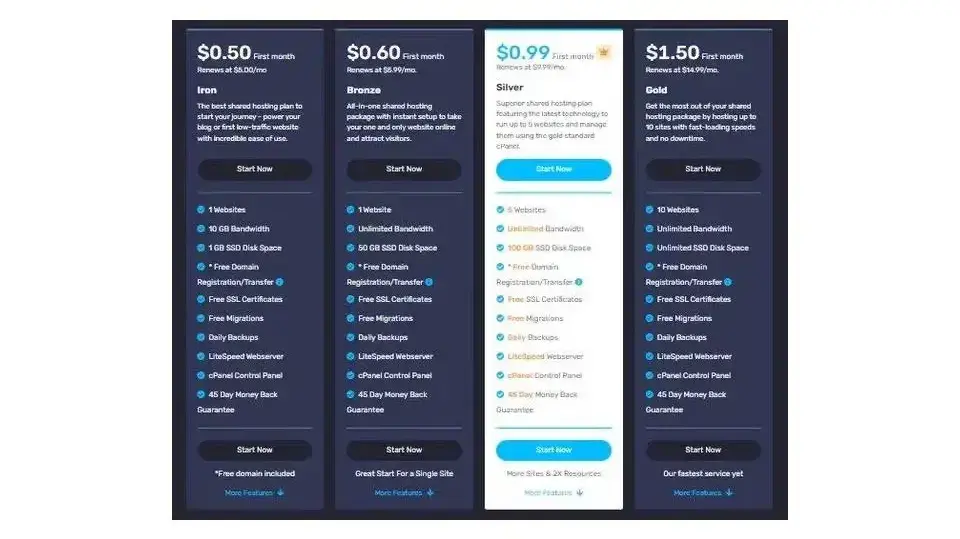
This pricing table also serves as a side-by-side package comparison for Verpex’s cloud hosting packages.
Table example that displays data:
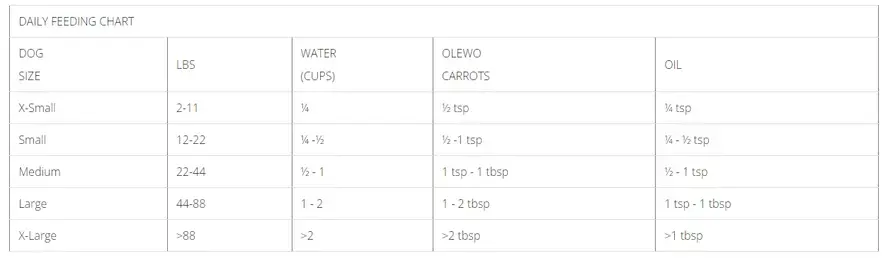
This simple data lists a daily feeding chart for dogs.
10 Steps to Create a Table in Elementor
In this tutorial, you’ll be learning how to make a table using the free versions of Elementor and TablePress. You’ll be setting up a basic feature side-by-side comparison. The pro version of Elementor does have a table feature, but TablePress does such a great job, especially if you need to save data and re-use the table in other places on your website.
- Install and activate Elementor
- Install and activate TablePress
- Go to Add new table under TablePress.
- Name your new table.
- Add table content.
- Adjust table’s settings and styling.
- Copy table’s shortcode.
- Open or add a new page, and choose to edit with Elementor.
- Search for ‘shortcode’ and drag the widget to the Elementor content box.
- Paste the shortcode for your table.
1. Install and activate Elementor
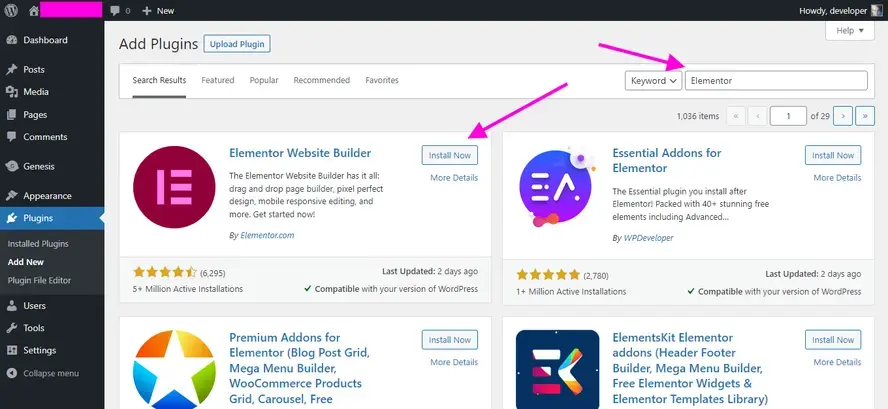
Install and activate the Elementor plugin. When you activate it, skip through all of the wizard steps. It will send you to a page to edit. You’ll want to keep the page open.
2. Install and activate TablePress
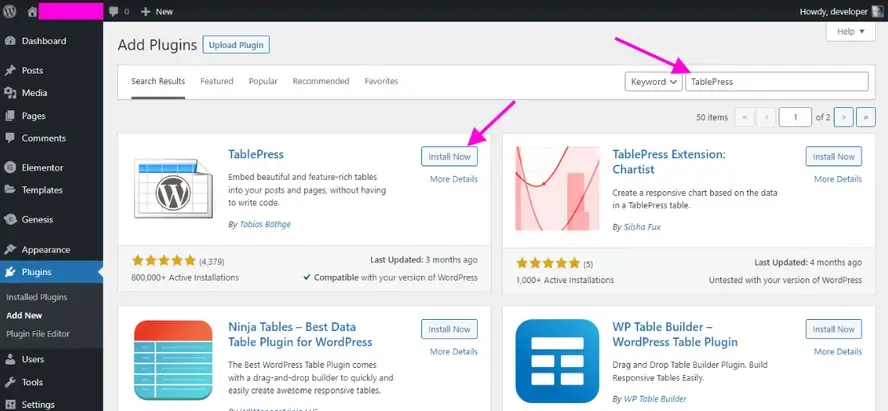
Install and activate TablePress. Unlike Elementor, TablePress doesn’t have a setup wizard.
3. Go to Add new table under TablePress.

While leaving a page to edit open, you will want to open a new browser tab and open your WordPress admin. You should have an area in your left sidebar of the WordPress dashboard that says TablePress. Under there, click “Add New Table.”
4. Name your new table.
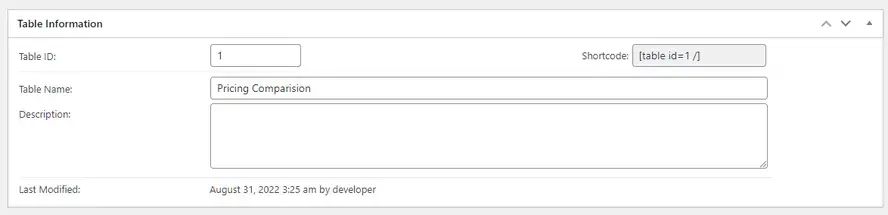
Make sure to name your table. If you create multiple tables in the future, you can easily find what you need.
5. Add table content.
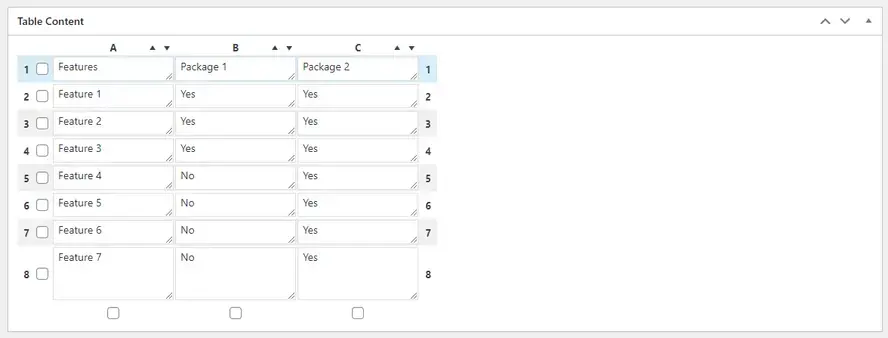
Add your table’s content. Make sure to use the first row to label each column. The rows beneath should be used to add your features. This table is just using example words. You can add your own.
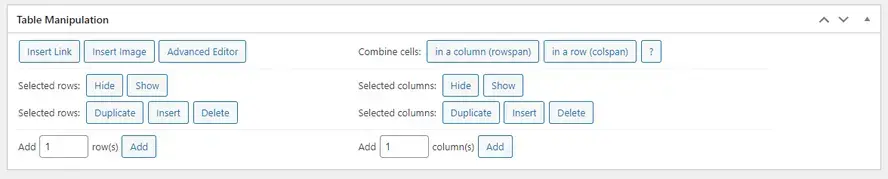
In the case your table needs more rows or columns, you can add them with the Table Manipulation section.
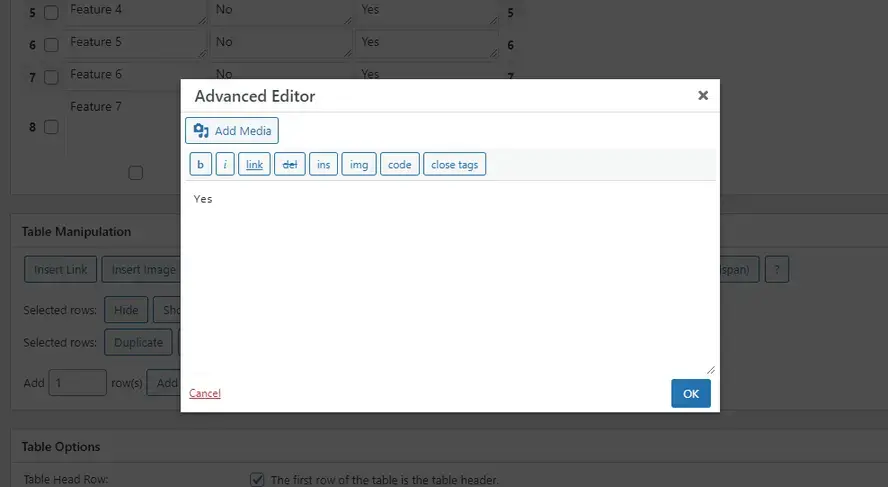
TablePress also offers an Advanced Editor if you need to insert images or other types of content. A great example of this is if you wish to add a small green checkmark image instead of Yes or a small red ‘X’ image for No.
6. Adjust table’s settings and styling.
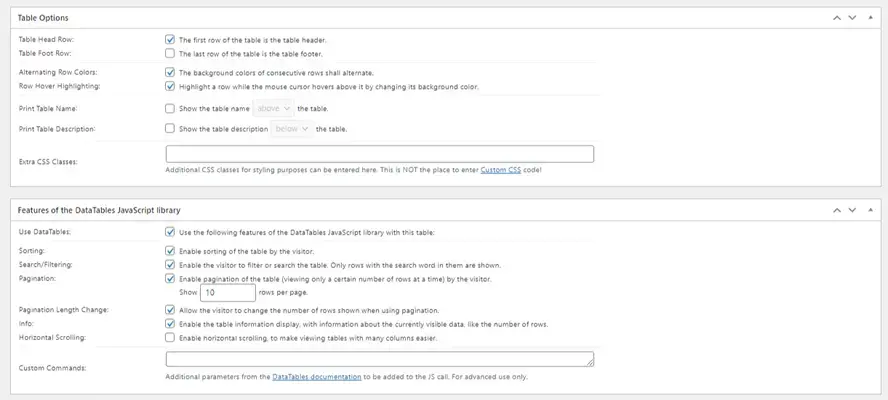
If you need to adjust your table and styling, you can do so with the Table Options. You can style each of your individual tables in TablePress and give them custom css classes.
Make sure to save your changes before going to the next step.

7. Copy table’s shortcode.
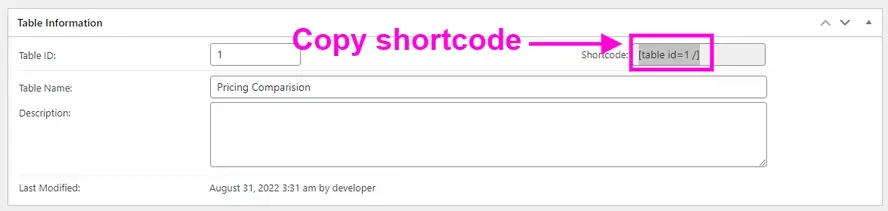
Before heading over to add your table into Elementor, you need to copy your table’s shortcode. You’re going to need this shortly.
8. Open or add a new page, and choose to edit with Elementor.
If you didn’t have a page already open to edit, you can either open an existing page or create a new page. Make sure to choose to edit the page with Elementor by clicking the big blue button that prompts you to open the page builder.
9. Search for ‘shortcode’ and drag the widget to the Elementor content box.
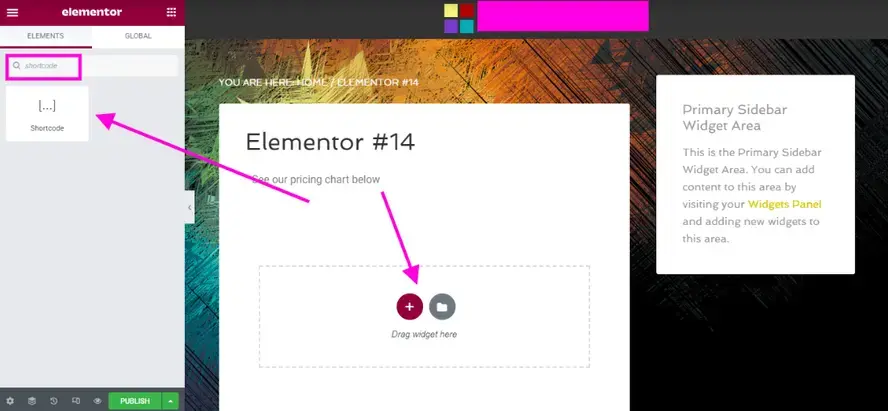
In the Elementor sidebar, you’ll want to search for the “shortcode” widget. When you have, drag and drop it into the area that says “Drag widget here”.
10. Paste the shortcode for your table.
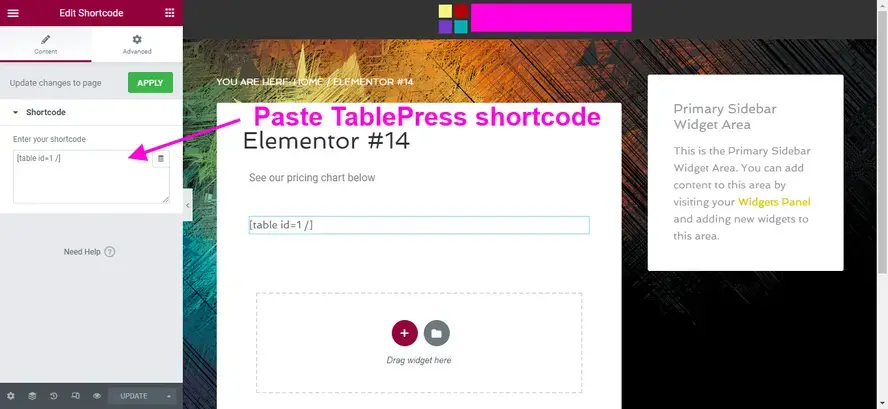
In the box within the Elementor sidebar, paste the shortcode in the box, that is under “Enter your shortcode”. When you do, you will see the shortcode in the content area. Please note that this will actually show your table once you’ve hit update and preview the page, like the image below.

The default TablePress styling can be altered to suit your needs. This is just a basic tutorial to help you get started making your own tables and how you can use TablePress with Elementor.
There are other types of table plugins that may offer more design features, or have specific purposes. If they have shortcodes, then they should work similarly with Elementor.
If you wish to display some pretty pricing tables, here are a few free plugins to achieve that:
PowerPack Addons for Elementor
PowerPack addons of Elementor actually adds a pricing table widget to Elementor so you can bypass purchasing Elementor Pro.
Easy Pricing Tables
Easy Pricing Tables allows you to create and store unlimited tables that are much prettier than TablePress. You can use this plugin similarly to TablePress, as it generates a shortcode that you can paste into Elementor.

In Summary
Now that you know tables, when to use them, and even how to create a table in Elementor, it’s time to try making your own. You can use TablePress or any other plugin that you like, that may offer more eye catching pricing tables. If you happen to come across any Elementor add-on plugins that you can achieve creating tables for free, then even better.
Frequently Asked Questions
Is WordPress free?
All you need to do to use WordPress is to invest in a web hosting plan since the software itself is free.
What is WordPress hosting?
WordPress hosting involves housing your website on servers dedicated to CMS WordPress. You can learn more about WordPress Hosting on our blog.
Why choose Verpex for WordPress?
As the leading CMS out there, we’ve made it our mission to offer the most comprehensive and streamlined WordPress solutions on the market. Backed by a responsive customer care team and reliable site enhancement tools, we ensure our users get the full WordPress value and support for a reasonable price.
What support will I receive for my plug-ins?
This depends on what you’ve purchased. Sometimes you may get support directly from your hosting provider, while with others you’ll need to contact the third-party platform directly.

Nile Flores is a long time professional blogger, as well as WordPress website designer and developer from the St. Louis Metro East. Nile blogs at NileFlores.com, where she’s passionate about helping website owners, whether they’re small business owners or bloggers. She teaches about Blogging, Social Media, Search Engine Optimization, Website Design, and WordPress. Additionally, Nile loves to speak at WordCamps (WordPress conferences) across the United States. When Nile isn’t knee-deep in coding, she’s a proud mom of a college student, and enjoys oil painting, cigar smoking, nail art design, and practicing traditional Okinawan kempo karate.
View all posts by Nile Flores


