It would be impossible to talk about GitHub without talking about Git. Git and Github complement each other, they both have specific uses, but they go well together. As a newbie, you should have heard of these terms and wondered what exactly is Git and GitHub. Git and Github are well known to developers because they go hand in hand, and to use GitHub, you should also be familiar with Git.
This article will outline the basics of working with Git and GitHub for beginners. We'll go over what Git and GitHub are, why you need a version control system, and some Git commands you should know.
Prerequisites
This article assumes that you already have the following:
A Command-Line Installed
GitHub Account
Code Editor (i.e VSCode)
What is Git?
Git is an open-source version control system that manages changes made in a source code. It allows you to perform different operations, such as fetching or pushing data from the version control server. If you're working in a large team with multiple developers, Git makes it easier for team members to work on the same project without disrupting work.
Git manages a repository, and a repository contains the history of changes made to a file related to a project or directory.
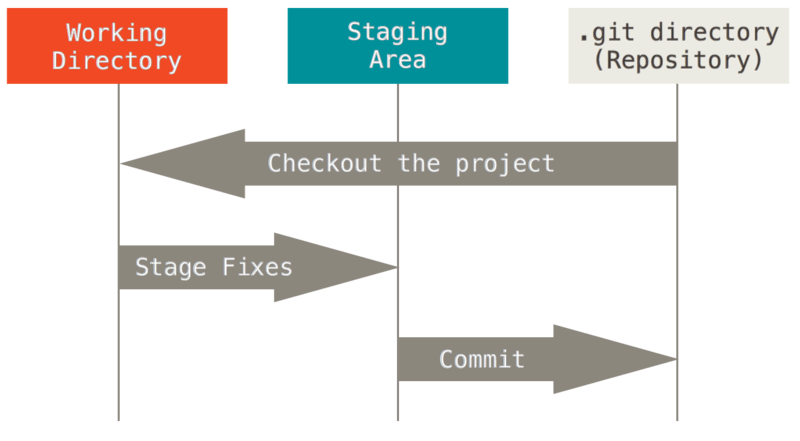
The Three stages of Git
The stages in Git are one of the most important concepts to learn, Git follows a three-stage process, and they include the following:
- Working Directory
This is a folder on your computer that contains projects and application files. This directory may or may not be managed by Git, but Git is aware of them.
Staging Area
This is a holding area for queuing changes for the next commit. In the Staging area, you can move files in and out without impacting the repository and the history of every change made.Commit Stage
This is the stage where you make a commit. Git takes the files in the staging area and stores them permanently in a GitHub directory.
How to Install Git for Windows
There are several ways to install Git for Windows, in our case, we’ll be downloading Git for Windows by going through the following steps:
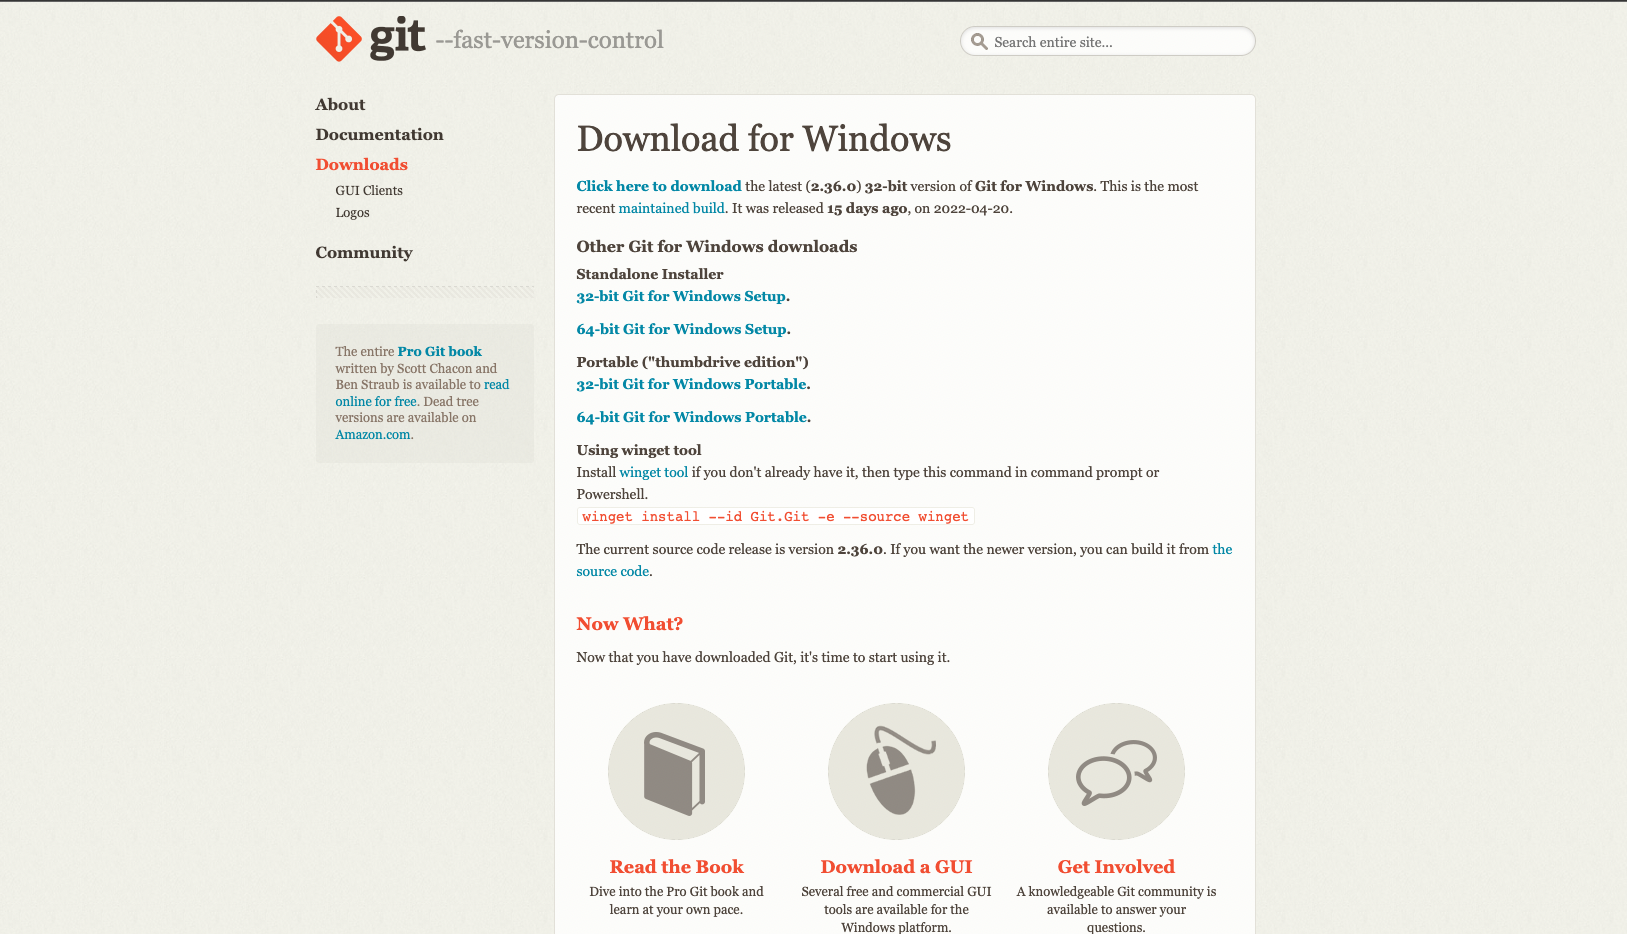
Choose the bit version of the operating system you're running. For instance, if you are running a 64bit version of Windows, choose the version of Git that matches your operating system.
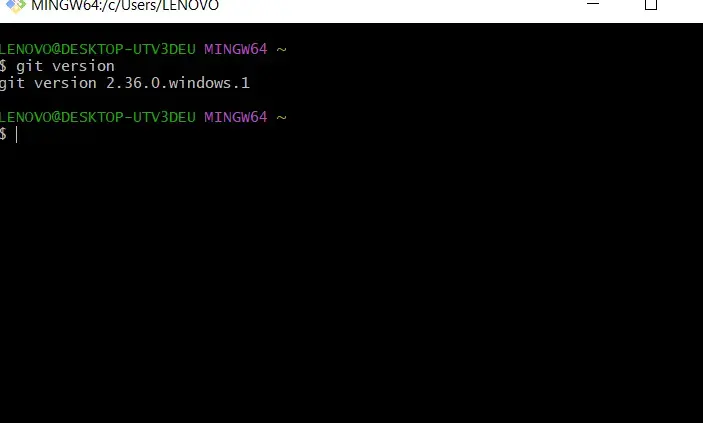
After the installer downloads, continue with the setup. To ensure that Git is installed, open the command prompt and type "git version" in your terminal. Git will respond by showing you the version of Git installed.
How to Install Git for Mac
There are several options for installing Git on macOS. We’ll use Homebrew to install Git, here’s how to do it:
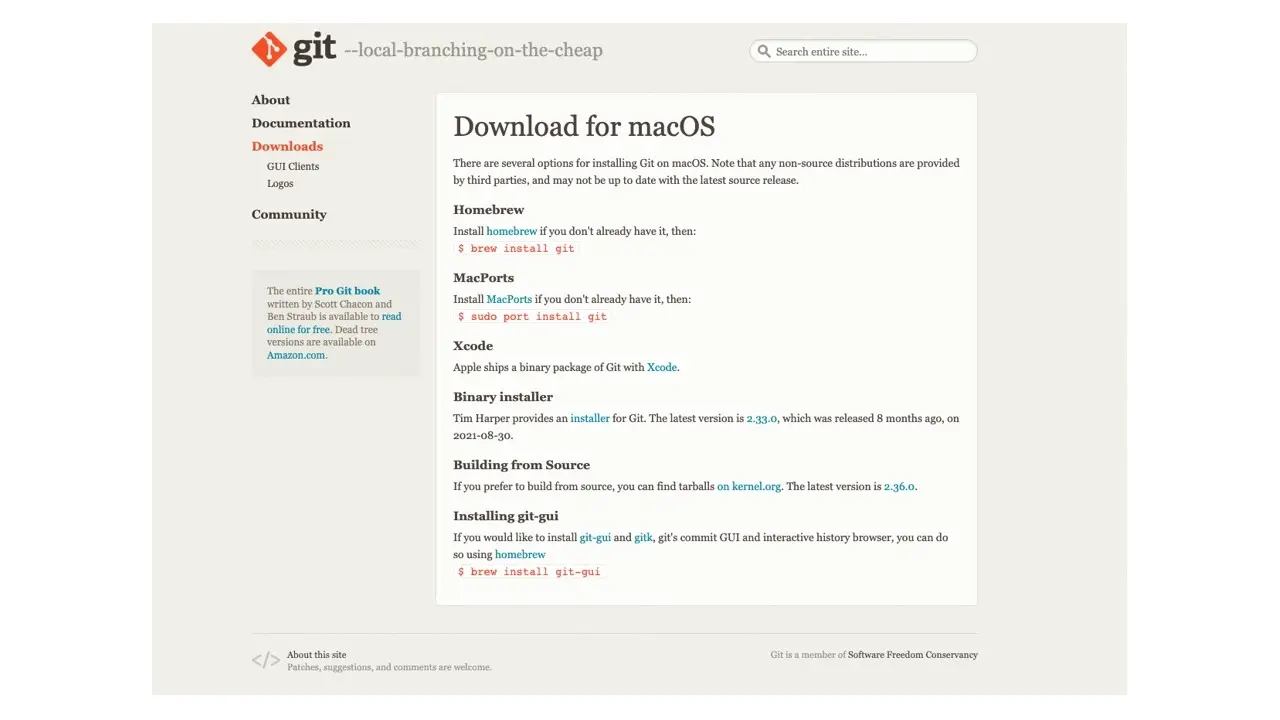
Make sure you have Homebrew installed by running the command:
brew - - version
Next, use the following command to install git:
brew install git
After that is completed, you can confirm you now have Git in your system by running the command:
git --version
The current version on my system is then returned:
git version 2.30.1 (Apple Git-130)
Getting Started with GitHub
There are a lot of Git repository hosting services on the internet. However, GitHub is the most popular one. GitHub is a Git repository hosting service used for software development and version control using Git. It's a website that allows anyone to host their Git repositories. With GitHub, people worldwide can work on the same project simultaneously to collaborate on one project at a time.
Why do we need GitHub?
You may ask yourself this question, why do I need GitHub? There are a lot of reasons why learning GitHub is beneficial to you:
Code Tracking: GitHub helps you track changes made to your code that have been pushed to your repository.
Showcase: Many companies check GitHub profiles when hiring. It's a great tool to display your work and gives you a better chance of employment.
Open Source Contribution: Because it's an open-source tool, you can contribute by making changes to other open-source projects or allowing other developers to make changes to your project.
Documentation: GitHub documentation has a lot of good content to help you learn the fundamentals of Git.
Basic Git Commands
These are some basic git commands that you will use throughout your git workflow. It is essential to familiarise yourself with them and understand their use.
git init: This command “init” is used to start and create a new repository.
git add: This command is used to add files in a repository to the staging area.
git commit: The commit command comes after git add, and it is used to save changes to a local repository. These changes are then added to the staging area.
git status: git Status shows the status of the working directory and the state of the staging area. It shows the changes that have been staged, stages that haven’t been staged, and also files that are not being tracked. It simply tells a story of the events between git acc and git commit.
git clone: git clone is used to make a copy of a selected repository into a new directory. This command is used to create multiple versions of the same code running on the same machine.
git branch: The branch command can be used to create, rename, list, and delete a branch.
git push: The push command is used to push files from a local repository to a remote repository. When changes are made to a local repository, the push command shares this change or improvement to a remote repository.
git pull: This command combines fetch and merge changes from a remote repository to a local repository. It can be said to be the opposite of the push command.
git checkout: This command works together with branches, it enables navigation within branches. In other words, with git checkout, you have the ability to switch between branches.
git merge: The git merge command integrates different branches into a single branch.
Working With Git on your Local System
The first thing to do is open Git Bash for Windows or Terminal for Mac OS x. You can also use a third-party terminal program such as iTerm2 for Mac. When you open your terminal program by default, you will be in your current working directory or home directory, and you can confirm this with the command:
pwd
To create a project directory where you can manage your files, enter the command
mkdir projects
In other words, you’re saying create a directory called projects. After creating a directory, navigate into the directory by using the command:
cd projects
Before you can use Git to the fullest, it is essential to set up your user credentials, including your username and user email address, in your git configuration file.
To do this, open your terminal, and enter the following commands:
git config - - global user.name "user name"
git config - - global user.email "user email"
To confirm that the email and address are registered, enter the command:
git config - -global - - list
The command will return a list with your username and user email entered.
How to Create a Repository On GitHub
A repository is a storage space where you store files and folders. Creating a repository is like making a storage space where you want your files to live. A repository contains all the files and folders for your project, including the revision history for your project files.
To create a new repository, make sure you already have a GitHub account and use the github.com/new URL to navigate the create repository page.
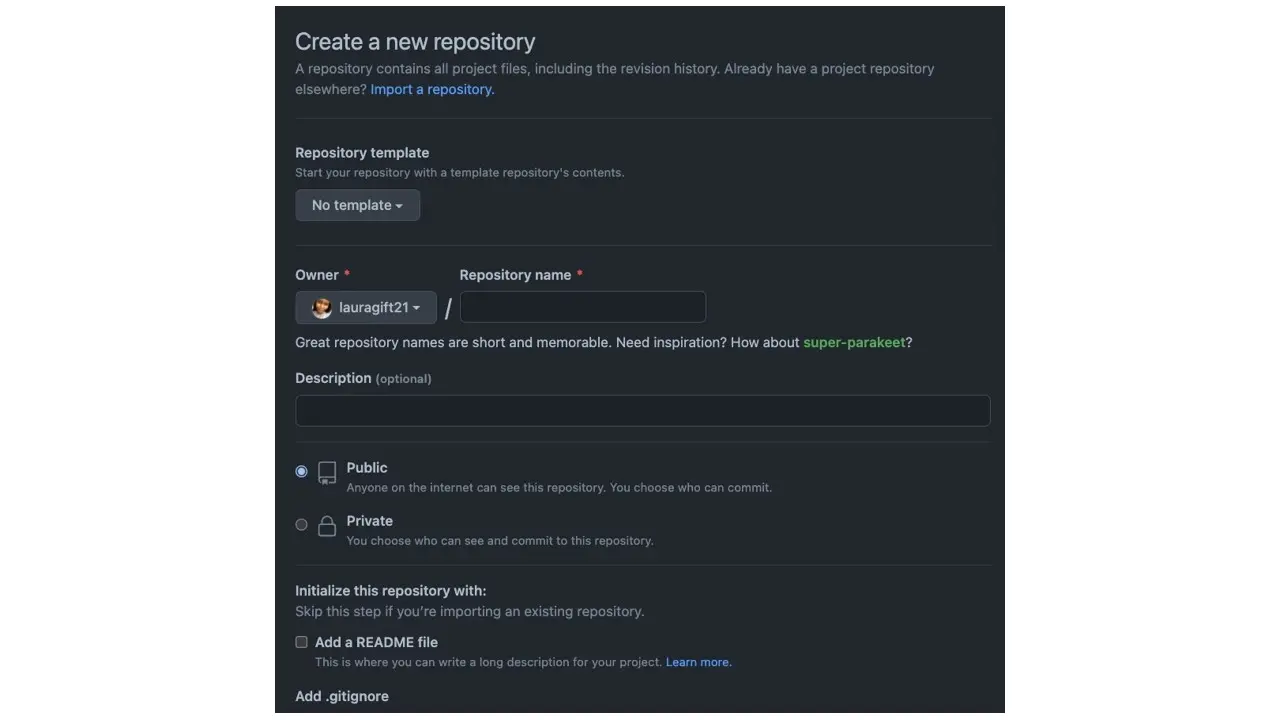
You'll be prompted to enter a repository name and description, as shown in the image above. You can also include a README file that will describe your project in detail.
After you create a repository, GitHub will suggest some commands for you to run in your terminal. You can import the local folder stored on your computer or push it to an existing repository.
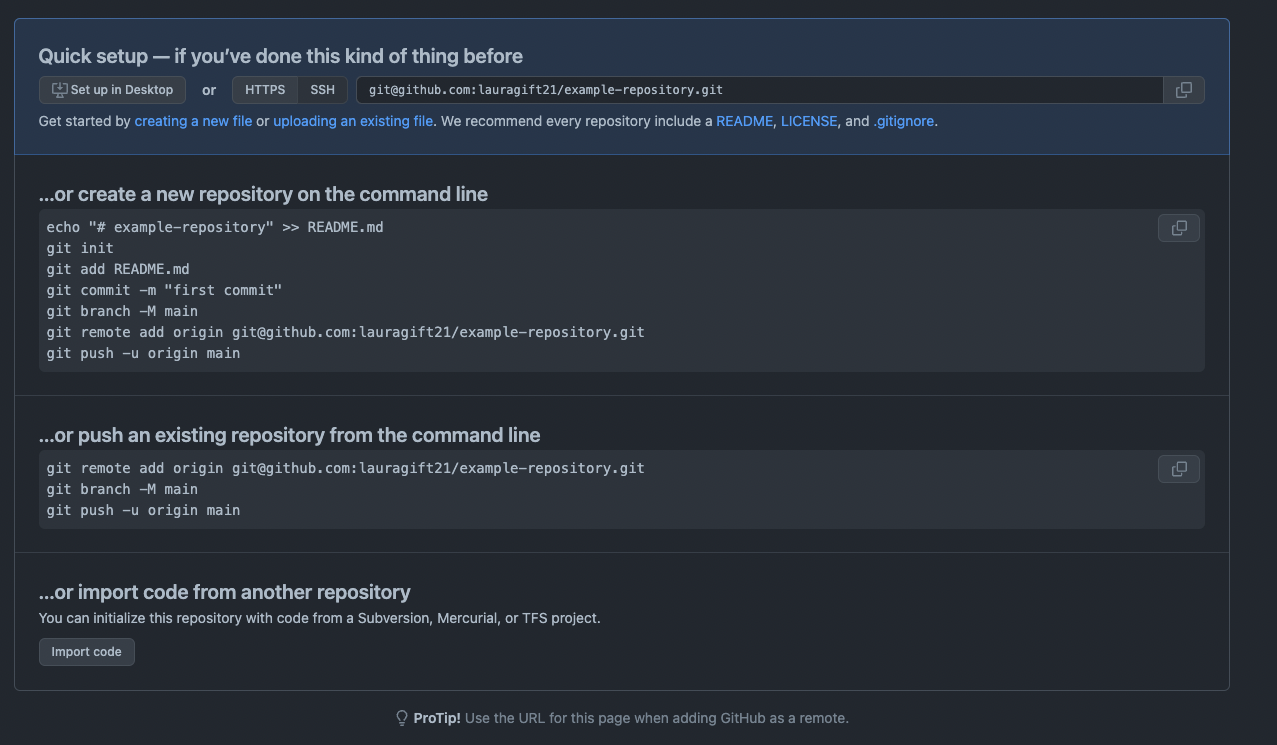
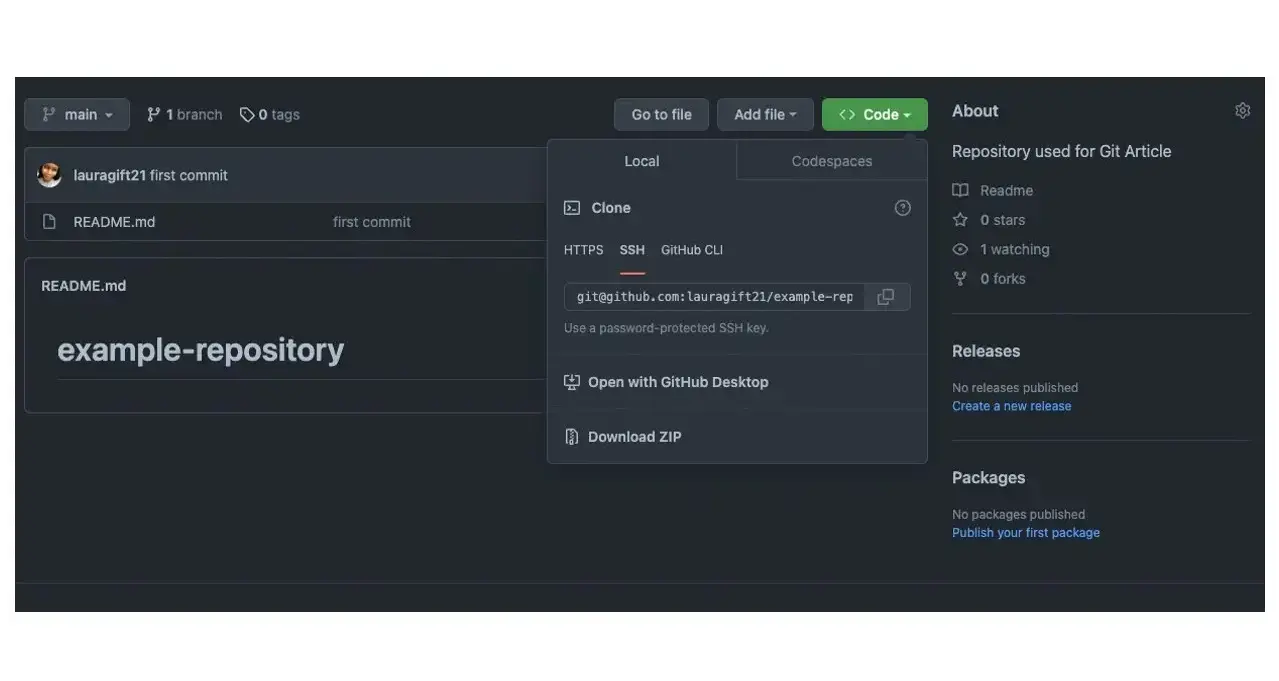
How to Clone a Repository
How do you copy a repository from GitHub to your local system to work on it? To do this, you need to make a clone of the GitHub repository using either the HTTPS, SSH, or GitHub CLI command when you click the Code dropdown. I like to use SSH or GitHub CLI options because, with this, I don't always have to authenticate with my username and password when I make a push or try to pull from the repository.
After copying the URL, go back to your terminal, type git clone, and paste the URL you copied from GitHub.
git clone [email protected]:lauragift21/example-repository.git
Git will automatically create a directory named after our repository. This can be confirmed by typing the command ls command, which will list out all the content of our directory.
To check the status of the repository, use the command git status. This shows the current status of the branch you're working on and if there have been any modified files or new files created.
example-demo git:(main) git status
On branch main
Your branch is up to date with 'origin/main'.
nothing to commit, working tree clean
In the code block above, you can see that we are on the main branch. This command tells us that the git repository is current and the working directory is clean. The working directory is where all the work is done and also where Git monitors all the changes that occur. In simpler terms, the status command is used to monitor changes between the working directory, staging area, and local/remote repository.
How to Create and Manage Branches in Git
Creating Branches in GitHub helps you work on different versions of your repository at once. For example, if you are working in a team and want to make changes to the project, you want to include a new feature. Still, you don't work your work to conflict with your teams. You can create another branch to make the changes and then decide if you would like to go ahead before merging it with the main branch.
Branches allow you to work on the same files on a project simultaneously. A file or folder change can be made to a source code without affecting the main branch. After all the changes have been made, the sub-branch is merged into the main branch
To create a branch from your terminal, use the command:
git branch -m 'name-of-the-branch'
How to Make Commits in a Git Repository
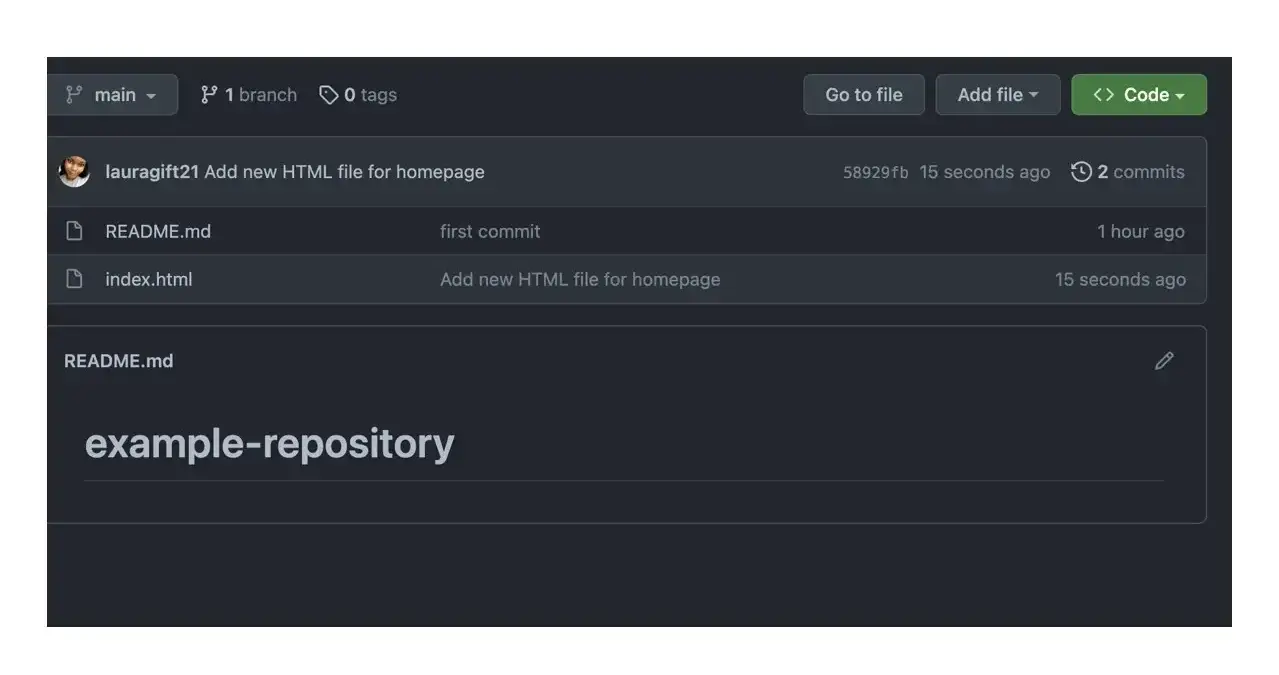
The commit command allows you to save changes to a file. When you make a commit, ensure that you include a message that details the changes made. One advantage of having a commit message is that it helps other contributors understand the changes you added every time you commit a file. Let's see an example of how to make a commit and write a good commit message. We'll create a new file called index.html in our current working directory using the command:
touch index.html
Inside the file, we can include a barebones HTML template. To make this new file to our GitHub repository, We have to commit the file change and push the change up to the repo after that.
To commit this file, we’ll ruin the following commands:
git status
git add index.html
git commit -m 'Add new HTML file for homepage'
I like to run git status every time. To know the current state of my files, the Git add command will update the index using the recent content found in the working directory. Now your file is in the staging area waiting for you to commit. Next, we run the commit command, which will record the file changes in the repository.
How to push changes as commits on GitHub
Since our new file has been added to our local repository, we should note that it hasn't been added to GitHub yet. If we go back to check our GitHub page, we'll realize that no change has occurred. We have to push the file from the local repository to GitHub. To do this, In the terminal or git bash and type the following command:
git push origin main
This specifies the remote name "Origin" that was set up for us automatically by GitHub and the name of the branch to push to called "Main".
After this step is done, the new file "index.html" should be saved on the Github repository. We can verify this by going to the GitHub repository, and we should see a new file has been added.
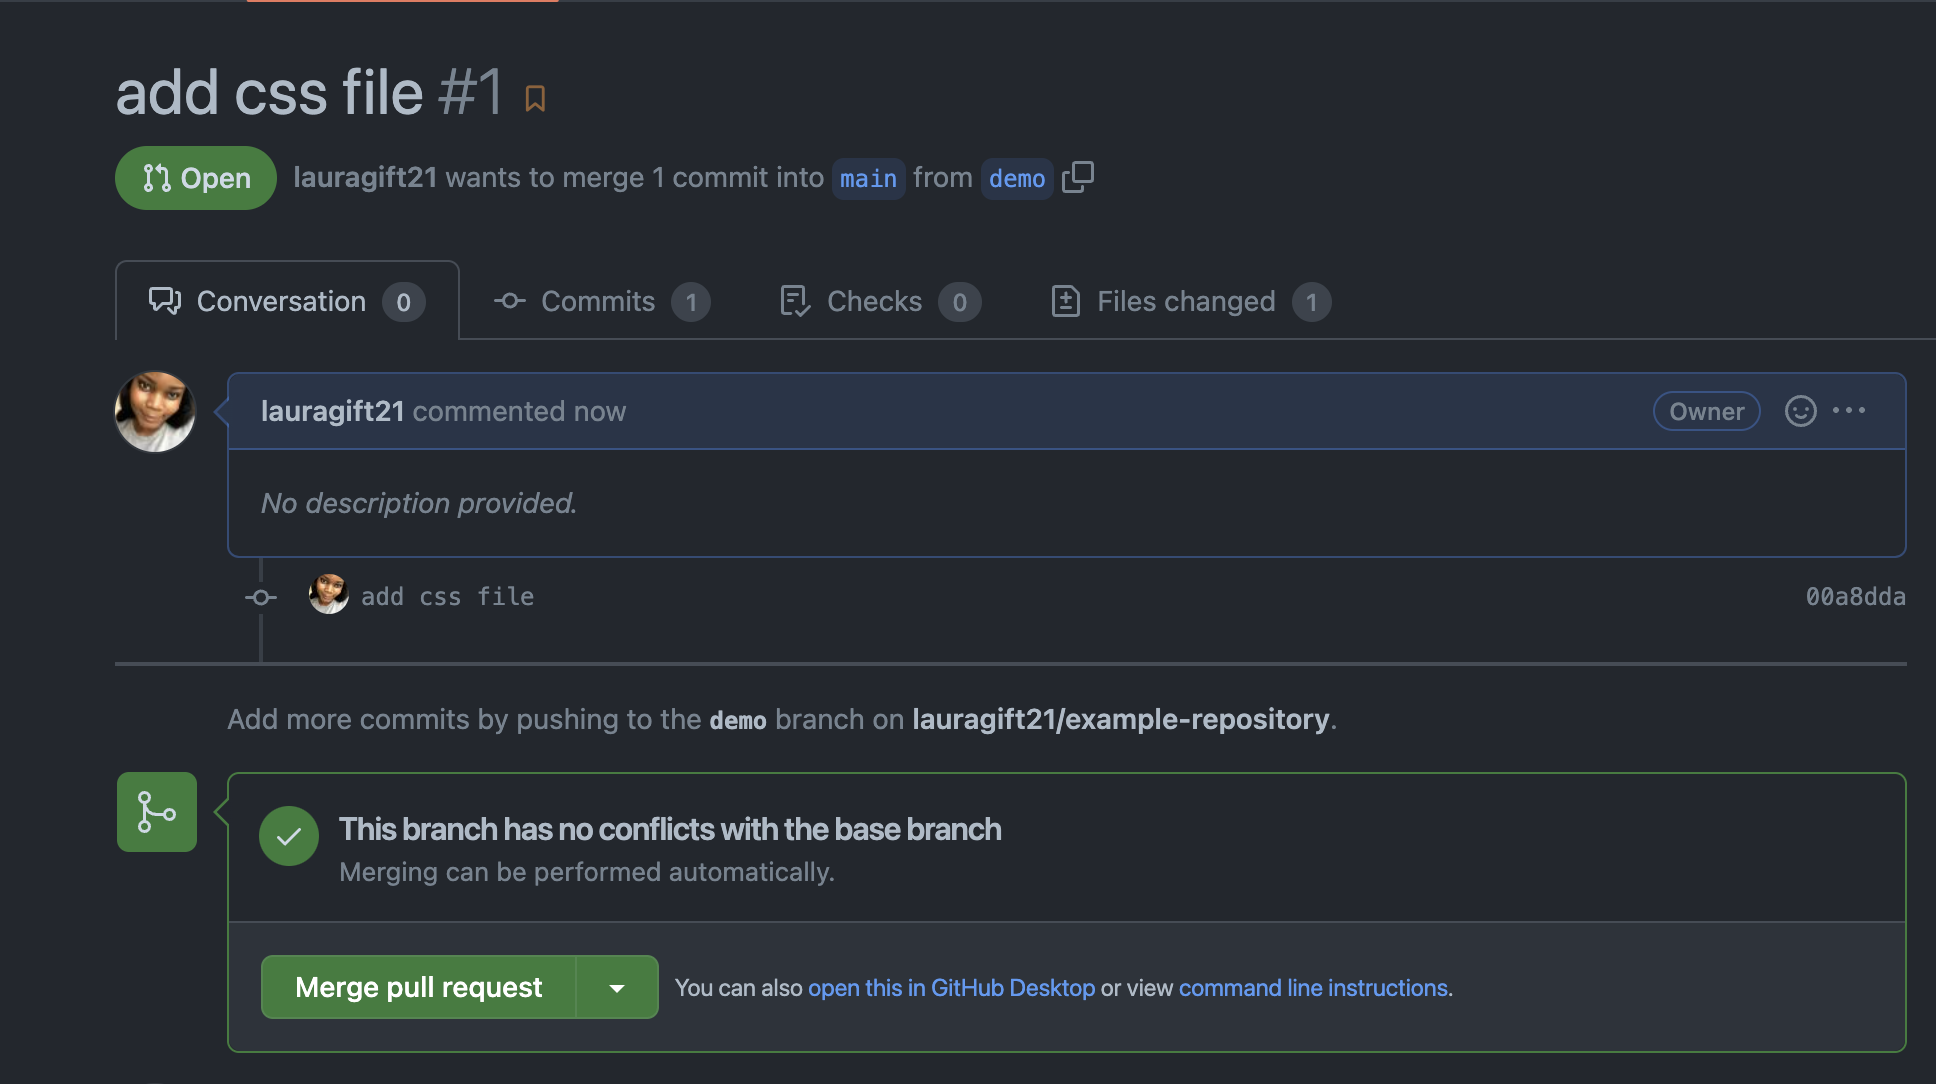
How to Open and Merge a Pull Request
Remember we mentioned git branches are used to work simultaneously on the same repository. What if we have multiple branches and we need to merge them into the main branch, which is the single source of truth for our repository. To do that, we need to make a Pull Request. A Pull Request or Merge Request, commonly called PR, occurs when a contributor or team member working on the same repository asks for changes in their branch to be merged into the main repository.
To open a PR on GitHub, you need to make sure your branch has the current changes you want to merge in by making a commit and push to the remote branch.

On GitHub, we see a new popup with the newly created branch that has some changes and a button to compare & pull Request. Click on the button to take you to the next page to open a PR. Here, we can change the name of the PR, add a comment for whoever will review it, and click the create a PR button.

Next, we'll see a new page confirming we just created a new Pull Request, the PR can then be reviewed by someone else on the team or another collaborator, and after that, it is merged into the main branch.
The GitHub CLI
GitHub CLI is a command-line tool that enables you to make pull requests, clone repos, create issues, and other GitHub features directly on your terminal, making it easier to do all Git-related work in one place. GitHub CLI is an open-source tool for using GitHub from your computer's command line.
Some features of the CLI include:
View, create, clone, and fork repositories
Create, close, edit, and view issues and pull requests
Review, diff, and merge pull requests
View and list workflows
Create, list, view, and delete releases
Create, edit, list, view, and delete gists
Conclusion
Your very first "commit" can be very exciting. Learning the basics of Git will help you understand the concept better and be a great starting point for you to understand how to work with version control and hosted repositories platforms like GitHub. You can do so much more with GitHub, and we hope this article helped you get started.
Learning these concepts is essential for your journey to learning software development because Git & GitHub is a fundamental skill required for working as a developer.
Frequently Asked Questions
Which hosting provider should I choose?
This will depend on your budget, how much bandwidth you need, server locations, speed, and security measures. We’d recommend doing extensive research.
Will clients know I’m renting space from a hosting provider?
You can freely promote the business with your name on it since the customers won’t know who your actual upstream hosting provider is.
Do I need to provide all the technical expertise when choosing dedicated hosting?
No. You can choose to opt for a fully managed service in which Verpex will take care of administration and maintenance. However, this can usually be quite expensive.
How does Verpex help with my reseller hosting?
Our job doesn’t end once we’ve sold you the reseller space. In fact, we’re with you for the whole time you’re hosting with us, supporting both your needs and that of the customers you pick up along the way, whether you max out your cPanel account limit or not.
The Verpex team is at your disposal, acting as your essential support team 24/7. That means anything pertaining to hardware, the network, updates and configuration, security, and connectivity, is all handled by us.
Both you and your customers can focus on running your businesses while we take care of all maintenance and troubleshooting with expert technical support.

Gift Egwuenu is a developer and content creator based in the Netherlands, She has worked in tech for over 4 years with experience in web development. Her work and focus are on helping people navigate the tech industry by sharing her work and experience in web development, career advice, and developer lifestyle videos.
View all posts by Gift Egwuenu