
Whether you run a web development agency and offer your clients hosting or you’re a brand with multiple landing pages/ microsites, there are numerous benefits to hosting multiple websites on the same server. In this article, we’ll explore why you may want to consider doing this, what the benefits are, and how you can implement this on your Verpex web server.
Pros and Cons of Hosting Multiple Websites on the Same Server
There are both advantages and disadvantages to hosting multiple websites on the same server. One of the main reasons for hosting sites in this way are the potential savings you can expect to make - let’s take a look at an example.
Advantages of hosting multiple websites on one server
Verpex offers four different cloud hosting plans, ranging in price from $5.00 per month up to $14.99 per month. The cheapest plan, Iron, priced at $5 per month, allows one website to be hosted on the server. In contrast, the Gold plan allows users to host up to 10 sites on the server for the cost of $14.99 per month (or $1.49 per site).
If you have 10 different sites to host, the savings between using 1x Gold plan vs 10x Iron plans from Verpex, would come to over $35 per month!
Another benefit to hosting multiple websites on the same server is a decrease in the amount of admin work that will be required.
Looking at the same example above, if you were to host your 10 websites across different servers, you would have 10 monthly invoices to pay, 10 servers you have to keep up to date, and 10 sites to set up backups for.
In contrast, if you hosted these 10 sites on the same server, you would have just 1 invoice to pay each month, 1 server to keep updated and 1 backup to configure – far easier, no?
Disadvantages of hosting multiple websites on one server
After reading the above, you’d be forgiven for already deciding to move all of your websites to a single server. But, as with everything, there are always drawbacks to this approach which it’s important to understand before proceeding.
The first disadvantage to hosting websites in this way is that your web servers resources will be shared across all of your sites.
In practice this means the SSD space, CPU and RAM will be distributed across all websites and this may adversely affect performance, particularly if one or more of your websites are especially resource intensive.
Another drawback to hosting websites in this way is that if you plan on sharing FTP, database or cPanel access, you need to make sure that your hosting provider provides granular access controls and permissions that you can set up. If they don’t and you share FTP details with a client, it’s possible that they could access the files for all of the other websites on your server. The same goes for database access which is equally, if not more, important.
Make sure that your hosting provider provides granular access controls and permissions that you can set up.
For these reasons I would generally recommend that the only cases when it’s appropriate to host multiple sites on the same server is: if the websites are lightweight and not resource intensive and you have no requirement to share access with others (e.g. you will be hosting multiple websites belonging to the same organisation), or have at least checked sufficient access controls can be setup if required.
Guide to Host Multiple Websites on One Server
If you’ve decided that the benefits of hosting multiple websites on the same server outweigh the drawbacks, follow the steps below to set this up.
Note: we are using a Verpex Cloud Hosting Web Server for this tutorial - if you are using a different hosting provider the appearance of the screens may be slightly different, but the core steps should remain the same.
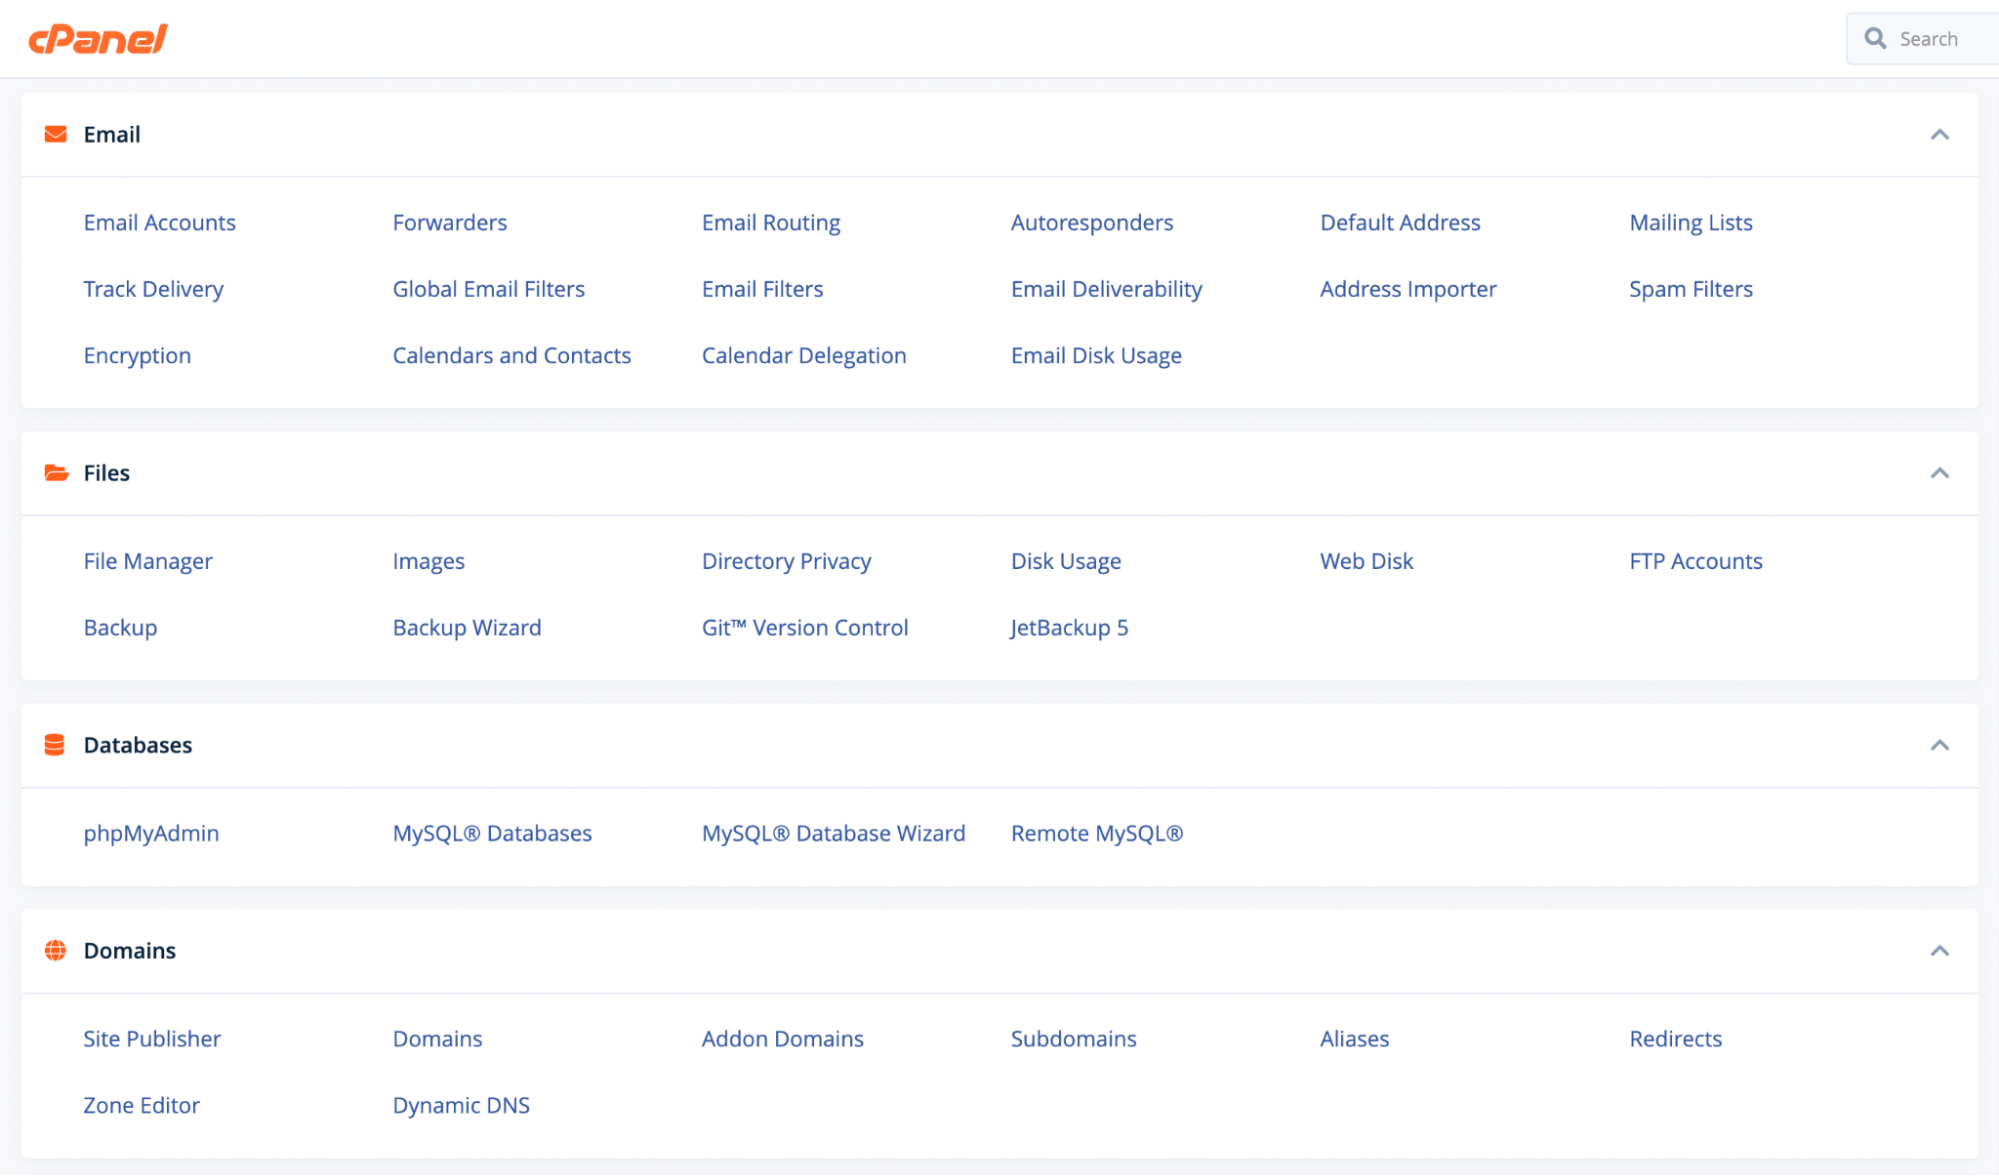
Let’s get started by logging into your Verpex account. From the dashboard, navigate to the Control Panel by clicking the button highlighted in the screenshot below
Once clicked, you should be redirected to a page that looks similar to the screenshot below - this is called the cPanel and is the beating heart of your web server - from here you can control all of the settings relevant to your hosting account:
Under the ‘Domains’ section, click the ‘Domains’ link. The page you are redirected to will look similar to this:
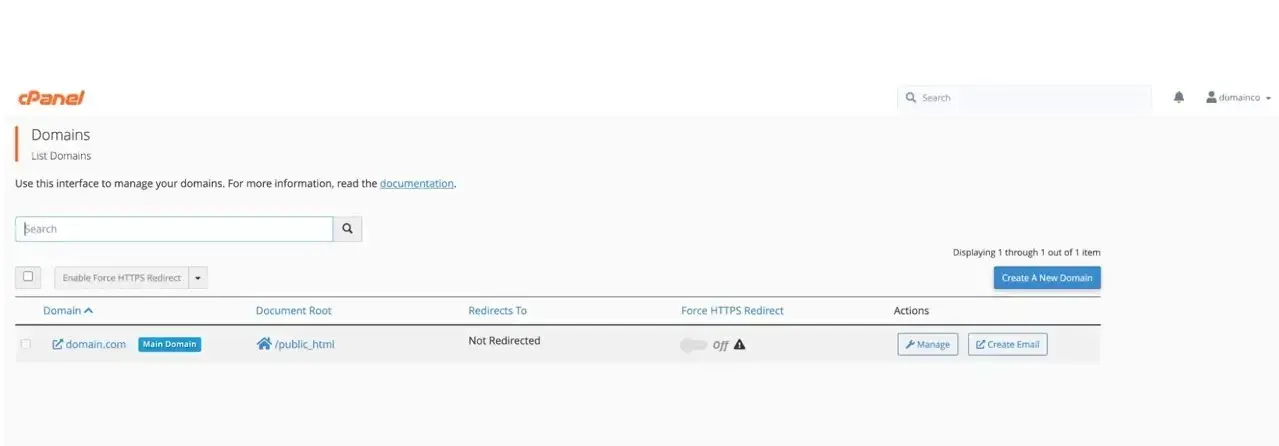
Currently, there will only be one domain in the list and for the purposes of this tutorial, we will assume that you have already pointed this to your server’s IP address.
Click the blue ‘Create a New Domain’ button and type the domain name you would like to connect to your server into the field at the top of the form.
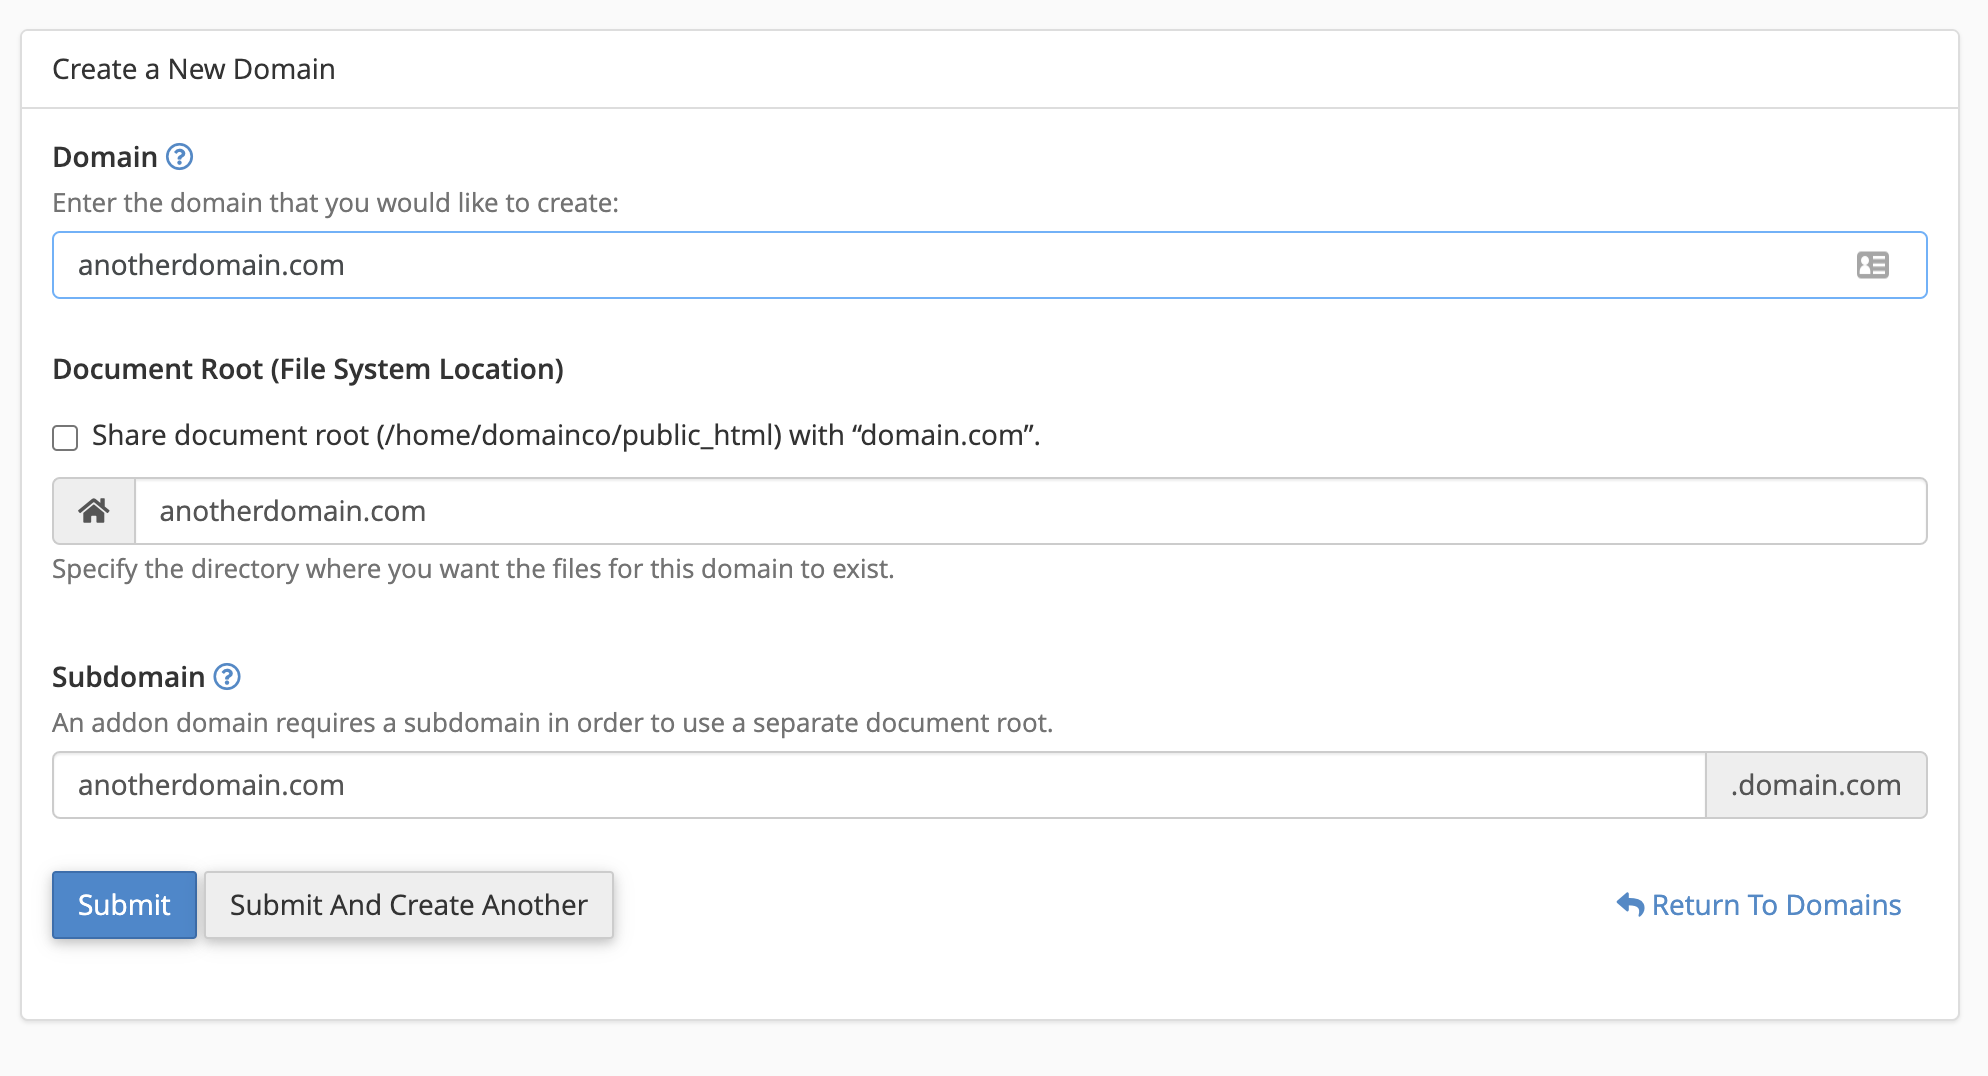
Next, de-select the “share document root” checkbox. This is an important step and will map your domain to its own file directory on your web server. A ‘subdomain’ field will be added and automatically populated - you can leave this as it is for now and click ‘Submit’ at the bottom.
If everything was successful, you should be redirected and see a green success message as per the following screenshot:
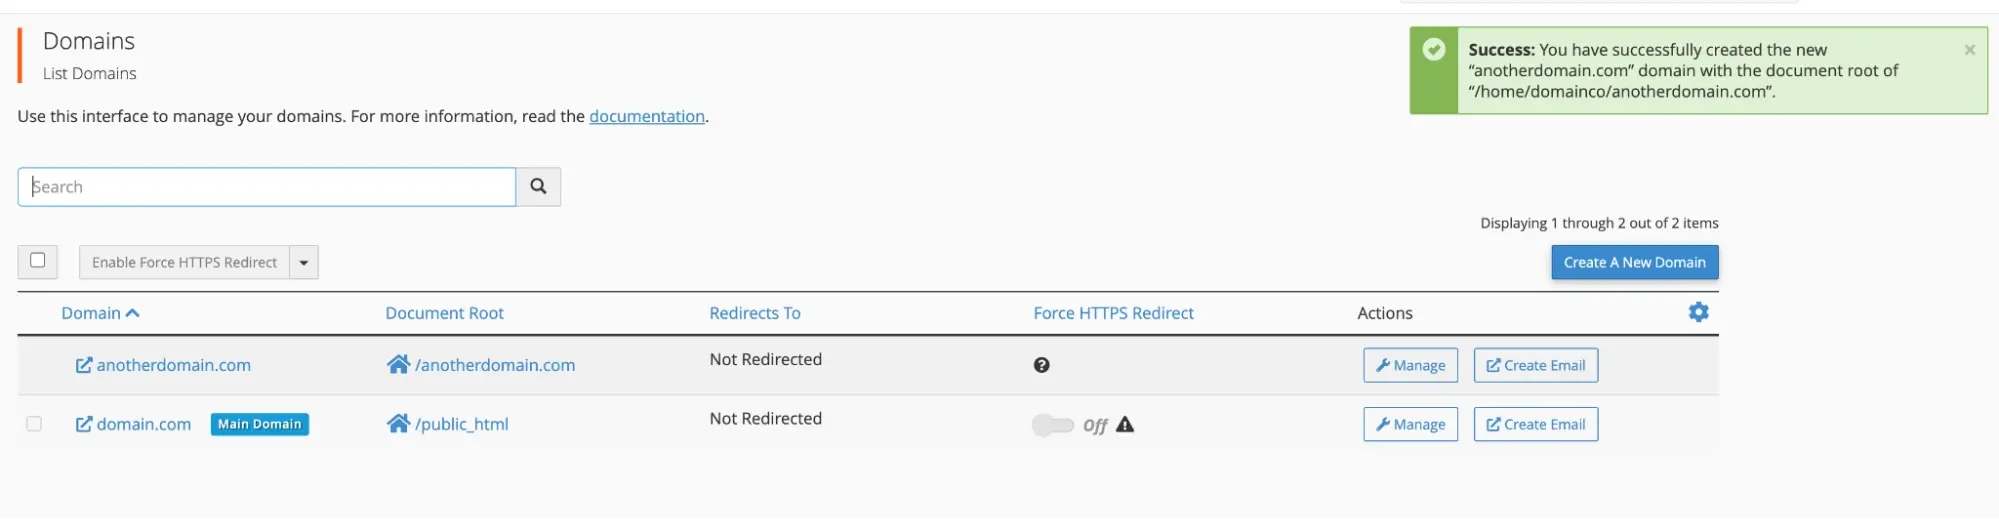
You will now see your new domain added to the list and you can see that its ‘document root’ has been set (this is the directory you will need to upload your website files to).
To do this, connect to your website via FTP or by using the file manager that exists within the cPanel by default:
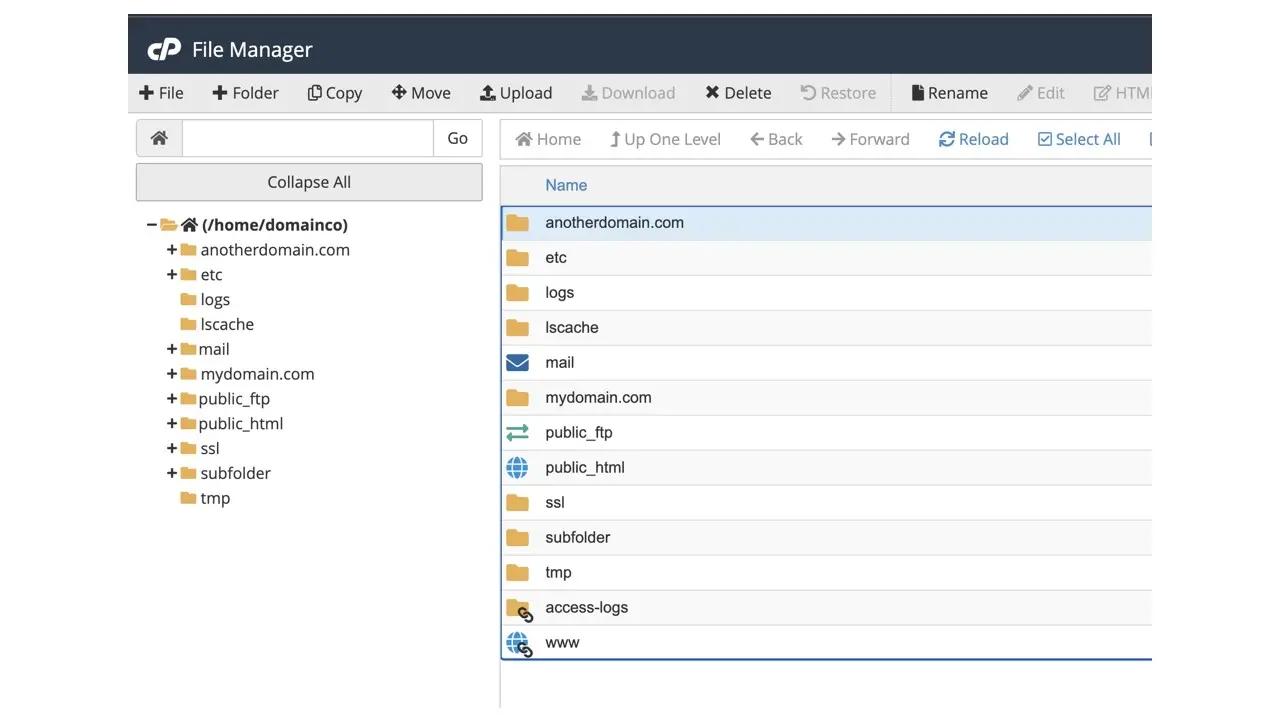
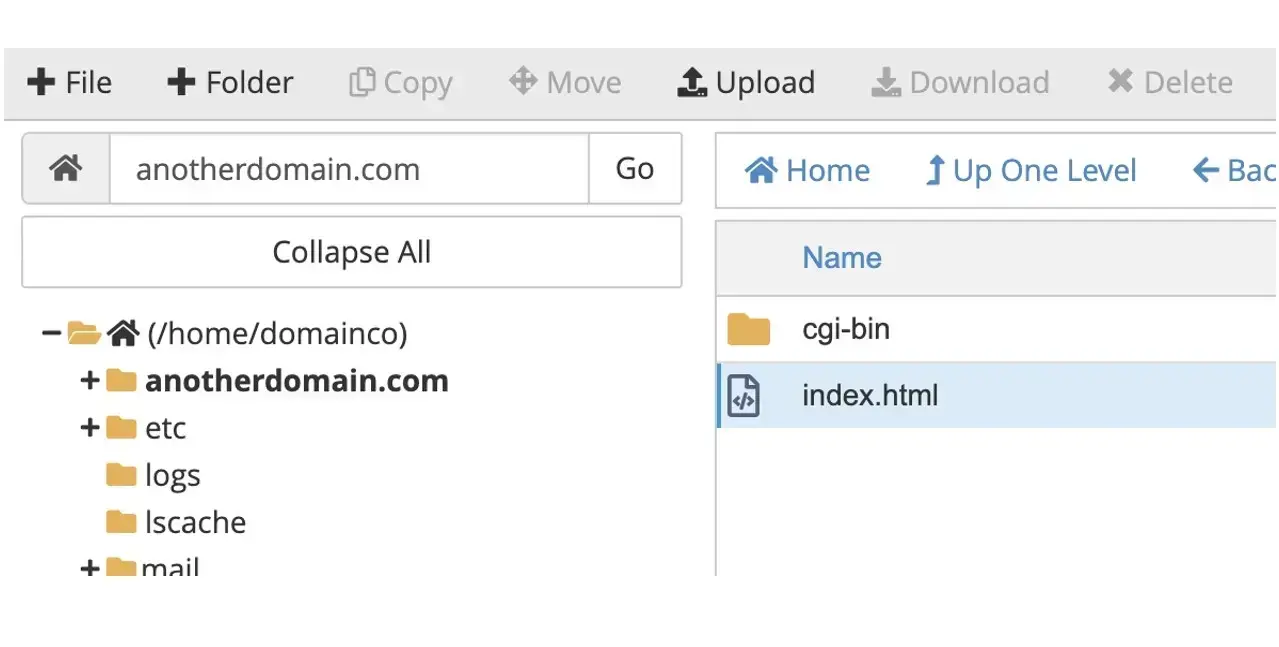
You will see that a new directory has been created based on the domain name you added. In our example we added ‘anotherdomain.com’ so you can see this has been added (highlighted in the above screenshot).
Navigate to the directory and upload your website’s files.
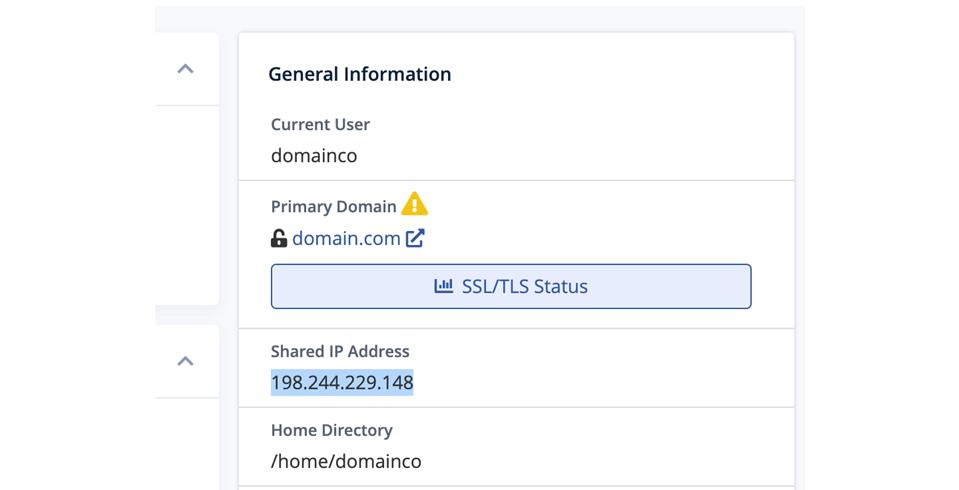
The final step is to ensure that your domain name’s A record is pointing to the IP address of your web server. If you aren’t sure what the IP is, you can find this within your cPanel:
That’s it! To check whether this has been successful, navigate to your domain in your browser - you should see it displaying the files you uploaded to the directory:


Wrapping Up
If you’ve made it this far, you’ve hopefully been able to add your domain to the web server via the cPanel, upload your files to the new directory (via FTP or the cPanel’s File Manager) and are now seeing your website as expected.
Please note that a prerequisite for this to work is for your hosting plan to support multiple domains. Only our Silver and Gold plans offer this, so if you’re struggling to add a domain and are getting an error message, it’s worth checking you aren’t limited on the number of domains you can connect to your web server first.
We hope you’ve found this article useful. If you’re looking to get started with building your very own website, whether that’s using WordPress as a CMS or not, check out some of our hosting plans! We look forward to seeing what websites you build…
Frequently Asked Questions
Who needs shared hosting?
Shared hosting is perfect for beginners that are just starting out with web hosting, and it’s a pretty cheap option as well. However, if you’re operating a busy website or many websites, you might want to consider other types of hosting.
Is managed hosting secure?
Managed hosting providers secure and handle the information and data of their customers with great sensitivity, and security is one of the benefits of a managed hosting service.
What’s the difference between shared hosting and WordPress hosting?
Shared hosting is a catch-all term for shared hosting services. WordPress hosting is a specialized hosting that’s optimized to the WordPress content management system. You can learn more about CMS WordPress on our blog.
How does managed hosting work?
With managed hosting, a third-party provider is responsible for the organization’s hardware, maintenance, problem-solving, and administration.

Dylan is the founder of Winn-Brown & Co., an agency he started at the age of 16, specializing in website development and digital transformation. Since starting the company he has worked on hundreds of projects and with clients across a broad range of industries. Now in 2022, the agency continues to service new and existing clients alongside incubating some exciting side projects.
View all posts by Dylan Winn-Brown


