WordPress powers over 42.9% of all the websites and can be used for so many types of websites, including eCommerce. With WordPress, while there are a lot of ecommerce plugins, the best way to achieve selling merchandise from your site, is to use WooCommerce. In this article, you’ll learn how to create an eCommerce website with WordPress using WooCommerce.
What is WooCommerce?

WooCommerce is a popular WordPress ecommerce plugin with over 5 million downloads and is also used by 8.7% of websites that exist. Out of the box, WooCommerce is free, and provides a robust online shopping cart experience, where you can sell digital and tangible goods. This means that if you’re creating a website on a dime, then WooCommerce is an extremely powerful tool to launch your own store.
Additionally, WooCommerce is the best ecommerce experience for most website owners, due to its flexibility and being super easy to use. You can easily update your product’s information and even take advantage of the plugin’s useful features like managing inventory and creating product variations.
Although the plugin is described to handle small to large online stores, it can even handle enterprise-level ecommerce. Aside from being able to sell basic digital items and tangible goods, with WooCommerce, you can build the platform to:
Book reservations
Buy event tickets
Sell e-courses
Create a membership section for your site
Sell subscription packages
…and much more! WooCommerce is designed to integrate with some of the most popular payment processors, shipping companies, analytics software, and most customer relationship management tools.
With WordPress, you can design an online store to suit most of your needs, and look how you want it to, while reaping the benefits of a fast loading and SEO-ready platform. That being said, if you need more functionality, you may need to pay for premium extensions. For example, there are paid extensions for UPS and Fedex shipping, as well as payment processor plugins like Authorize.NET and First Data.
How to Create an eCommerce Website with WordPress
For this article, you’ll be learning how to create an eCommerce website with WordPress using WooCommerce. Here’s the steps.
Choose a web host that can handle your online shop.
Choose a name domain for your site.
Install SSL.
Install WordPress.
Install and activate WooCommerce.
Use the WooCommerce Wizard to configure your store.
Choose and configure a payment processor.
Add your products.
Add content to your site.
Tell people about your site.
1. Choose a web host that can handle your online shop
Choosing a web host that can handle your WooCommerce store is important. A beginner’s shared hosting package probably won’t cut it, because you’ll more than likely run out of database resources. This means your site could timeout and not load, or become super sluggish.
You will want something like WordPress hosting, or a larger Managed Managed WordPress hosting. WordPress hosting is different from Managed WordPress hosting, as Managed WordPress is for sites that use WordPress, and may have a lot of products. If you’re just starting out, then WordPress hosting will do.
In the case that you add a lot of products to your site, or have a lot of traffic, then you can upgrade into Managed WordPress hosting.
2. Choose a domain name for your site
Once you’ve chosen a web host, part of the process is to choose a domain name. More than likely this is the name of your small business. The domain name acts as the URL for your website. While you can choose another domain at a later time, it’s best to think hard and carefully about your store’s name and URL and stick with it for some time.
3. Install SSL
SSL is required for any website that is selling or accepting sensitive information through a form on their website. SSL is short for Secure Socket Layer, and is a type of encryption that protects your user’s information, like credit cards and address, from hackers. In some cases, your web host may offer free SSL, and in others, it will cost. As a note, Verpex offers free SSL on all of their web hosting packages.
4. Install WordPress
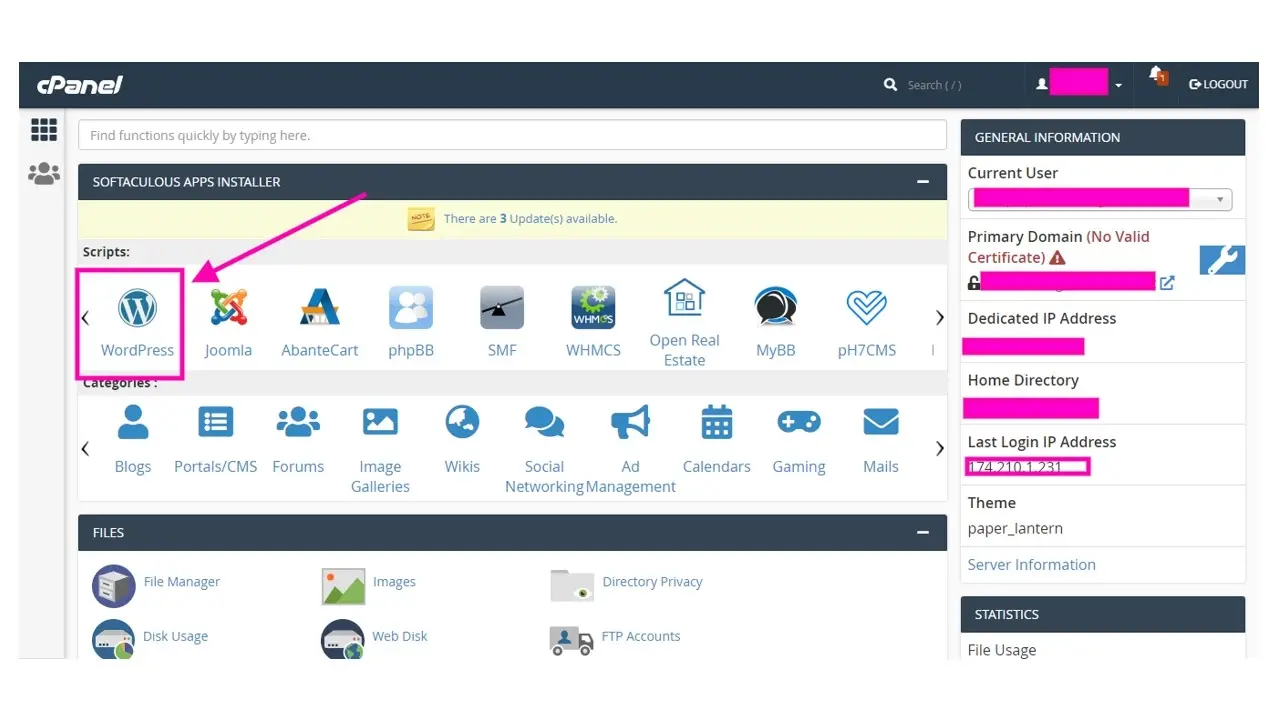
Once you’ve purchased web hosting and a domain, it’s time to install WordPress. Most web hosts, much like Verpex, offer an auto-installer script with cPanel to quickly and easily install WordPress for you.
To install WordPress using an auto-installer like Softaculous:
Step 1. Find the WordPress install button in cPanel.
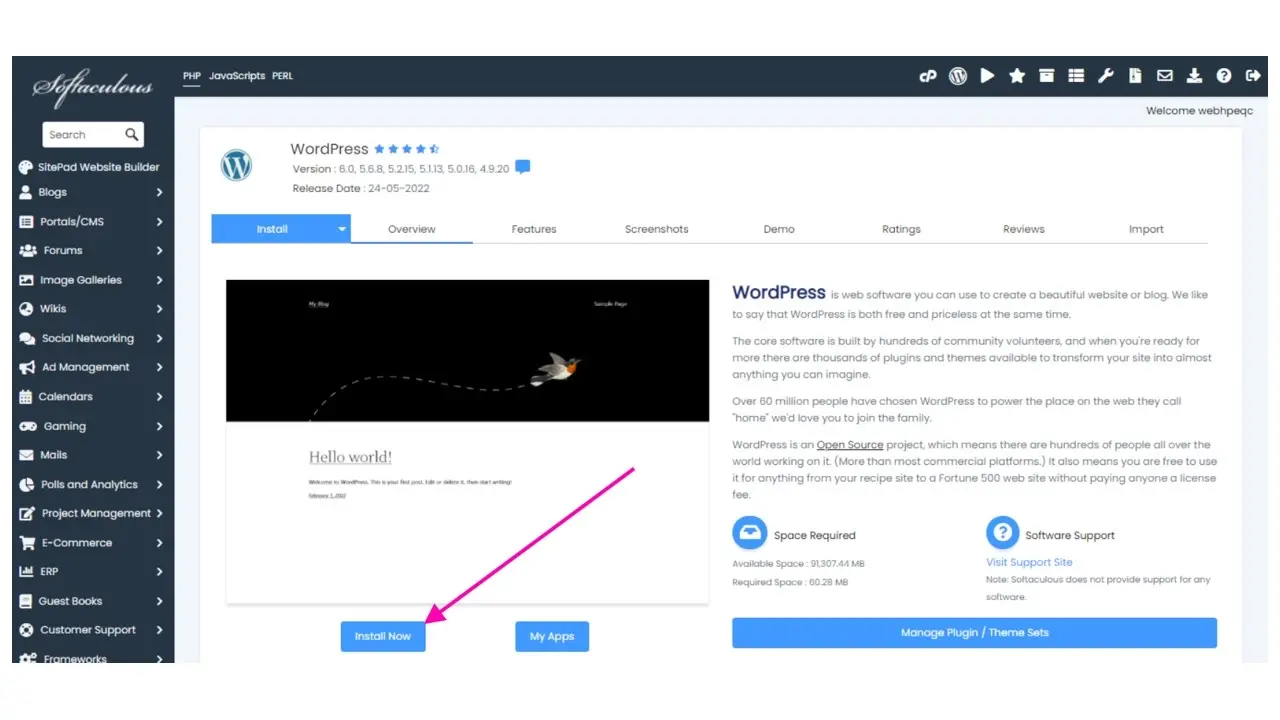
Step 2. Click on the Install Now button.
Step 3. Fill in where you want to install WordPress, your site’s name and tagline, as well as your username and password. Note: It’s important that you choose a secure password for your site.
In some of the options, they may be checked, but you don’t necessarily need them unless you’re familiar with what they are. Also, you can choose to install a theme, or allow WordPress to use the free Twenty Twenty-Two theme by default.
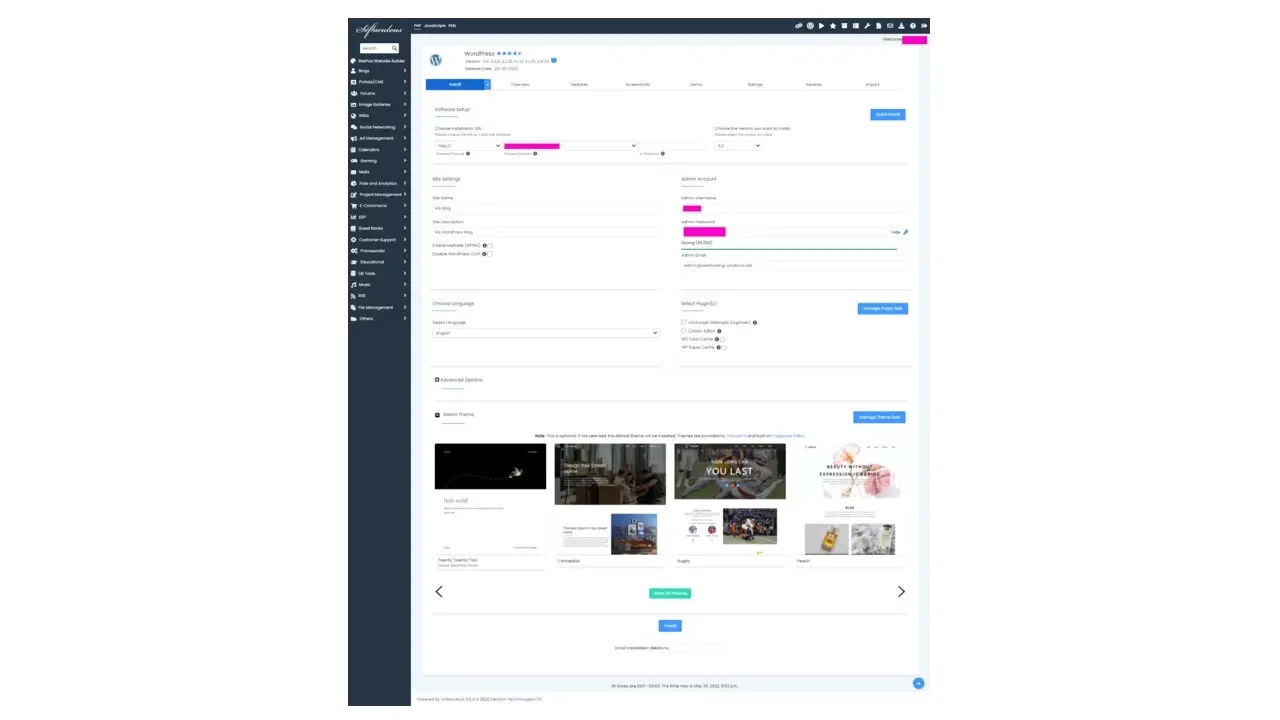
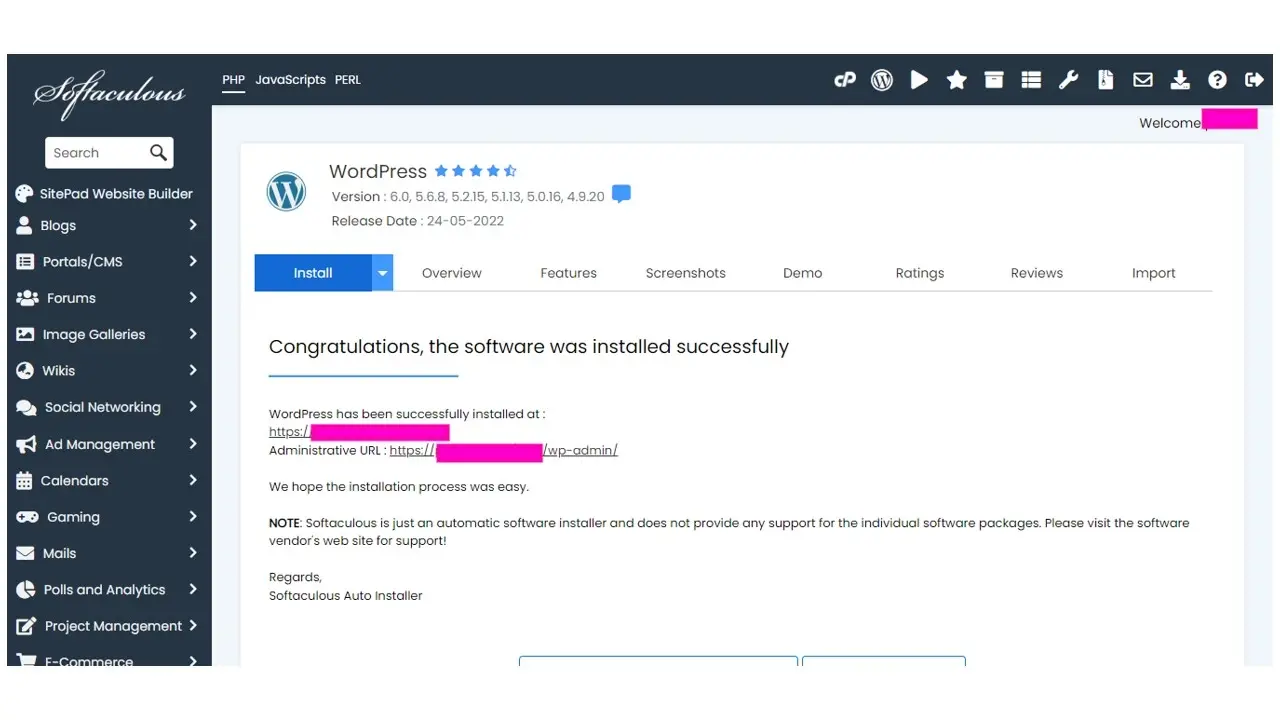
After you’ve clicked the blue Install button at the bottom of the page, it will take a few moments for the script to install WordPress for you. When it’s successful, it will lead you to a page that even tells you the URL of your website, as well as the link to your WordPress admin area. You can click from the administrative link and be automatically logged into your brand new WordPress site. You will also receive an email with login information, and a link to change your password if you need to.
5. Install and activate WooCommerce
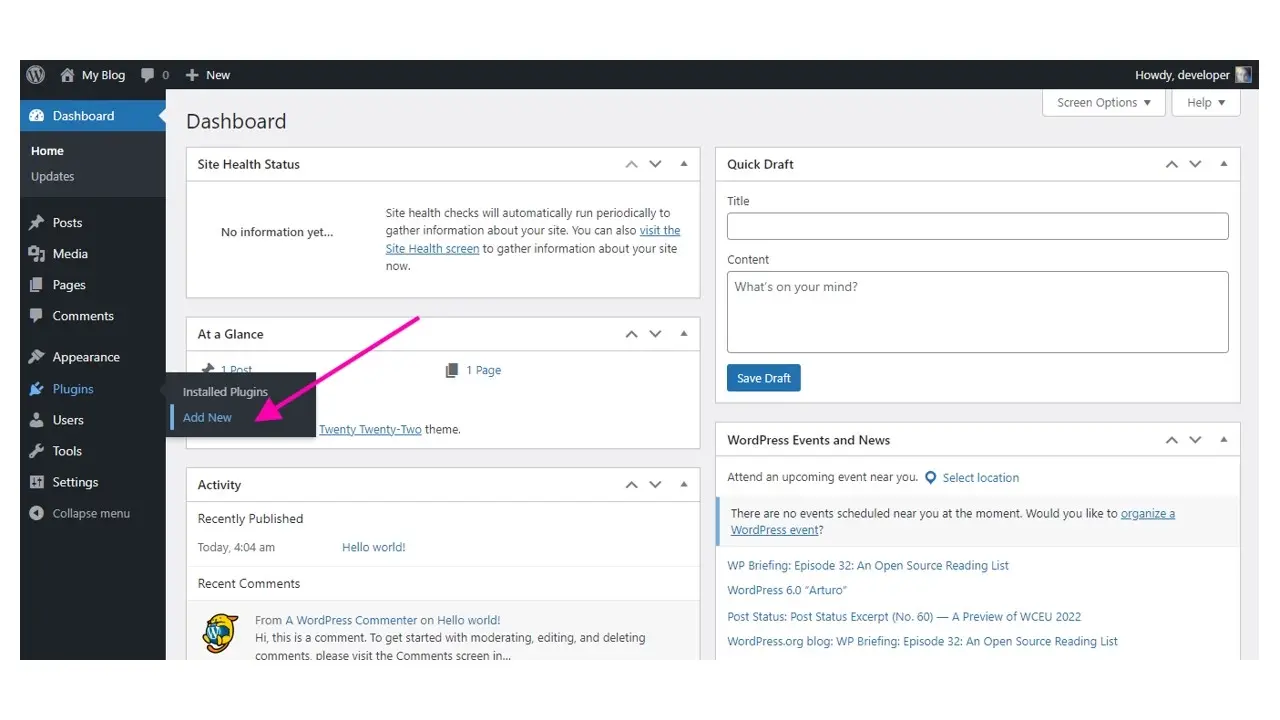
Step 1. Go to the Plugins section of your WordPress admin area, on the left navigation, and look for the link “Add New”.
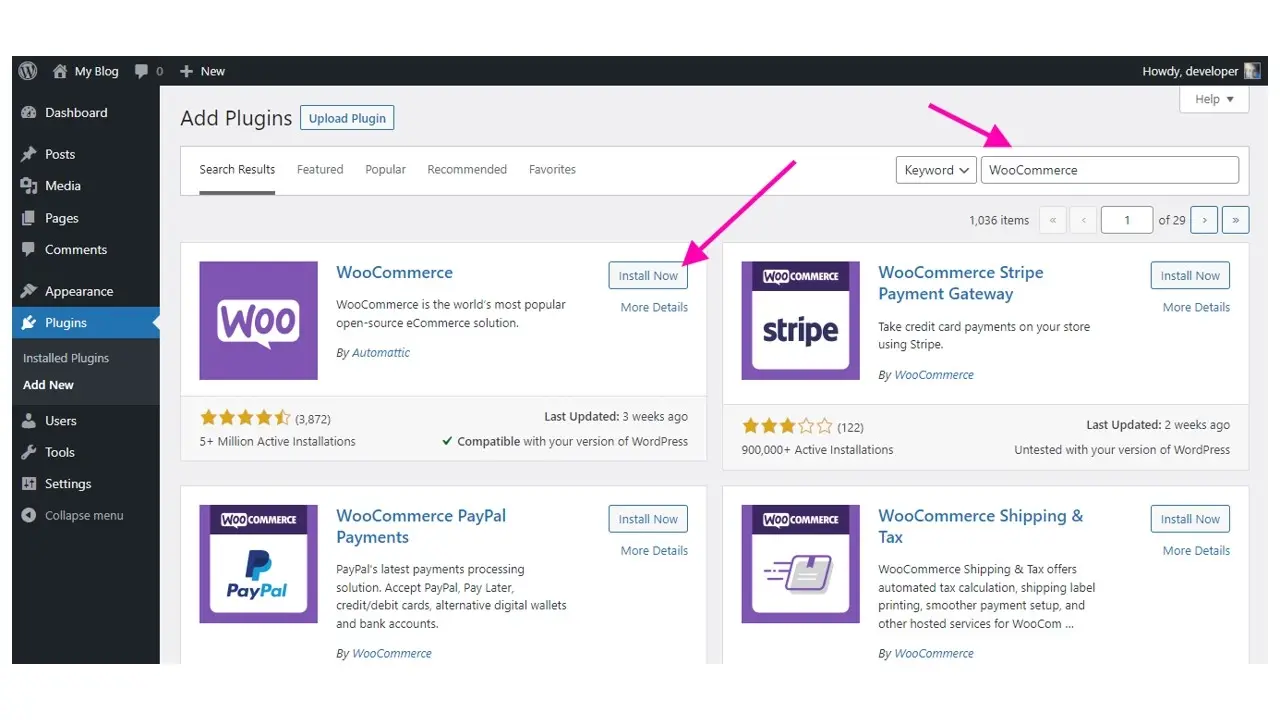
Step 2. Type “WooCommerce” in the search box, on the right. The search should turn up with WooCommerce as the first listing on the left.
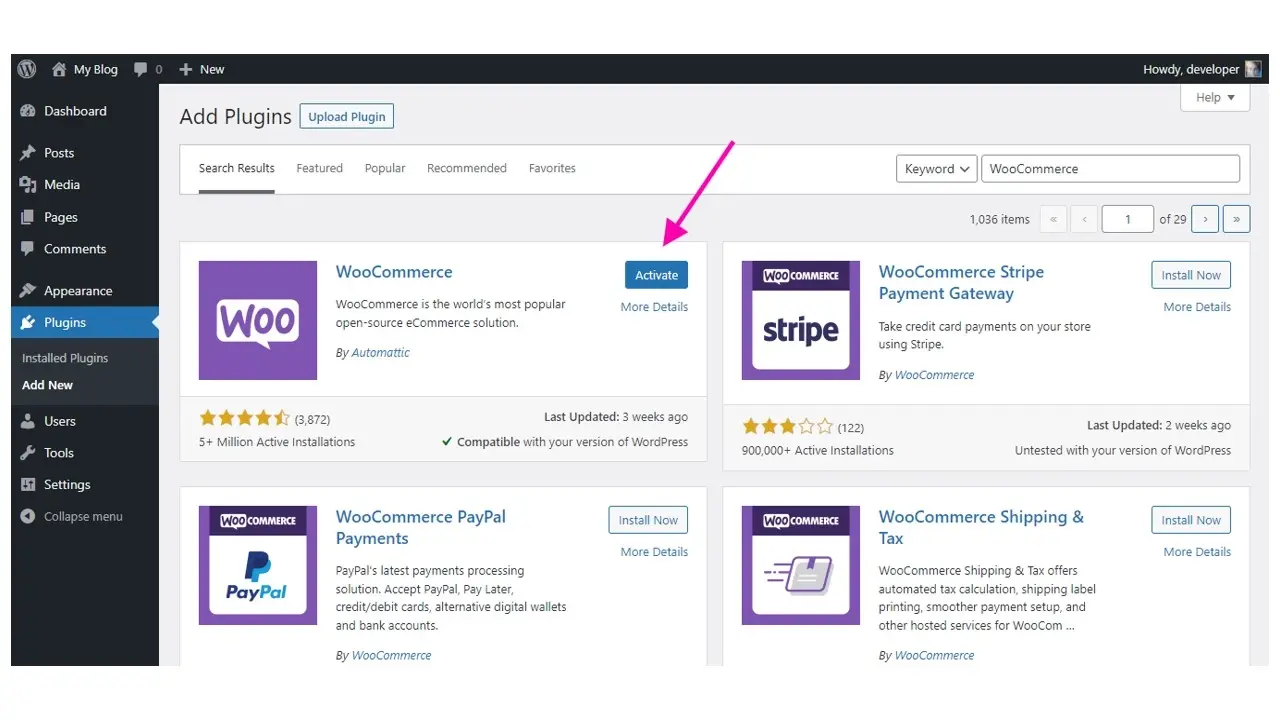
Step 3. Click the Activate button.
6. Use the WooCommerce Wizard to configure your store
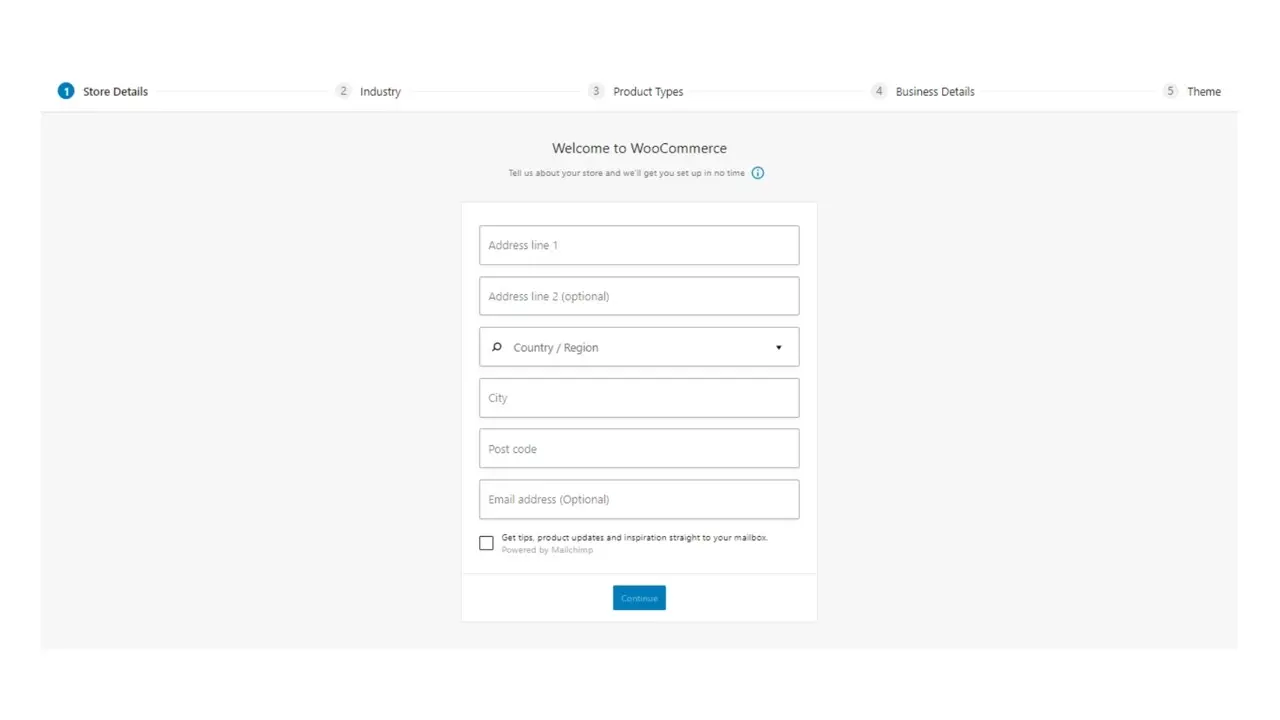
When you activate the plugin, you’ll be immediately sent to the WooCommerce wizard, in order to configure your store.
Step 1. Fill out your physical address and email address. You will need to use the place where you’re shipping your items from, as this will help calculate how much it costs to ship your items, and even helps if you need to calculate taxes based on the buyer’s location.
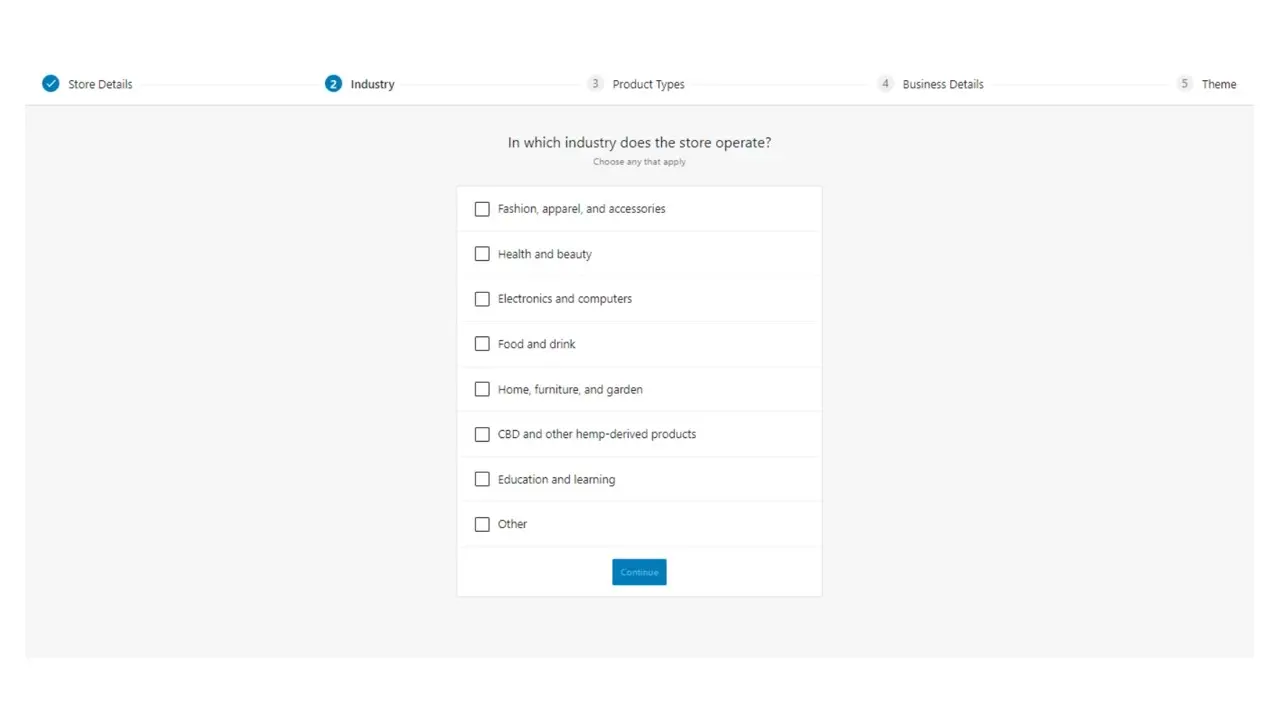
Step 2. Select what industry your business is about.
Step 3. Select what types of products you will sell. You can select whether you’re selling physical goods, digital items, subscriptions, and more. This will determine what plugins you might need.
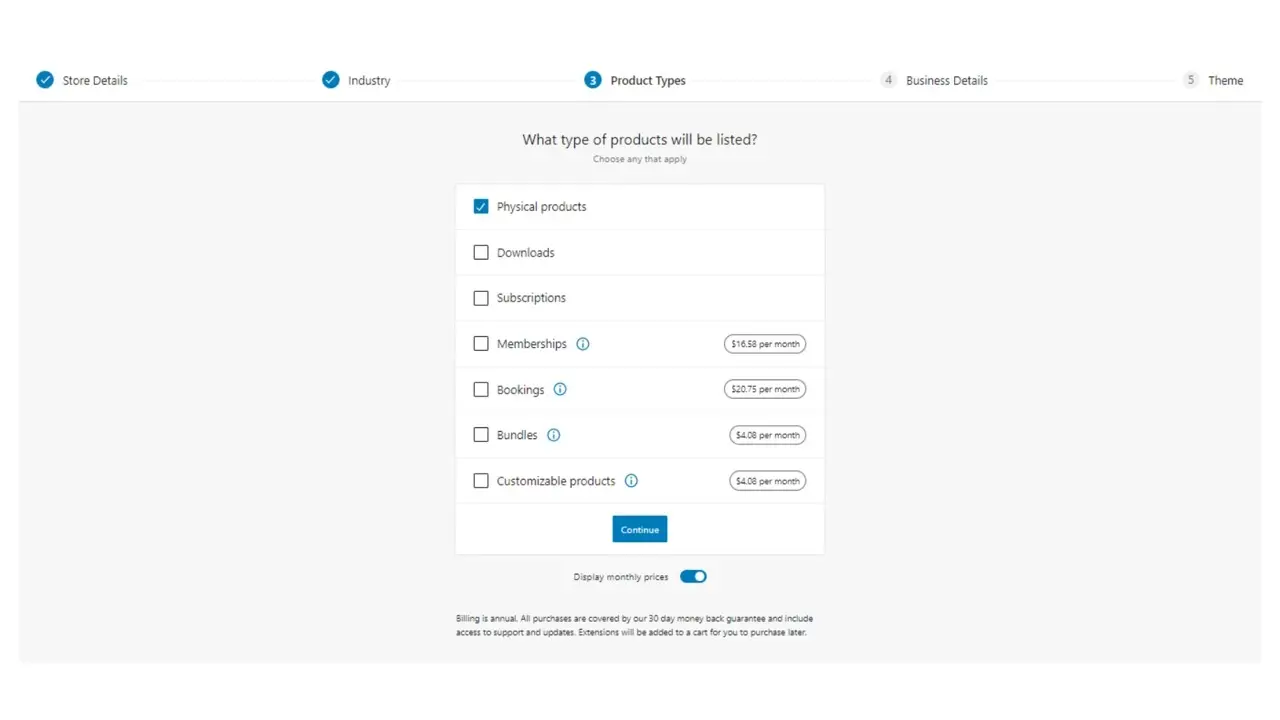
If you select memberships, bookings, or bundles, then you may be opting to pay for some plugins. WooCommerce has their own suggested plugins for these types of items, so if you’ve already downloaded a different plugin to use, then don’t select what you don’t need.
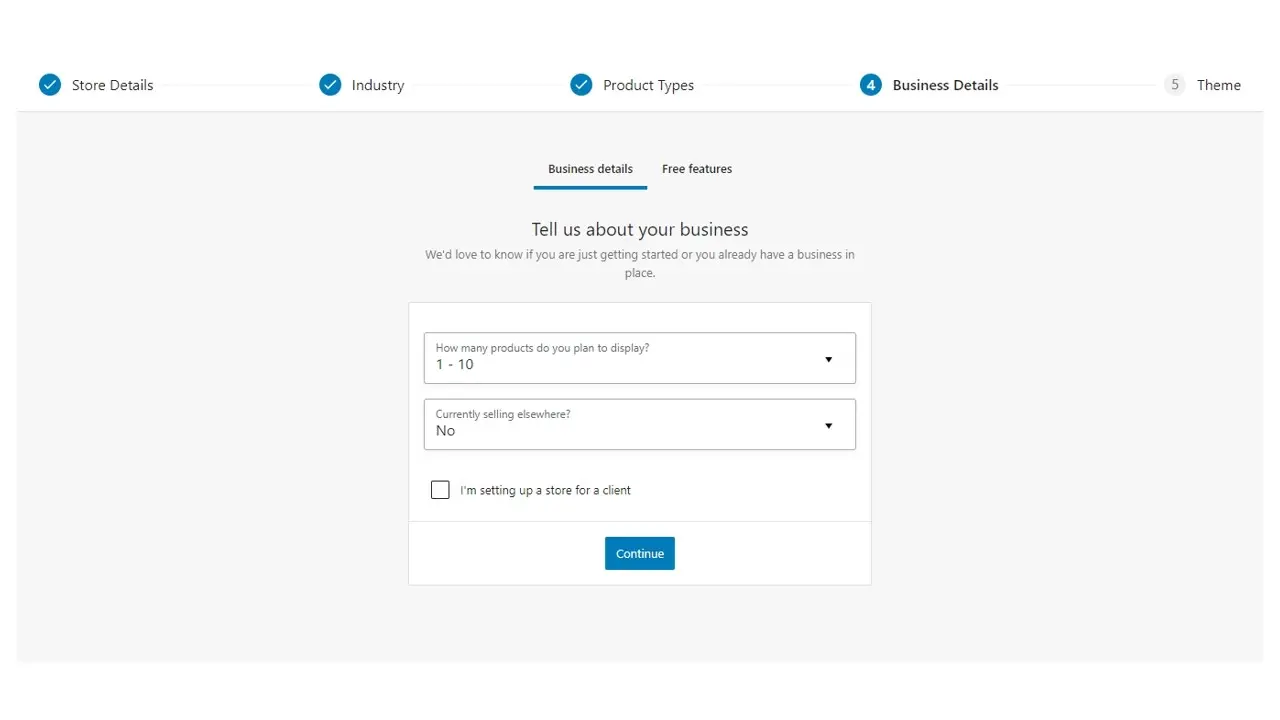
Step 4. Tell WooCommerce how many products you’ll be selling and if you’re selling anywhere else. In some cases, WooCommerce may suggest other plugins to install.
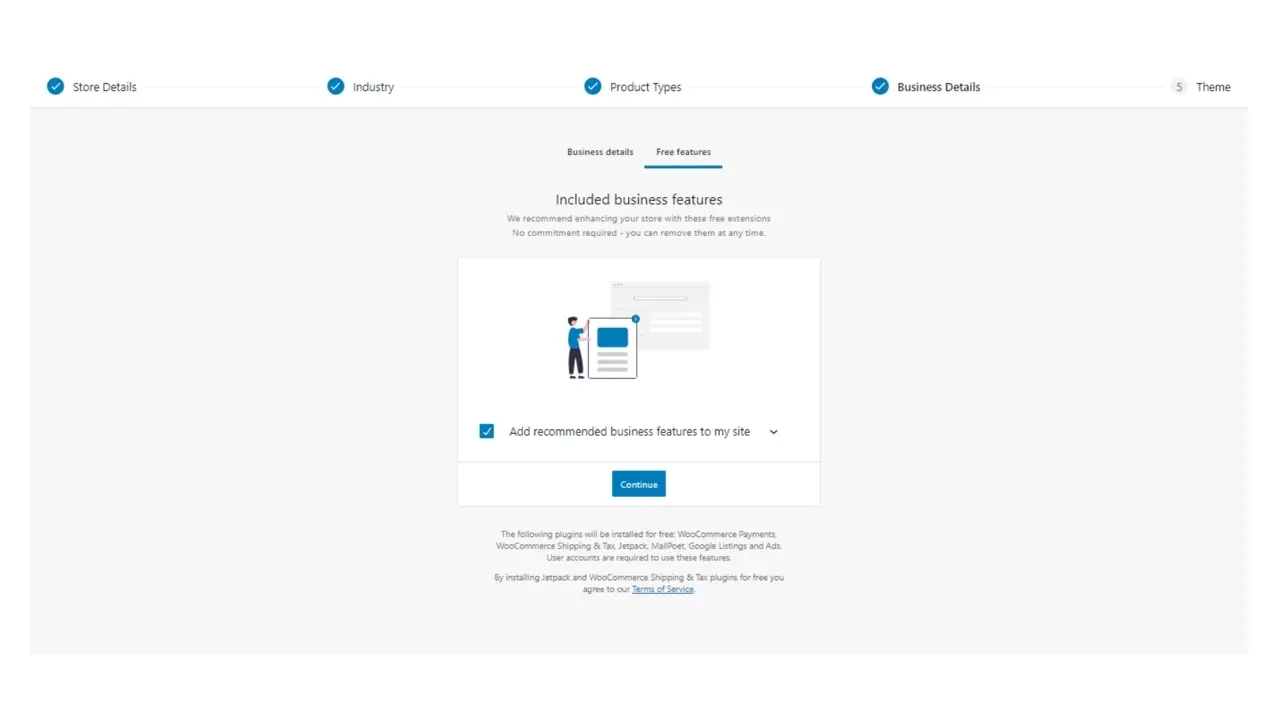
Step 5. Click to add more free features in WooCommerce. This will install a few handy plugins, like WooCommerce Payments, WooCommerce Shipping & Tax, Jetpack, MailPoet, Google Listings and Ads. There’s an arrow that you can click on, and exclude any feature that you don’t need.
Step 6. Choose a theme, upload your own, or keep the default Twenty Twenty-Two default theme. Some of the themes offered are ones that are optimized for WooCommerce, and may have a look that is more suitable for an online storefront.
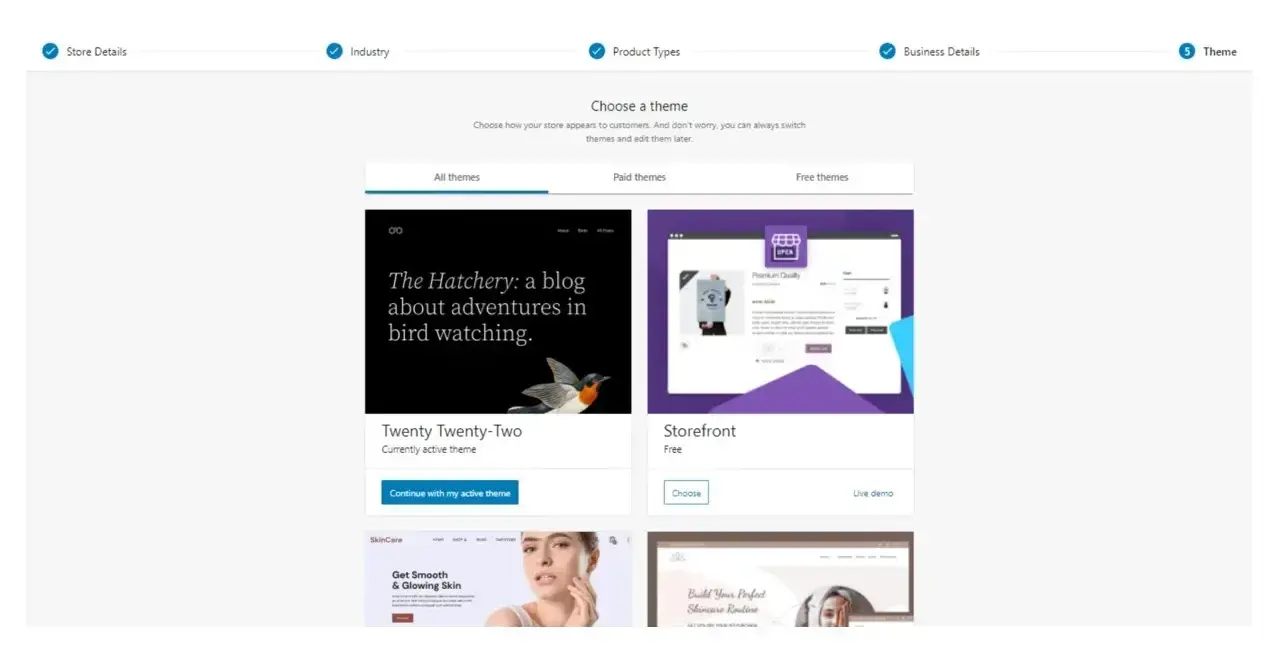
This step is merely to choose what theme you want, so if you wish to add different colors or images to the theme, then you can configure it later. If none of these suit you, and you have a web developer that is designing a custom theme, then just choose the default Twenty Twenty-Two theme.
7. Choose and configure a payment processor
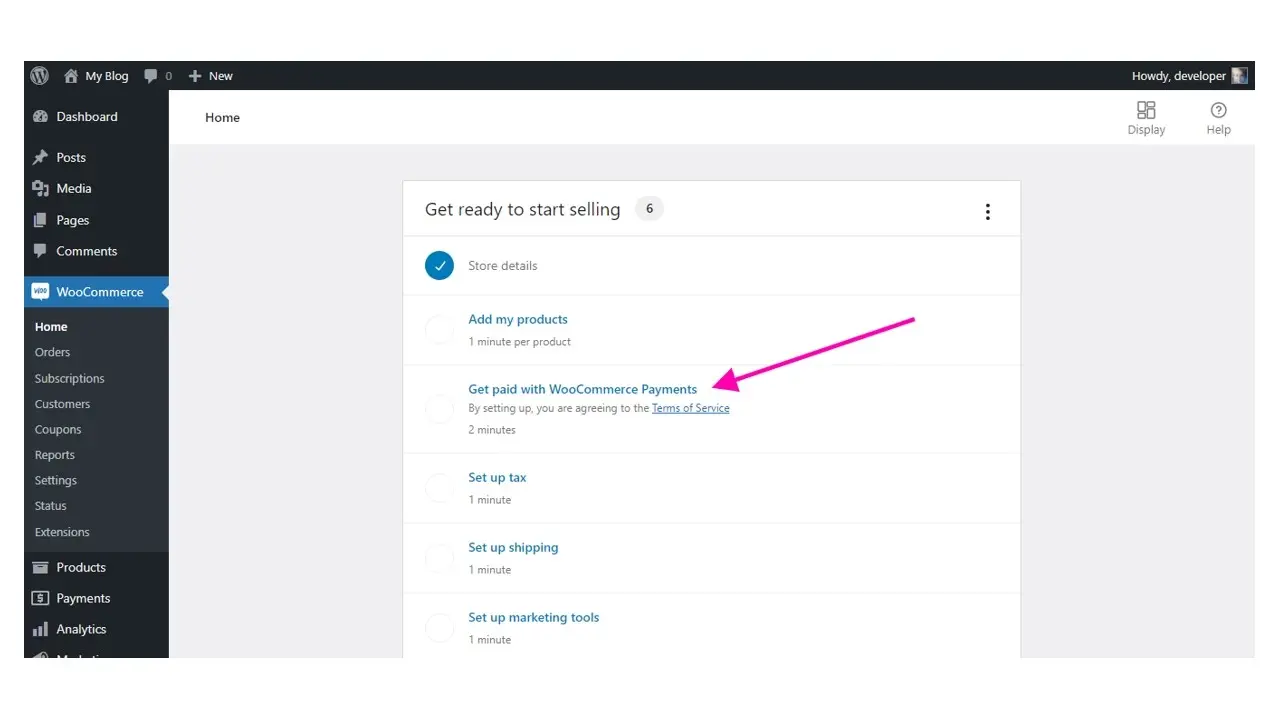
While WooCommerce suggests adding a product first, it’s important to get the difficult stuff out of the way. If you’re using PayPal or Stripe, WooCommerce Payments comes with both options.
Step 1. Clicking on the WooCommerce Payments option will leave you to another wizard. You’ll need to fill out your email address.

You’ll be prompted to log into your WordPress.com account or create a new account. It is free to have a basic WordPress.com account.
Step 2. Authorize and connect you store with WordPress.com
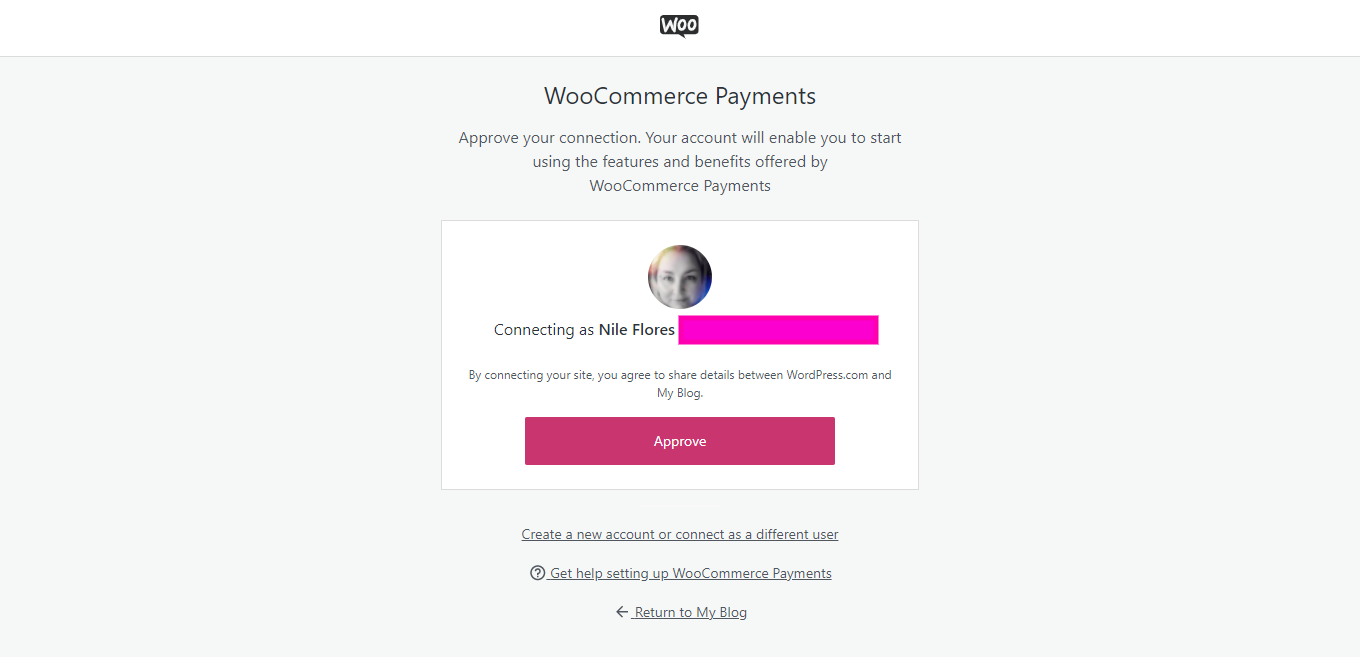
This will lead you to sign up with Stripe so you can get paid. You will go through their Wizard. Because there’s a lot of sensitive info beyond this step, there are no screenshots. Once you’re done, the plugin should re-direct you back into WordPress, so you can add your products.
If you don’t wish to use Stripe through WooCommerce Payments, and say you want to use PayPal, then you will go to Settings, under WooCommerce, and then to the Payments tab. There’s an option for “Other Payments”, or you can go directly to WooCommerce PayPal Payments, and download the plugin. With this, you’ll be uploading the plugin, and installing it.
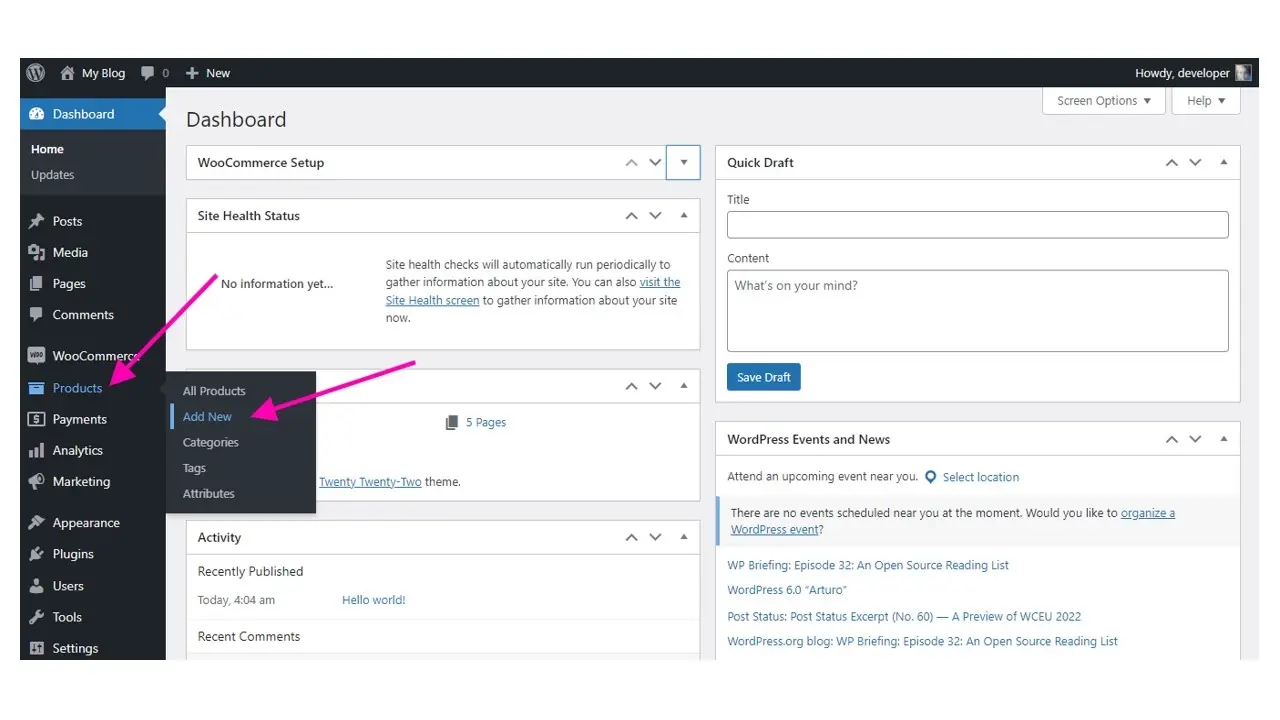
8. Add your products
Step 1. You can add your products anytime you wish by going to Products and then Add New.

Step 2. Add Product name, long description, and images.
Step 3. Select whether the product is a regular product or if the product can be seen online, also known as virtual, or downloaded.
Step 4. Add the price, as well as if there is an inventory count. You can even add variations of the product. For example, if you’re selling different colors of an item, then each other is a variation.
It’s important to fill out as much information about your product that you can. If your product is shippable, then you’ll most likely want to add the dimensions of the item, as well as the weight, in order for your shipping provider to calculate the cost to ship the item. You can opt to do your own flat rate price for shipping and handle the process yourself. If you choose a service like UPS, USPS, or Fedex, you will more than likely need to install a paid plugin to help calculate shipping costs and print a shipping label for you.
9. Add content to your site
Aside from your products, you should add content to your site, in order to make it engaging for customers. If your items have a special way that they are created, then you can add content about that. You will also want to include information like shipping, privacy policy, refund policy, and more.
10. Tell people about your site
Once your site and store have everything you want it to have, then it’s time to tell the world about your store. Tell your friends in person, network at local small business gatherings, and even people on social media sites.
In Summary
With WordPress and WooCommerce together, you have all the fundamental tools to launch an ecommerce store fast. Hopefully this article on how to create an eCommerce website with WordPress will help you launch one today! Good luck and make some money!
Frequently Asked Questions
How customizable is my ecommerce store?
This depends on the eCommerce tool you use. For example, Magento is 100% customizable, and you can amend just about every aspect. Shopify on the other hand has far fewer customization options.
Can WordPress be used for eCommerce?
WordPress offers many different ways to build an eCommerce online store for all types of products and markets. Almost 40 percent of all online shops are powered by WooCommerce, a WordPress eCommerce plugin.
Can I use WordPress hosting for an ecommerce site?
Yes, of course. In fact, the platform has some of the best online stores and a range of payment processor plugins on the market.
Does my ecommerce store need to be PCI compliant?
Yes, if you’re going to be accepting payments via credit and debit card you’ll need to meet PCI regulations.

Nile Flores is a long time professional blogger, as well as WordPress website designer and developer from the St. Louis Metro East. Nile blogs at NileFlores.com, where she’s passionate about helping website owners, whether they’re small business owners or bloggers. She teaches about Blogging, Social Media, Search Engine Optimization, Website Design, and WordPress. Additionally, Nile loves to speak at WordCamps (WordPress conferences) across the United States. When Nile isn’t knee-deep in coding, she’s a proud mom of a college student, and enjoys oil painting, cigar smoking, nail art design, and practicing traditional Okinawan kempo karate.
View all posts by Nile Flores